
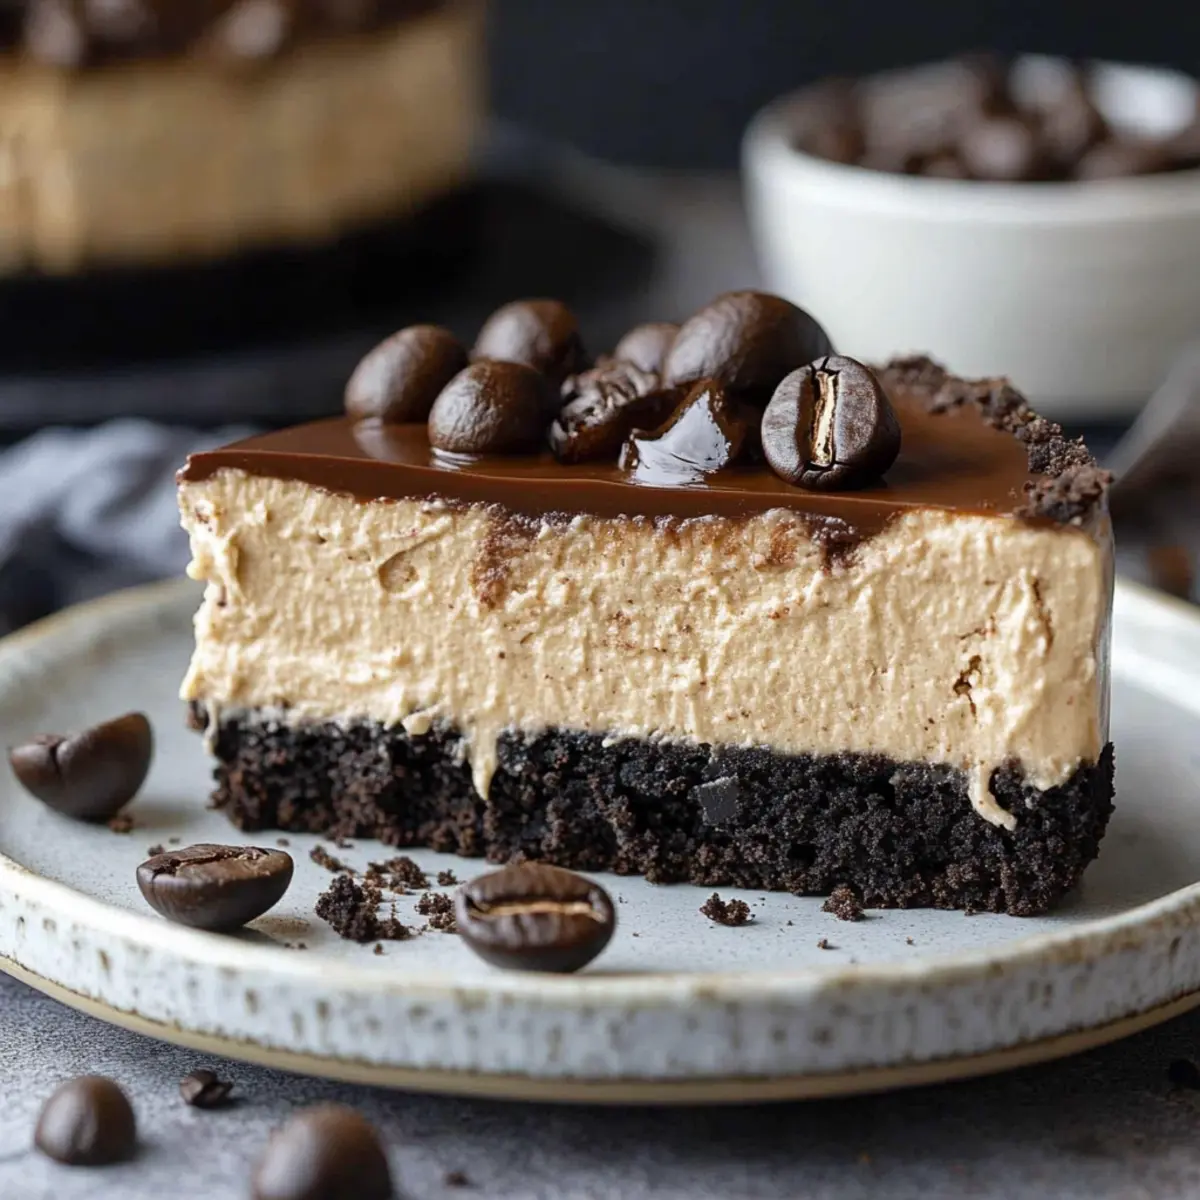
As I took my first bite of this Espresso Cheesecake, the rich, bold flavor of coffee enveloped my taste buds, instantly lifting my spirits. This dessert is a luscious blend of creamy goodness that pairs perfectly with the delightful crunch of an Oreo crust, making it an absolute showstopper for any gathering. Not only is this Espresso Cheesecake a feast for the eyes with its glossy dark chocolate ganache, but its elegant flavor profile also transforms it into a sophisticated indulgence that coffee lovers can't resist. Plus, with variations for everyone from cheesecake bars to no-bake versions, it’s designed to please both your palate and your busy schedule. Who’s ready to elevate their dessert game and impress friends and family?
Why Is This Espresso Cheesecake Irresistible?
Indulgent flavors: This decadent treat combines rich espresso and creamy cheesecake for a heavenly dessert experience.
Effortless elegance: With its stunning dark chocolate ganache, this cheesecake looks like a gourmet masterpiece without the fuss.
Versatile variations: Whether you prefer marbled mocha cheesecake, cheesecake bars, or mini versions, this recipe adapts effortlessly to your needs.
Easy preparation: Quick to assemble and bake, even novice bakers can whip this up and wow their guests.
Perfect for gatherings: With its crowd-pleasing flavors and beautiful presentation, this espresso cheesecake is sure to be the star of your next celebration – even alongside other homemade favorites like chocolate lava cakes or classic tiramisu!
Espresso Cheesecake Ingredients
For the Crust
• Oreo Cookies – Provides a rich, chocolatey crust; substitute with any chocolate cookie if unavailable.
• Unsalted Butter – Binds the crust together; use salted butter for added flavor if desired.
For the Filling
• Cream Cheese – Main ingredient for the filling; ensure it's at room temperature for proper mixing.
• Granulated Sugar – Sweetens the filling; can be substituted with granulated sweetener for a lighter option.
• Large Eggs – Provides structure and richness; use room temperature eggs for best results.
• Sour Cream – Adds creaminess and a slight tang; plain yogurt can be used as a substitute.
• Instant Espresso Powder – Infuses coffee flavor without excess liquid; can substitute with strong brewed coffee for a different flavor profile.
• Vanilla Extract – Enhances overall flavor; avoid imitation extract for best results.
For the Ganache
• Semi-Sweet Chocolate Chips – Used in the ganache, providing depth; dark chocolate chips may be substituted for added cocoa flavor.
• Heavy Cream – Helps create a rich ganache; half-and-half can be a lighter alternative, but will vary the richness.
Step‑by‑Step Instructions for Espresso Cheesecake
Step 1: Preheat the Oven
Begin by preheating your oven to 325°F (163°C). This temperature is perfect for baking the Espresso Cheesecake to achieve that creamy, luscious texture. While the oven warms up, gather your baking supplies, including a 9-inch springform pan and a roasting pan for the water bath.
Step 2: Prepare the Crust
In a mixing bowl, crush the Oreo cookies until they resemble fine crumbs. Melt your unsalted butter and combine it with the cookie crumbs until fully incorporated. Press this mixture firmly into the bottom of the springform pan to create a smooth, even layer. Set aside while you prepare the filling.
Step 3: Make the Filling
Using a stand mixer or a hand mixer, beat the room temperature cream cheese with granulated sugar until the mixture is completely smooth and creamy, about 2-3 minutes. Add the large eggs one at a time, mixing well after each addition to ensure a fluffy Espresso Cheesecake filling free of lumps.
Step 4: Add Flavor Components
Once the eggs are fully incorporated, mix in the sour cream, vanilla extract, and dissolved instant espresso powder. Blend the mixture on medium speed until everything is well combined, creating a rich and velvety filling that captures the deep coffee flavor typical of a decadent Espresso Cheesecake.
Step 5: Bake in a Water Bath
Pour the cheesecake filling into the prepared Oreo crust, smoothing the top with a spatula. Place the springform pan inside a larger roasting pan and fill the outer pan with hot water until it reaches halfway up the sides of the springform pan. Bake for 60-70 minutes, or until the center of the cheesecake is slightly wobbly but not liquid.
Step 6: Cool Gradually
After baking, turn off the oven and leave the cheesecake inside for an additional hour to cool gradually. This helps prevent cracks from forming on the surface. Once cooled, carefully remove the cheesecake from the water bath and let it cool to room temperature before transferring it to the refrigerator.
Step 7: Chill and Set
Cover your Espresso Cheesecake loosely with plastic wrap or foil and refrigerate overnight. This resting time enhances the flavors and allows the filling to set perfectly, creating that wonderfully creamy texture everyone loves in a cheesecake.
Step 8: Prepare the Ganache
For the dark chocolate ganache, heat the heavy cream in a small saucepan until it just begins to simmer. Pour the hot cream over semi-sweet chocolate chips in a bowl and let it sit for a minute. Stir until smooth and glossy, then spread the ganache over the chilled Espresso Cheesecake.
Step 9: Add Finishing Touches
Once the ganache is set, consider garnishing your Espresso Cheesecake with chocolate curls or shavings for a sophisticated presentation. Slice it up and serve with a cup of coffee or a dollop of whipped cream to enhance the delicious flavors of this decadent dessert.
What to Serve with Decadent Espresso Cheesecake?
Create an unforgettable dessert experience by pairing delightful accompaniments that elevate every bite of this rich cheesecake.
- Fresh Berries: The vibrant acidity of strawberries or raspberries cuts through the creaminess, providing a refreshing contrast.
- Whipped Cream: A dollop of homemade whipped cream adds a fluffy texture and subtle sweetness, enhancing the rich coffee notes.
- Espresso or Cappuccino: Sipping on a hot cup complements the espresso flavor of the cheesecake, intensifying the indulgent experience.
- Chocolate Ganache Tart: For chocolate lovers, serving a slice of rich chocolate tart plays up those decadent flavors and adds a beautiful presentation.
- Nutty Biscotti: Crunchy biscotti beside your cheesecake offers a delightful crunch and a nutty flavor pairing that harmonizes beautifully.
- Caramel Sauce: Drizzling warm caramel over the cheesecake provides a sweet contrast, turning each bite into a luscious treat.
- Vanilla Ice Cream: A scoop of creamy vanilla ice cream adds a cold, velvety texture that contrasts delightfully with the dense cheesecake.
- Hazelnut Liqueur: For adult gatherings, serving a shot of hazelnut liqueur enhances the coffee flavors while adding a luxurious twist.
How to Store and Freeze Espresso Cheesecake
Fridge: Store the cheesecake in the refrigerator, loosely covered, for up to 5 days to maintain its creamy texture and flavor.
Freezer: For longer storage, freeze the Espresso Cheesecake without toppings for up to 2 months. Wrap it tightly in plastic wrap, followed by aluminum foil to prevent freezer burn.
Thawing: To enjoy, thaw in the fridge overnight before serving. If the ganache has lost some gloss, a quick reheat with a splash of cream can bring it back to life.
Individual Slices: Consider freezing individual slices for easy access; simply wrap each slice in plastic wrap, then place in an airtight container for up to 2 months.
Espresso Cheesecake Variations & Substitutions
Feel free to sprinkle your own magic on this delightful recipe and make it uniquely yours!
-
Marbled Mocha: Swirl melted chocolate into half of the batter before baking for a striking visual and complementary flavors. This creates a beautiful marbled effect that'll impress your guests.
-
Cheesecake Bars: Simply press the crust into a 9x13 inch pan and bake for about 45 minutes. It's a perfect solution for portion control and easy serving at parties.
-
Mini Cheesecakes: Bake the filling in a muffin tin lined with Oreo cookie bases for bite-sized treats. These mini delights are perfect for gatherings, allowing guests to indulge without overcommitting!
-
No-Bake Version: Replace the baking process with whipped cream and mascarpone for a quick and easy no-bake cheesecake. Not only does this save time, but it also results in a light and airy dessert.
-
Dairy-Free Twist: Use dairy-free cream cheese and coconut cream for the ganache to create a dairy-free version that doesn’t compromise on flavor. Everyone deserves a slice of this indulgence!
-
Flavor Boost: Add a splash of flavored liqueur, like Irish cream or coffee liqueur, to the filling for an adult twist that enhances the decadent espresso flavor.
-
Chocolate Chip Delight: Fold in mini chocolate chips to the cheesecake batter before baking to add delightful pockets of melted chocolate and a fun texture.
-
Spiced Espresso: Incorporate a pinch of cinnamon or a dash of nutmeg into the filling for a warm, cozy flavor that makes your cheesecake perfect for fall gatherings.
By experimenting with these variations, you'll create a dessert that not only delights the senses but also brings a personal touch to your culinary repertoire. And remember, serving it alongside a cup of fresh espresso or a slice of classic tiramisu takes it to another level!
Make Ahead Options
This Espresso Cheesecake is ideal for meal prep enthusiasts, allowing you to create a stunning dessert with ease! You can prepare the crust and filling up to 24 hours in advance; simply refrigerate the crust in the springform pan and cover the prepared filling in a separate bowl. When ready to bake, pour the filling into the chilled crust and follow the baking instructions. For the best texture, remember to let it chill overnight after baking to set properly. If you're short on time, make the ganache ahead and store it in the fridge—just warm it slightly before spreading on the cheesecake. With these make-ahead tips, you'll delight in beautiful, restaurant-quality results with minimal effort!
Expert Tips for Espresso Cheesecake
-
Room Temperature Ingredients: Ensure all your ingredients, especially cream cheese and eggs, are at room temperature to avoid lumps in the filling.
-
Water Bath Magic: Using a water bath prevents cracks in your cheesecake, keeping it smooth and perfect for serving. Don't skip this step!
-
Smooth Ganache: For a glossy finish on your ganache, make sure to stir the chocolate chips thoroughly after pouring in the hot cream until it’s completely melted.
-
Dissolve Espresso Properly: Mix the instant espresso powder with hot water to prevent graininess in your espresso cheesecake filling; this enhances the flavor without any grit.
-
Chill Before Serving: Refrigerate the cheesecake overnight to set. This not only improves the texture but also allows the flavors to meld beautifully, making each bite irresistible.
-
Sharp Slices: For clean, professional-looking slices, run your knife under hot water before each cut; this will keep the ganache from sticking.

Espresso Cheesecake Recipe FAQs
How do I select the best ingredients for my Espresso Cheesecake?
Absolutely! For the best results, choose chocolate Oreos with no signs of moisture or dark spots. Ensure your cream cheese is at room temperature; imagine a perfectly smooth finish! Fresh eggs should feel heavy in your hand, and look for heavy cream that has no lumps. If you can, opt for high-quality instant espresso powder for a richer flavor.
How should I store my Espresso Cheesecake after baking?
Very important! Store your Espresso Cheesecake in the refrigerator, loosely covered with plastic wrap or foil, for up to 5 days. This helps maintain its incredible texture and prevents it from drying out. Before slicing, allow it to sit at room temperature for about 15-20 minutes; this will make cutting easier and the flavors even more pronounced.
Can I freeze leftovers of my Espresso Cheesecake?
Yes! You can freeze your Espresso Cheesecake without toppings for up to 2 months. First, wrap it tightly in plastic wrap, followed by aluminum foil to keep it fresh. If you slice it first, make sure to wrap each piece individually for quick access later. When you’re ready to indulge again, simply thaw it in the fridge overnight before serving.
What if my cheesecake cracks while baking?
Don’t worry; it happens to the best of us! A water bath is essential for preventing cracks. If cracks do form, you can cover them with ganache to make it look beautiful again! If the center wobbles a bit after the baking time, that's a good sign—let it cool gradually in the oven for an hour before refrigerating to help smooth everything out.
Are there any allergy considerations for this Espresso Cheesecake?
Absolutely, and it’s great to be mindful! This cheesecake contains dairy and eggs, which are common allergens. For a gluten-free version, make sure to use gluten-free chocolate cookies for the crust. If you have lactose intolerance, you can substitute cream cheese with a dairy-free alternative, but be sure to check the consistency; adjustments to the other ingredients might be needed.
Can I use brewed coffee instead of espresso powder?
Certainly! You can substitute the instant espresso powder with about ⅓ cup of strong brewed coffee. However, make sure to reduce the sour cream slightly to maintain the creamy texture of your filling. Just be sure to let the brewed coffee cool slightly before mixing it into the filling. Enjoy the aromatic journey!
Decadent Espresso Cheesecake That Everyone Will Love
Ingredients
Equipment
Method
- Preheat your oven to 325°F (163°C) and gather your baking supplies.
- In a mixing bowl, crush the Oreo cookies until they resemble fine crumbs. Melt your unsalted butter and combine it with the cookie crumbs until fully incorporated. Press this mixture into the bottom of the springform pan.
- Beat the cream cheese with granulated sugar until smooth. Add eggs one at a time, mixing well after each addition.
- Mix in sour cream, vanilla extract, and dissolved instant espresso powder. Blend until well combined.
- Pour the filling into the prepared crust. Place the springform pan inside a larger roasting pan filled with hot water halfway up the sides. Bake for 60-70 minutes.
- After baking, turn off the oven and leave the cheesecake inside for an additional hour. Remove from the water bath and let cool to room temperature.
- Cover loosely and refrigerate overnight to set.
- For the ganache, heat heavy cream until it begins to simmer. Pour over chocolate chips and stir until smooth. Spread ganache over the cheesecake.
- Garnish with chocolate curls or shavings before serving.


Leave a Reply