
In the heart-shaped boxes of my childhood, there was always one star that outshone the rest: the irresistible Oreo truffle. As I delve into the world of festive treats, these Valentine’s Day Oreo Truffles take the cake—not only because they’re a delightful no-bake dessert, but also because they allow you to express your love without the fuss of baking. Just imagine the joy of whipping up these easy chocolate delights in under an hour, packing them with creamy goodness and crunchy cookie bits. Perfect as a sweet gift or a simple indulgence for yourself, they merge whimsy with taste, leaving you and your loved ones smiling with every bite. Ready to make a delicious impression this season of love? Let's dive in!
Why Are Oreo Truffles So Irresistible?
Decadent Flavor: Each bite bursts with creamy cream cheese and crushed Oreo goodness, satisfying your sweet tooth perfectly.
No-Bake Convenience: You can whip these up in less than an hour, making it an ideal last-minute treat for your Valentine.
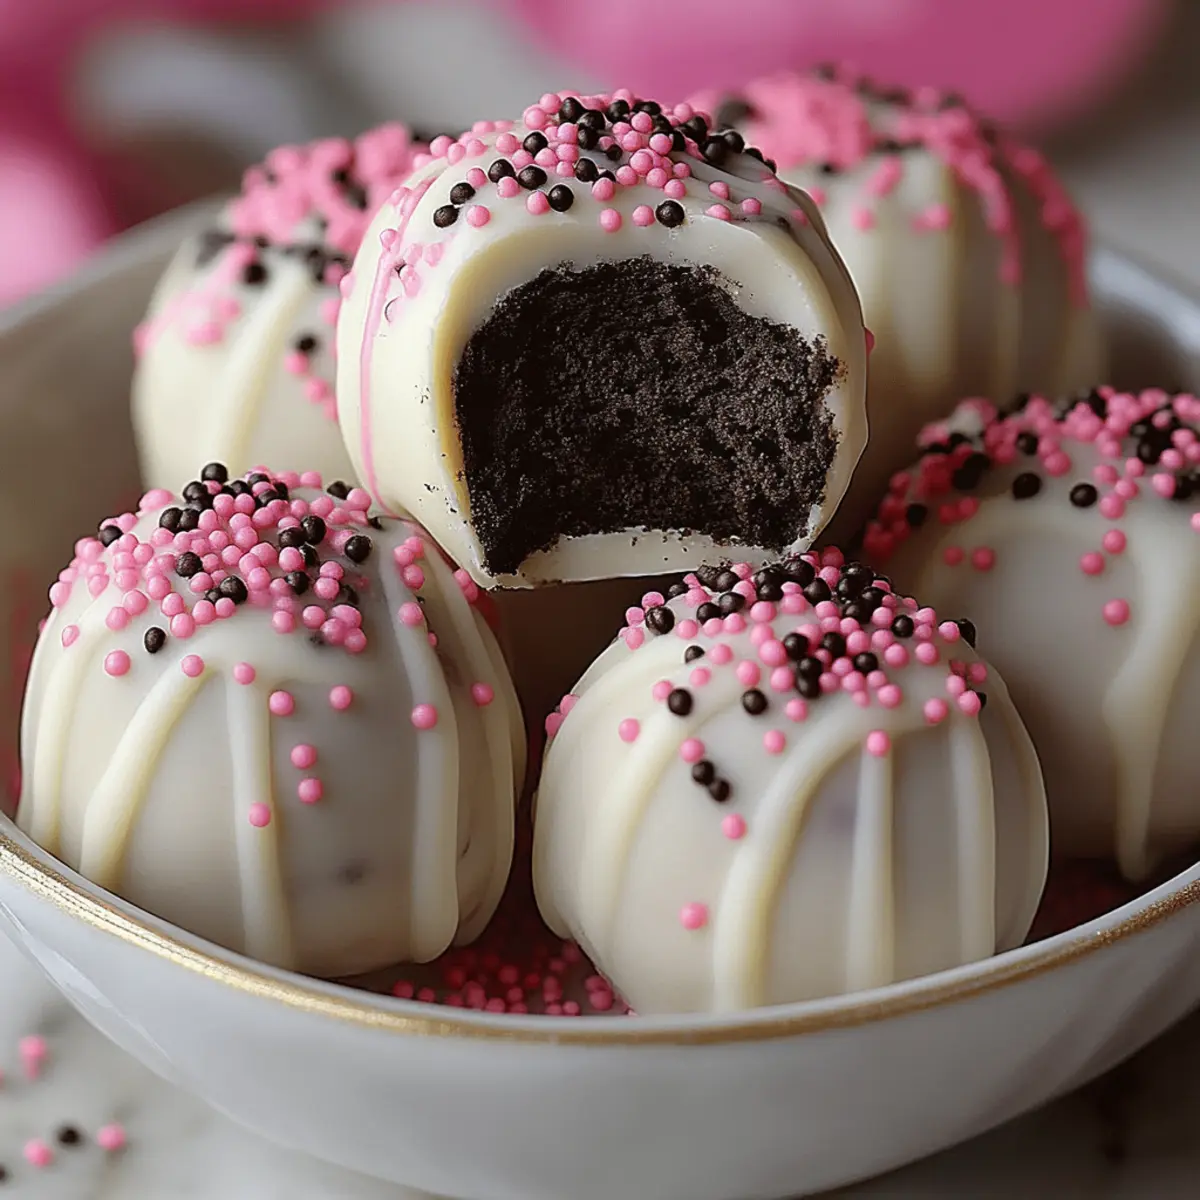
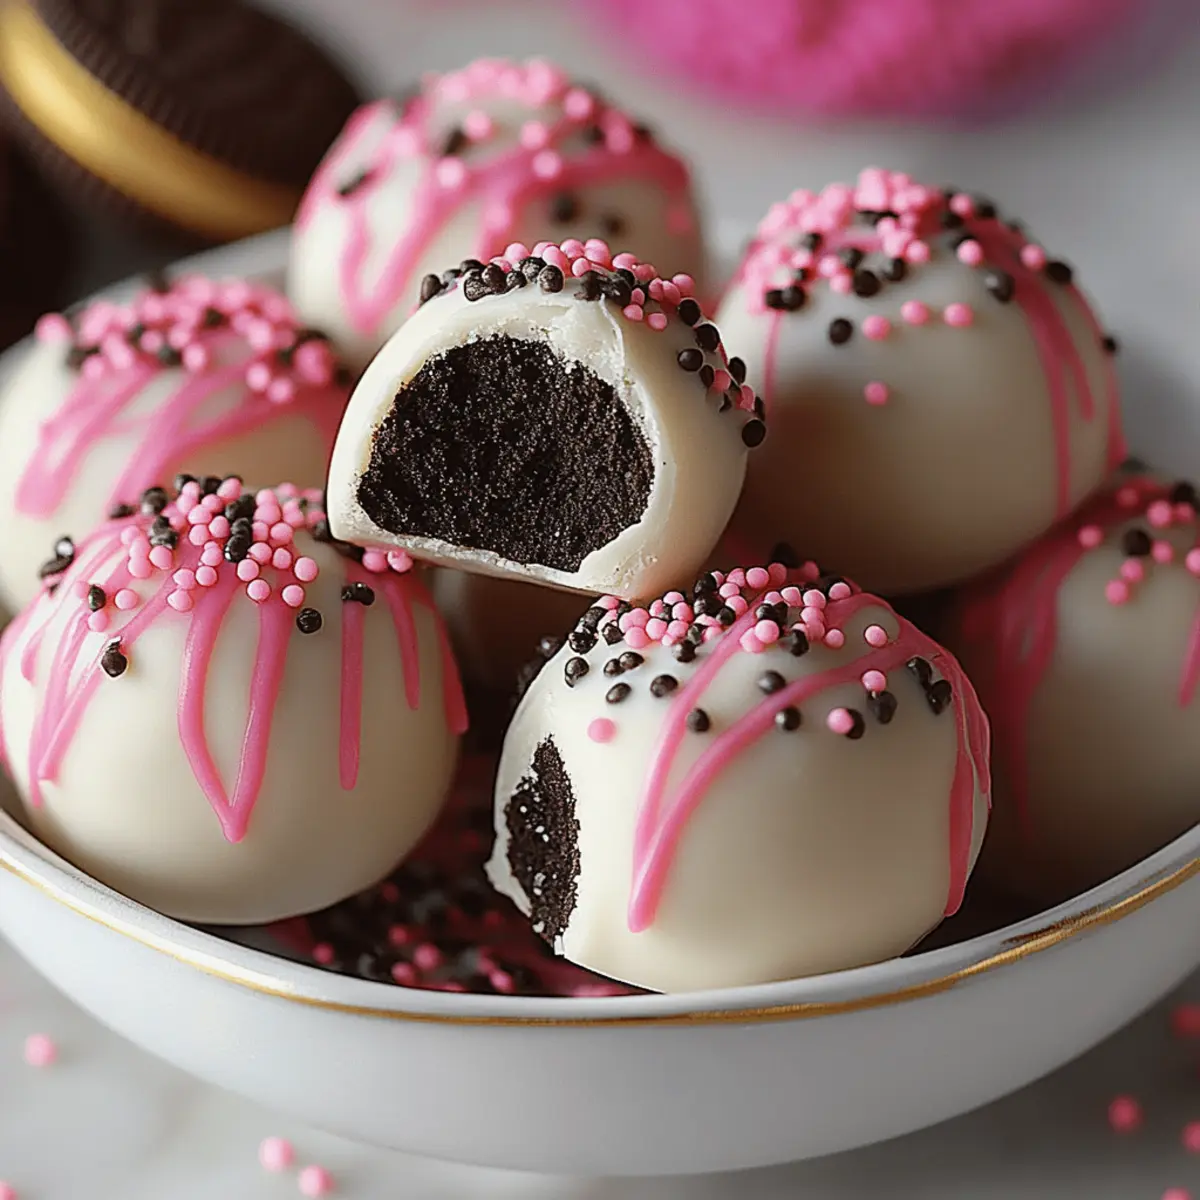
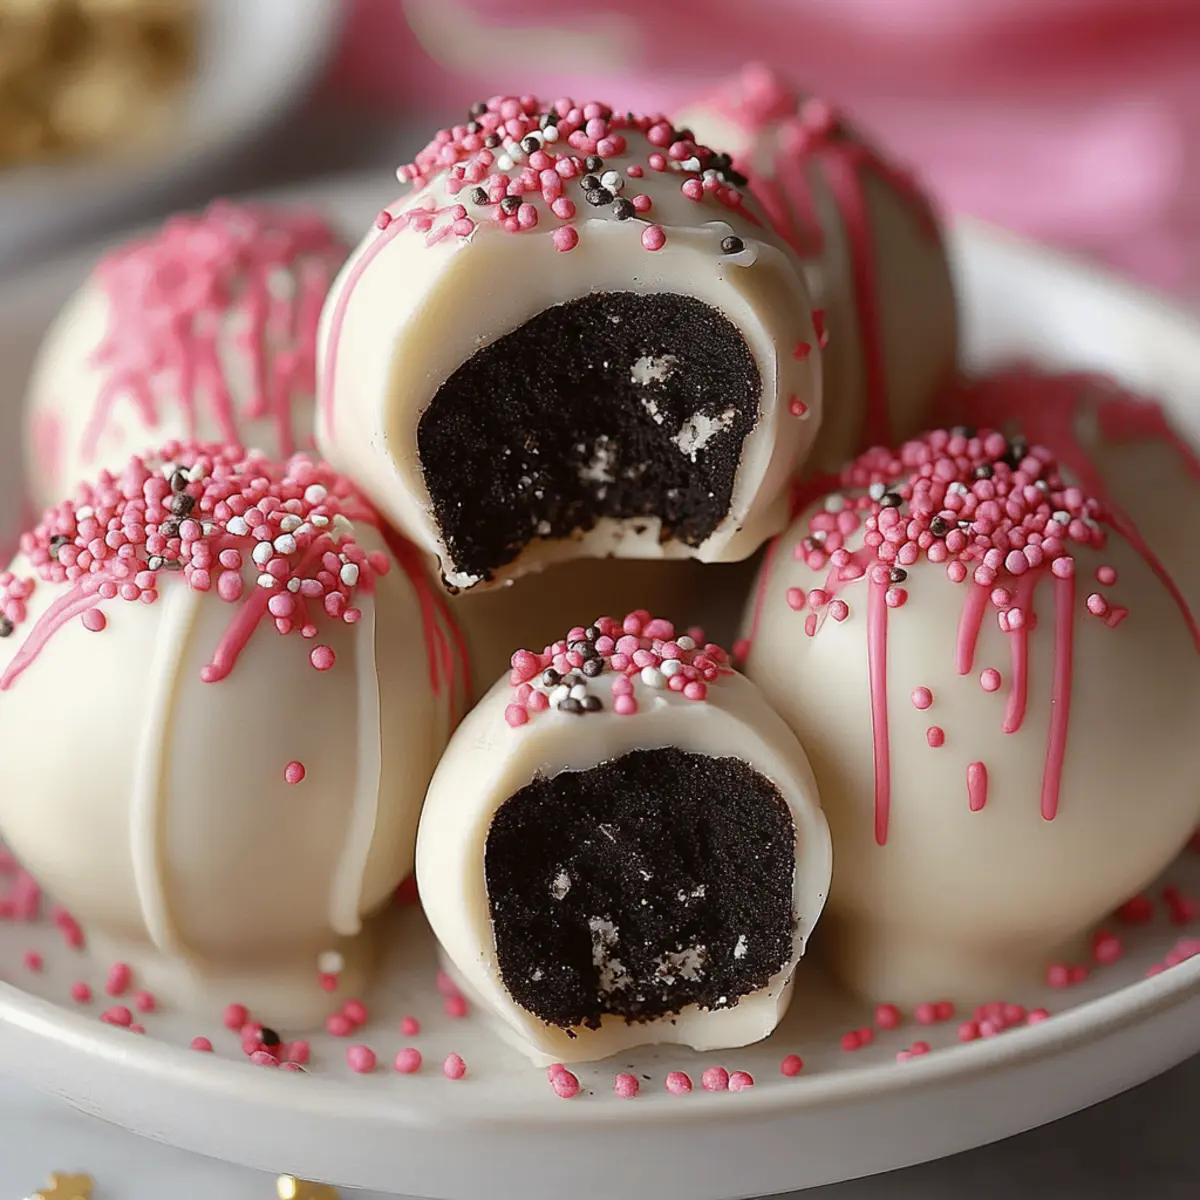
Visually Stunning: Coated in smooth white chocolate and sprinkled with festive colors, these truffles are a feast for the eyes and the taste buds!
Crowd-Pleasing Delight: Whether for a romantic dinner or a gathering with friends, these treats will steal the show.
Endless Customization: Feel free to personalize your truffles with different flavors or toppings; ideas like adding peppermint extract or crushed nuts can elevate the experience!
Make these delightful Oreo Truffles when you're looking for an easy yet impressive dessert that will have everyone asking for more.
Oreo Truffles Ingredients
• For the Truffle Mixture
- Oreo Cookies – The key ingredient providing the rich, chocolatey flavor; feel free to switch to any chocolate sandwich cookie if needed.
- Cream Cheese – This adds a creamy texture and binds the crumbs together; make sure it's softened for easy mixing.
- Vanilla Extract (optional) – A splash enhances the flavor profile; omit for a more straightforward chocolate taste.
• For the Coating
- White Chocolate Chips – The sweet coating that complements the truffles perfectly; you can use milk or dark chocolate chips as a substitute.
- Vegetable Oil (optional) – Thins the melted chocolate for easier coating; skip if you prefer a thicker layer.
• For Decoration
- Red and Pink Sprinkles – Adds a festive touch for Valentine’s Day; substitute with colorful sprinkles or chopped nuts for variety.
Step‑by‑Step Instructions for Oreo Truffles
Step 1: Crush Oreos
Begin by placing the Oreo cookies into a food processor. Pulse until you achieve a fine crumb texture, which should take about 30 seconds to 1 minute. If you don't have a food processor, you can use a zip-top bag and a rolling pin to crush them by applying firm pressure. This base will provide the rich flavor for your Oreo truffles.
Step 2: Mix Filling
In a mixing bowl, combine the crushed Oreos with softened cream cheese and optional vanilla extract. Using a spatula or a hand mixer, blend the mixture until it becomes smooth and homogenous, which typically takes about 2-3 minutes. The cream cheese will bind the crumbs together, creating a rich filling for your Oreo truffles.
Step 3: Form Balls
Scoop out about a tablespoon of the mixture and roll it into a ball, roughly 1 inch in diameter. Continue this process until all the mixture is rolled into balls, placing them on a parchment-lined baking sheet. Aim for uniform sizes to ensure even coating and presentation for your delicious Oreo truffles.
Step 4: Chill
Once all the balls are formed, transfer the baking sheet to the refrigerator. Allow the truffles to chill for at least 30 minutes, or until they are firm enough to hold their shape. This step is crucial because it helps the truffles maintain their structure when dipped in chocolate.
Step 5: Melt Chocolate
While the truffles are chilling, prepare the coating by melting the white chocolate chips. Place them in a microwave-safe bowl and heat in 30-second intervals, stirring in between until completely melted and smooth. Be cautious not to overheat the chocolate, as it can burn quickly and ruin the coating for your Oreo truffles.
Step 6: Coat Truffles
Remove the chilled truffles from the refrigerator. Dip each ball into the melted white chocolate, ensuring it is fully coated. Use a fork to lift it out, allowing any excess chocolate to drip off. Return the coated truffles to the parchment-lined sheet, ready for decoration.
Step 7: Decorate
Immediately after coating, sprinkle the top of each truffle with festive red and pink sprinkles before the chocolate sets. This not only adds a pop of color but also makes your Oreo truffles visually appealing for Valentine's Day. Be sure to do this quickly, as the chocolate sets rapidly.
Step 8: Set
Once decorated, let the truffles sit at room temperature for about 15-20 minutes, or place them back in the refrigerator for a faster set. You want the coating to harden completely, ensuring each bite of these Oreo truffles has that delightful crisp chocolate exterior once enjoyed.
Step 9: Serve
Your Oreo truffles are now ready! After the coating has set, plate them up for sharing or store them in an airtight container in the fridge. These decadent treats are perfect for indulging or gifting, filling hearts and stomachs alike with sweetness this Valentine's Day.

Oreo Truffles Variations & Substitutions
Feel free to explore your creativity and make these delightful treats uniquely yours!
- Dairy-Free: Use dairy-free cream cheese and chocolate to create a vegan version that still satisfies your sweet tooth.
- Nutty Surprise: Add finely chopped nuts like almonds or walnuts to the truffle mixture for a delightful crunch and flavor dimension.
- Minty Fresh: Incorporate a few drops of peppermint extract into the mixture for a refreshing twist; it's perfect for your winter celebrations!
- Double Chocolate: Substitute the white chocolate coating with dark chocolate, or create a two-tone effect by layering both for a richer taste.
- Coconut Bliss: Roll your truffles in toasted coconut flakes instead of sprinkles for a tropical twist; it adds delightful texture and flavor.
- Seasonal Flavors: Try adding pumpkin spice or cinnamon for a holiday-themed treat that brings warmth to your gatherings.
- Fruit Infusion: Mix in finely diced strawberries or raspberries into the filling for a fruity surprise that beautifully balances the chocolate richness.
- Spicy Kick: Add a pinch of cayenne pepper or a few drops of hot sauce to the mixture for a surprising heat that beautifully complements the sweetness!
With these variations, your Oreo truffles can transform into an array of flavors that cater to every palate. Enjoy personalizing these little delights!
How to Store and Freeze Oreo Truffles
Fridge: Store your Oreo truffles in an airtight container for up to one week. This keeps them fresh and delicious, ready to satisfy your sweet cravings!
Freezer: For longer storage, you can freeze your truffles for up to three months. Layer them in an airtight container with parchment paper in between to prevent sticking.
Reheating: When ready to enjoy, simply remove from the freezer and let thaw at room temperature for about 30 minutes before serving. This will bring back their creamy texture.
Reminder: Keep your truffles refrigerated until serving to maintain their shape and taste, ensuring they’re the perfect treat for your loved ones!
Expert Tips for Oreo Truffles
-
Use Softened Cream Cheese: Ensure your cream cheese is at room temperature for smoother mixing, which helps the truffles hold their shape better.
-
Melt Chocolate Carefully: Heat the chocolate in short intervals and stir often to prevent burning; overly hot chocolate can ruin your Oreo truffles' coating.
-
Chill Before Coating: Don’t skip the chilling step! Allowing the truffles to firm up helps them hold their shape while being coated.
-
Decorate Quickly: Sprinkle with red and pink sprinkles right after coating. The chocolate sets fast, so work swiftly for a colorful finish.
-
Store Properly: Keep your Oreo truffles in an airtight container in the fridge for up to a week to maintain their freshness and texture.
Make Ahead Options
These Valentine’s Day Oreo Truffles are perfect for meal prep, allowing you to save precious time on busy days! You can prepare the truffle mixture up to 24 hours in advance by following the first three steps: crushing the Oreos, mixing in the cream cheese, and rolling them into balls. Simply store the formed balls in an airtight container in the refrigerator to maintain their quality. When you're ready to indulge or impress, just coat the chilled truffles in melted white chocolate and add sprinkles before serving. This ensures they remain just as delicious and visually appealing, making your dessert planning a breeze!
What to Serve with Valentine’s Day Oreo Truffles?
Treat your loved ones to a delightful spread that enhances your Oreo truffles with a mix of flavors and textures!
-
Glass of Milk: A classic pairing that balances the rich sweetness of truffles, making every bite more satisfying.
-
Cup of Coffee: The robust flavor of coffee beautifully complements the sweetness of the truffles, creating a delightful contrast.
-
Raspberry Sauce: Drizzle this tangy-sweet sauce over your truffles, adding a refreshing burst of flavor and vibrant color.
-
Fresh Strawberries: The juicy sweetness of strawberries complements the creaminess of the truffles while adding a refreshing crunch.
-
Chocolate Fondue: For a decadent twist, serve the truffles with warm chocolate fondue for dipping, enhancing the chocolate experience.
-
Cheesecake Bites: These creamy treats provide a smooth contrast to the crunchy texture of the truffles, creating a delightful dessert platter.
Indulging in these perfectly paired accompaniments transforms your dessert experience, taking your Valentine’s Day celebration to a whole new level!
Valentine’s Day Oreo Truffles Recipe FAQs
How do I know if my Oreos are fresh enough to use?
You can tell if your Oreo cookies are fresh by checking for any dark spots or unusual odors. If they smell off or have a stale texture, it’s best to grab a new package. Fresh Oreos will give your truffles a delightful crunch and flavor.
How should I store leftover Oreo truffles?
Store your Oreo truffles in an airtight container in the refrigerator for up to one week. Make sure they are fully cooled and set before placing them in the container to avoid any sticking or melting.
Can I freeze Oreo truffles? How do I do it?
Absolutely! For longer storage, freeze your truffles by placing them on a baking sheet to first firm up. Once set, layer them in an airtight container with parchment paper between each layer to prevent them from sticking together. They can be frozen for up to three months. When you're ready to enjoy, allow them to thaw at room temperature for about 30 minutes.
What if my chocolate coating isn't smooth?
If your chocolate coating isn’t smooth, it may have overheated. Always melt chocolate in short bursts (30 seconds) and stir between each interval. If you're facing issues, you can try adding a teaspoon of vegetable oil to the melted chocolate to thin it out for a smoother coating.
Are Oreo truffles safe for pets?
It's important to note that chocolate is toxic to pets, so keep your Oreo truffles well out of reach of dogs and cats! If you want to make a pet-friendly treat, consider using non-chocolate alternatives and ingredients safe for them.
Can I substitute ingredients for allergies?
Definitely! You can use a dairy-free cream cheese alternative and dark chocolate if you’re avoiding milk products. Just check labels to ensure all substituted ingredients are allergy-friendly for your specific needs.
Indulgent Oreo Truffles: Easy No-Bake Sweet Treats!
Ingredients
Equipment
Method
- Begin by placing the Oreo cookies into a food processor. Pulse until you achieve a fine crumb texture, about 30 seconds to 1 minute.
- In a mixing bowl, combine the crushed Oreos with softened cream cheese and optional vanilla extract. Blend until smooth, about 2-3 minutes.
- Scoop out about a tablespoon of the mixture and roll it into a ball, roughly 1 inch in diameter. Place on a parchment-lined baking sheet.
- Transfer the baking sheet to the refrigerator and chill for at least 30 minutes.
- While the truffles are chilling, melt white chocolate chips in a microwave-safe bowl, heating in 30-second intervals until smooth.
- Remove the chilled truffles and dip each ball into the melted white chocolate, ensuring full coating.
- Immediately sprinkle the tops of each truffle with festive red and pink sprinkles.
- Let the truffles sit at room temperature for about 15-20 minutes or refrigerate to allow the coating to harden.
- Once decorated, plate the truffles for sharing or store them in an airtight container in the fridge.


Leave a Reply