
As I stood in my kitchen, the delightful aroma of simmering spices transported me back to late-night runs to Taco Bell. It’s amazing how food can evoke such vivid memories! With this Homemade Taco Bell Chili Cheese Burrito, I’ve brought that nostalgic warmth right to my own table. Not only is this recipe quick and easy to whip up, but it also invites endless customization—whether you want it spicy, vegetarian, or even as a hearty breakfast option, the choice is yours. Perfect for a satisfying dinner or a late-night snack, these burritos provide the comfort of fast food without any of the guilt. So, who’s ready to serve up a taste of nostalgia in a fresh, homemade way?
Why is this burrito a must-try?
Comforting, Homemade Goodness: Enjoy the nostalgic taste of Taco Bell in your own kitchen.
Quick & Easy: This recipe is perfect for busy nights, ready in under an hour!
Customizable: Spice it up or keep it mild—add veggies or switch to a vegetarian option for a healthy twist.
Crowd-Pleaser: Perfect for family dinners or gatherings, everyone will love these hearty burritos.
Deliciously Satisfying: The gooey cheese and zesty chili blend create a flavor explosion that will have you coming back for more!
For more delicious ideas, check out this Cream Cheese Spaghetti or my favorite Steak Egg Cheese Bagel.
Chili Cheese Burrito Ingredients
• Take your homemade Chili Cheese Burrito to the next level with these fresh ingredients!
For the Chili
- Ground Beef – Adds protein and rich flavor; substitute with plant-based crumbles or lentils for a vegetarian option.
- Yellow Onion – Provides sweetness and aromatic base flavors.
- Garlic – Enhances the flavor profile with its savory notes.
- Green Bell Pepper – Adds freshness and a slight crunch.
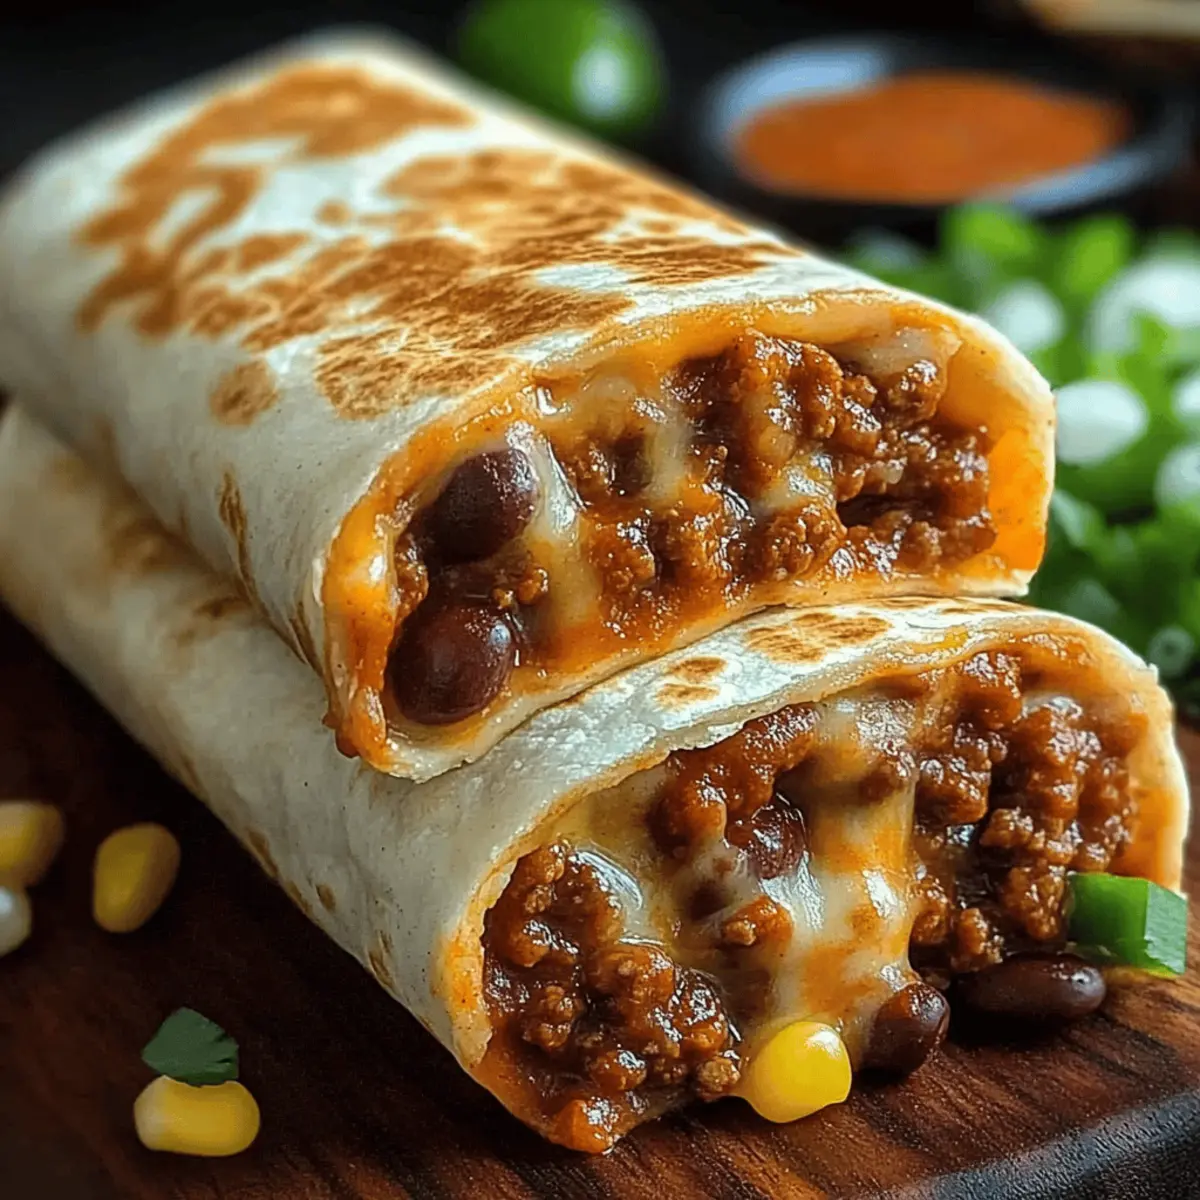
- Kidney Beans – Offers texture and heartiness; can swap with black beans.
- Pinto Beans – Complements kidney beans for a varied texture.
- Tomato Sauce – Creates the saucy base for the chili.
- Diced Tomatoes and Green Chiles – Adds a kick and texture.
- Beef Broth – Provides richness; can use vegetable broth for a vegetarian version.
- Chili Powder – Key seasoning for spice; adjust for taste.
- Cumin – Adds warmth and earthiness.
- Smoked Paprika – Introduces a smoky flavor.
- Garlic Powder & Onion Powder – Enhance the overall flavor without adding bulk.
- Cayenne Pepper – Optional for heat; adjust to taste.
- Dried Oregano – Adds herbal notes.
- Ground Cinnamon – Optional but adds depth to the flavor.
- Salt and Black Pepper – Essential for seasoning.
- Vegetable Oil – Used for sautéing; can substitute with olive oil.
For the Burritos
- Flour Tortillas – Encases the filling; burrito-sized for broader coverage.
- Cheddar Cheese – Melts beautifully, adding creamy richness; consider a blend with Monterey Jack for variety.
Step‑by‑Step Instructions for Chili Cheese Burrito
Step 1: Cook Ground Beef
In a large skillet, heat 1 tablespoon of vegetable oil over medium-high heat. Add 1 pound of ground beef, cooking it while breaking it into small pieces with a spatula. Brown the meat for about 6-8 minutes, until it's thoroughly cooked and no longer pink. This flavorful base is essential for your Chili Cheese Burrito.
Step 2: Sauté Vegetables
Once the ground beef is browned, stir in 1 chopped yellow onion and 1 diced green bell pepper. Sauté them together for 5-7 minutes, until the vegetables become tender and translucent. This sweet aroma will enhance the overall flavor of your chili, making your Chili Cheese Burrito even more delightful.
Step 3: Add Garlic and Spices
Add 3 minced garlic cloves along with chili powder, cumin, smoked paprika, garlic powder, onion powder, cayenne pepper, dried oregano, ground cinnamon, and a pinch of salt and black pepper. Stir for about 1 minute, cooking until the garlic is fragrant and the spices bloom, infusing the mixture with bold flavors that are perfect for your Chili Cheese Burrito.
Step 4: Combine Ingredients
Stir in 15 ounces of tomato sauce, 14.5 ounces of diced tomatoes with green chiles, 1 can of kidney beans, and 1 can of pinto beans. Mix well until all ingredients are thoroughly combined. This creates a rich, chunky filling that is the heart of your Chili Cheese Burrito, perfect for wrapping up.
Step 5: Simmer Chili
Reduce the heat to low, cover the skillet, and let the chili simmer for 1-2 hours. Stir occasionally, allowing the flavors to meld and intensify. Aim for a thick, hearty consistency; this will create a satisfying filling for your Chili Cheese Burrito, leaving you with mouthwatering results.
Step 6: Season to Taste
After simmering, taste and adjust the seasoning with additional salt and black pepper as needed. This final step is crucial to ensure your chili has the perfect balance of flavors, setting a delicious foundation for your Chili Cheese Burrito.
Step 7: Warm Tortillas
When ready to assemble, heat the burrito-sized flour tortillas in a dry skillet over medium heat for about 30 seconds on each side, or microwave them for 15-20 seconds until pliable. This step ensures that the tortillas are soft and easy to wrap around the filling in your Chili Cheese Burrito.
Step 8: Fill Burritos
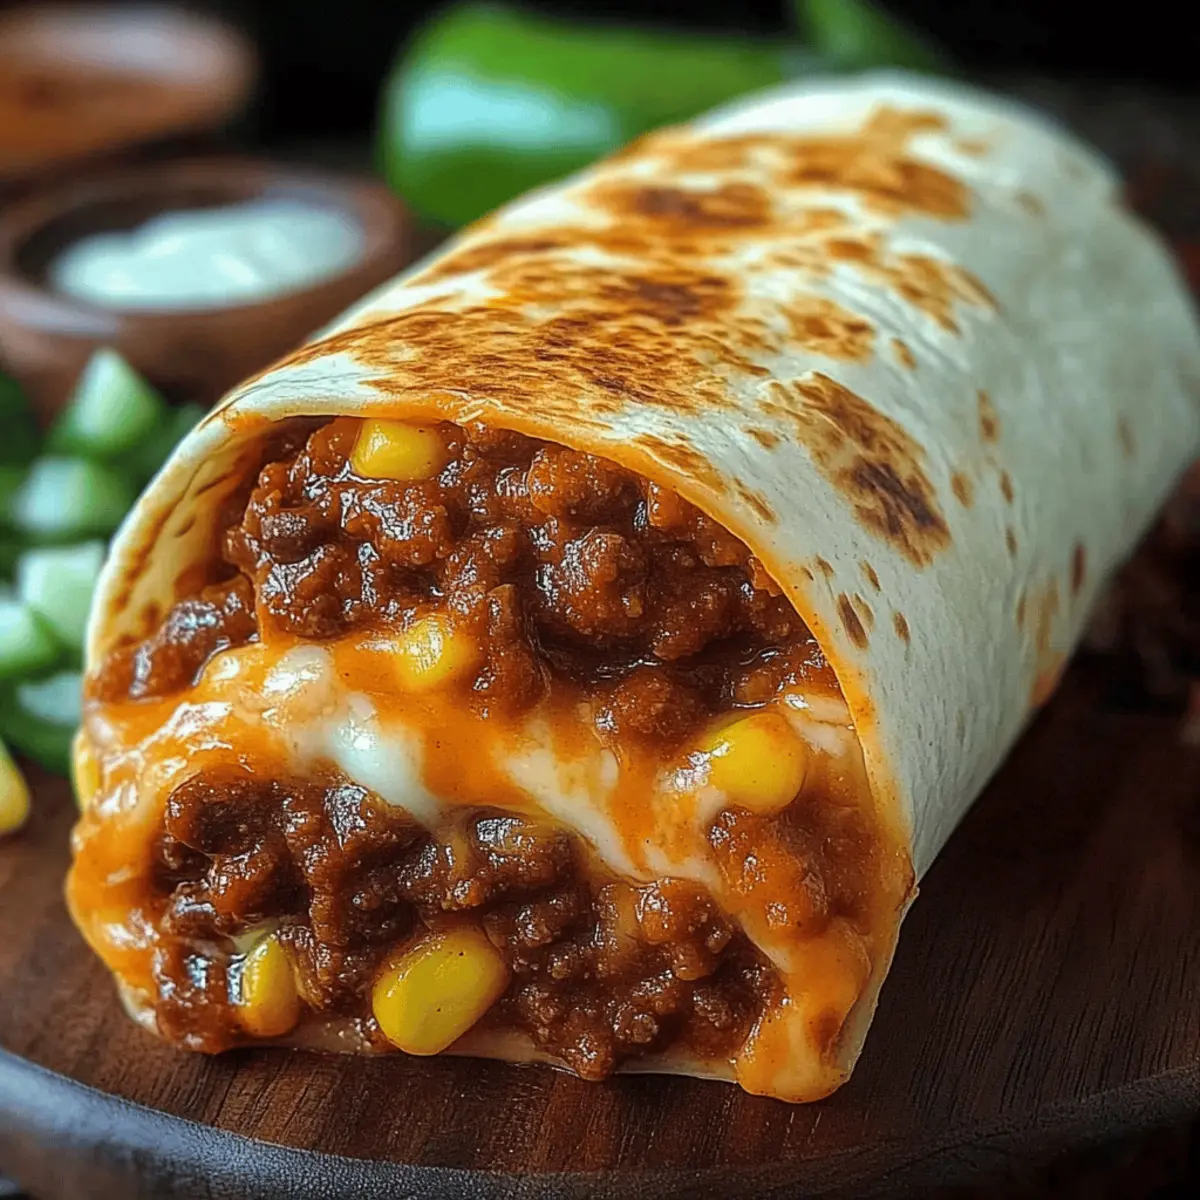
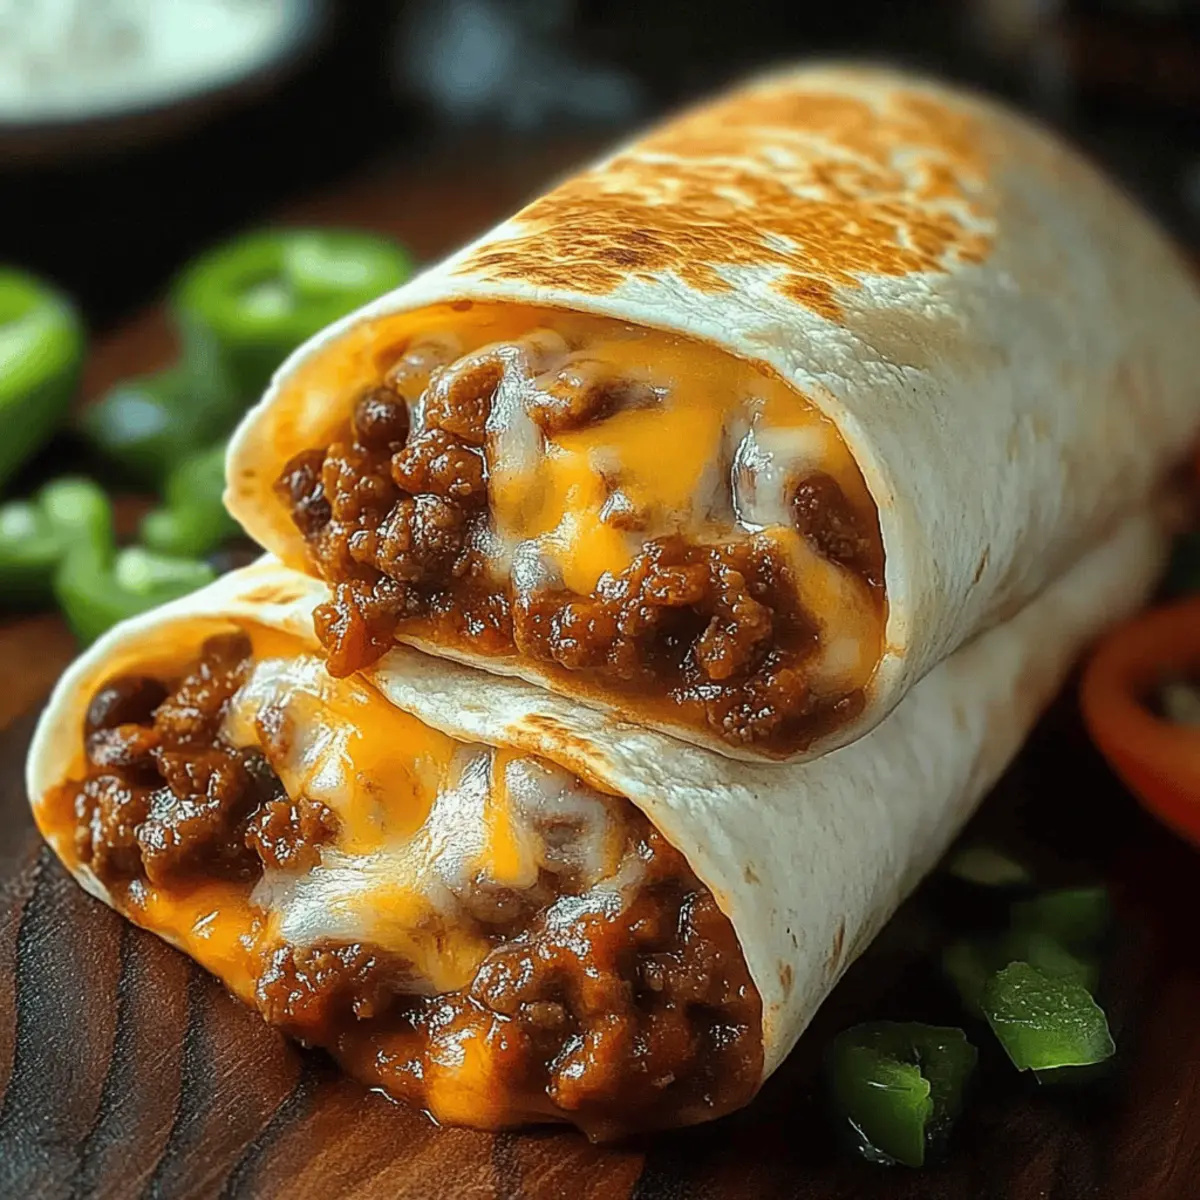
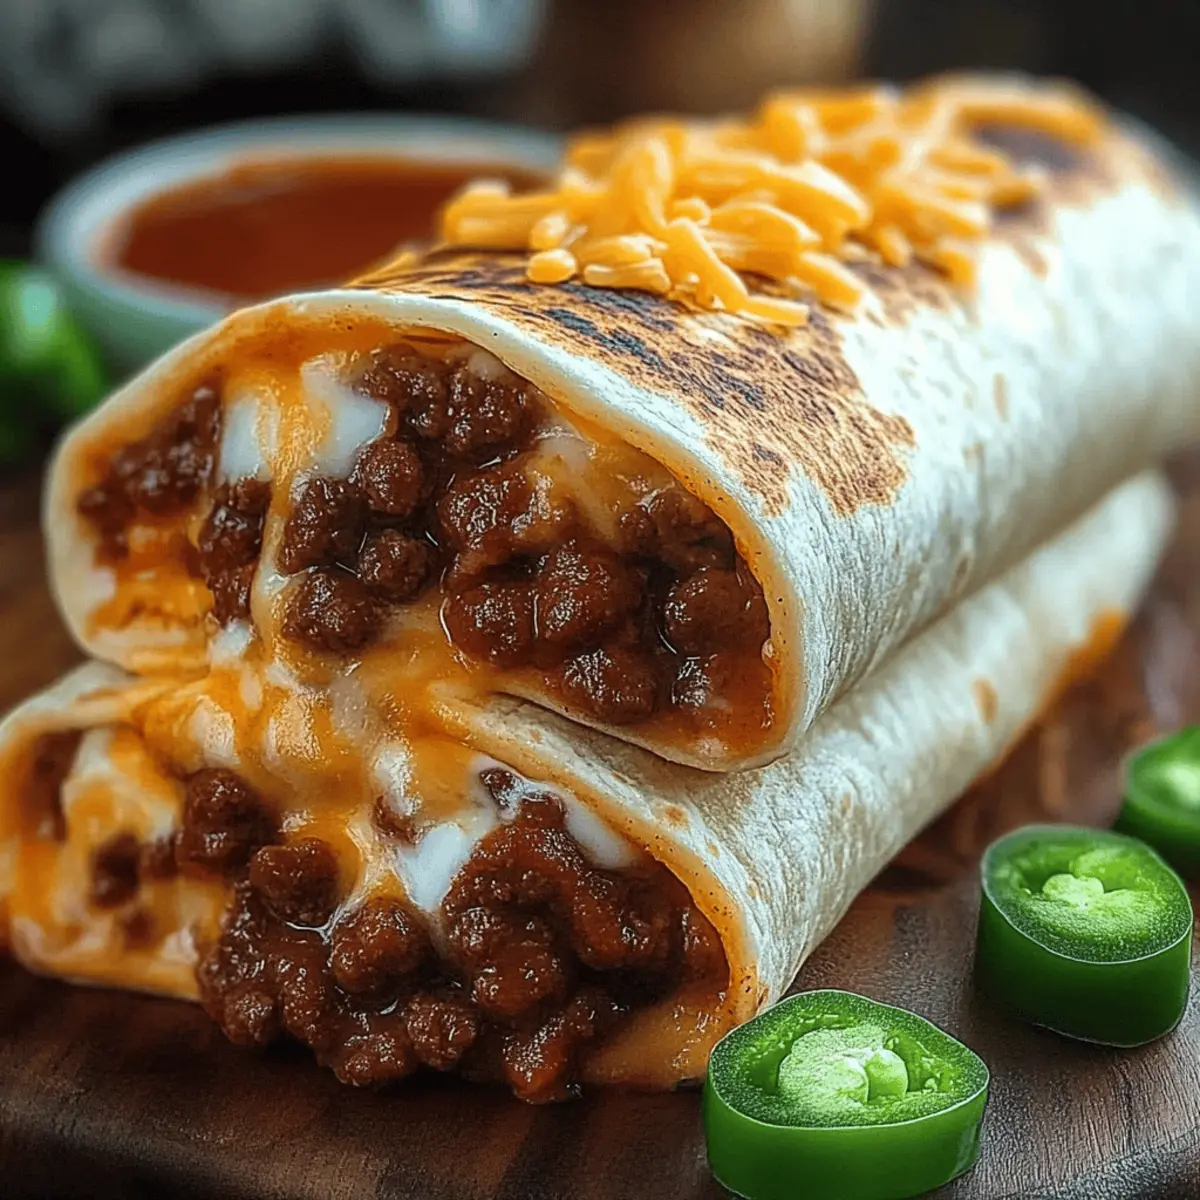
Take a warm tortilla and spoon a generous amount of the chili mix into the center. Sprinkle a handful of shredded cheddar cheese over the chili filling. This cheesy layer melts beautifully, adding that signature gooeyness to your Chili Cheese Burrito.
Step 9: Roll Burritos
Carefully fold in the sides of the tortilla, then roll it tightly from the bottom up to secure all the filling inside. This technique not only holds the burrito together but also keeps every bite packed with delicious chili and cheese.
Step 10: Serve Immediately
Once rolled, place your Chili Cheese Burrito on a plate and serve warm. Enjoy them right away for the best experience, or keep them wrapped in foil to retain heat until you’re ready to dig in.
Chili Cheese Burrito Variations
Feel free to let your creativity shine while crafting these delightful burritos!
- Spicy Twist: Add cayenne pepper or hot sauce for an extra kick. Feel the heat rise and dance in your mouth with every bite!
- Vegetarian Delight: Replace ground beef with plant-based crumbles or lentils. This option is packed with flavor and perfect for meatless days!
- Crunchy Add-ins: Toss in crushed tortilla chips for a satisfying crunch. The contrast between the creamy cheese and crispy texture is simply irresistible.
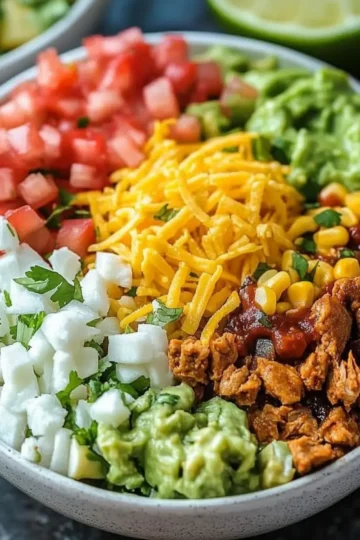
- Chili Cheese Bowl: Create a beautiful bowl by layering chili, toppings, and cheese instead of wrapping it up. A flavorful twist that’s perfect for a cozy night in!
- Gourmet Toppings: Top your burritos with sour cream, guacamole, or fresh pico de gallo. Elevate your meal with these delightful complements that add freshness and color.
- Breakfast Burrito: Mix in scrambled eggs for a hearty breakfast twist. Imagine waking up to the aroma of warm tortillas and cheesy, savory goodness.
- Extra Cheese: Go cheesy with a blend of cheddar and Monterey Jack for a meltingly delicious surprise. You can never have too much cheese, right?
For more unique flavors, try some of my other delightful recipes like Cream Cheese French Toast Roll-Ups to add to your breakfast repertoire!
What to Serve with Homemade Taco Bell Chili Cheese Burrito
Prepare for a delightful culinary experience that pairs perfectly with your comforting burritos!
- Creamy Guacamole: The smooth, rich avocado dip brings freshness and complementing flavors, elevating your meal to new heights.
- Zesty Salsa: A vibrant, tangy salsa adds a burst of flavor and brightness, enhancing the heartiness of the burrito. Consider a mango salsa for a fruity twist!
- Mexican Street Corn Salad: With its crunchy corn, herbs, and creamy dressing, this side offers a refreshing contrast to the warm, cheesy burrito. It's a colorful addition everyone will love.
- Refried Beans: Silky and savory, refried beans provide a comforting texture and excellent flavor that pairs beautifully with the filling of the burrito.
- Crispy Tortilla Chips: These crunchy bites are perfect for dipping into your favorite salsa or guacamole, adding a satisfying crunch to your meal. Serve them on the side for that extra indulgence.
- Classic Lemonade: The refreshing and slightly tart drink cleanses the palate between bites, balancing the rich flavors of the Chili Cheese Burrito. Try a sparkling version for some fizz!
- Chocolate Chip Cookies: End your meal on a sweet note with these classic treats. The warm, melty chocolate contrasts beautifully against the hearty burrito, creating a comforting finish.
- Coleslaw: A crunchy, tangy coleslaw provides refreshing crunch and brightness that compliments the chili's richness. It's a great way to add more veggies to your plate!
- Rice and Beans: A side of seasoned rice with pinto or black beans offers a traditional touch, making your meal both filling and satisfying. The harmonious flavors make this a classic pairing.
Make Ahead Options
These Homemade Taco Bell Chili Cheese Burritos are perfect for meal prep enthusiasts looking to save time during busy weeknights! You can make the chili filling up to 3 days in advance; simply let it cool completely, then refrigerate in an airtight container. To maintain the delicious flavors, ensure you store it away from air exposure to prevent spoilage. When you're ready to serve, warm the chili gently on the stovetop and reheat the tortillas as instructed. Fill them with the chili and cheese, roll, and enjoy a comforting meal that's just as satisfying as fresh—saving you both time and stress in the kitchen!
Storage Tips for Chili Cheese Burrito
Fridge: Store leftover burritos in an airtight container for up to 3 days. This keeps them fresh and flavorful, ready for a quick meal!
Freezer: Wrap burritos tightly in foil or plastic wrap and freeze for up to 2 months. This way, you can enjoy a homemade Chili Cheese Burrito anytime you crave comfort food!
Reheating: To reheat, unwrap burritos and place them in a preheated oven at 350°F (175°C) for about 15-20 minutes. For quicker reheating, use a microwave for 1-2 minutes until heated through.
Airtight Storage: Ensure that your storage containers are airtight to prevent freezer burn and preserve the delicious flavor of your Chili Cheese Burrito.
Expert Tips for Chili Cheese Burrito
-
Brown the Beef: Always cook the ground beef thoroughly before adding vegetables. This step enhances the flavors vital for your Chili Cheese Burrito.
-
Bloom Spices: After adding spices, let them cook for a minute to blossom their flavors. This simple trick transforms your chili into a delectable filling.
-
Avoid Tortilla Tears: Always warm your tortillas before filling them. This prevents tears and makes rolling your Chili Cheese Burrito a breeze.
-
Longer Simmer: Extend the simmering time for a richer chili. Not only do flavors deepen, but you'll also achieve that thick consistency ideal for burritos.
-
Taste and Adjust: Always taste and season after simmering. A pinch of salt or extra spice can elevate your Chili Cheese Burrito to new heights!
Chili Cheese Burrito Recipe FAQs
What type of beef should I use for the chili?
For the best flavor in your Chili Cheese Burrito, I recommend using ground beef with a bit of fat (like 80/20). This fat will render during cooking, enriching the chili. If you prefer a lighter option, you can also use lean ground turkey or plant-based crumbles for a vegetarian take.
How do I know when my chili is done?
Your chili is ready when it has a thick, hearty consistency and the flavors have melded together beautifully. Typically, it takes about 1 to 2 hours on low heat to reach the perfect texture. Stir occasionally to prevent sticking, and taste it near the end to adjust seasonings as needed.
How should I store leftovers?
Store any leftover Chili Cheese Burritos in an airtight container in the fridge for up to 3 days. If you'd like to keep them longer, wrap them tightly in foil or plastic wrap and freeze for up to 2 months. Make sure to label them for easy identification later!
Can I freeze the chili before wrapping it in tortillas?
Absolutely! To freeze your chili, let it cool completely after cooking. Portion it into freezer-safe containers or bags, and ensure you squeeze out as much air as possible before sealing. It will last for up to 3 months in the freezer. When you're ready to use it, thaw it in the fridge overnight before reheating.
What are some common troubleshooting tips for my Chili Cheese Burrito?
If your chili turns out too watery, try simmering it uncovered for a bit longer to reduce the liquid. On the other hand, if it feels too thick, splash in a little beef or vegetable broth to loosen it up. Lastly, if you find it too spicy, add a touch of sugar or honey to balance the heat.
What should I do if I have allergies?
If you have allergies, you can easily customize this Chili Cheese Burrito. For gluten-free options, use corn tortillas instead of flour. Always double-check labels for any packaged ingredients to ensure they're allergy-friendly. You can also adjust spices or ingredients based on your specific dietary needs. Enjoy cooking!
Indulgent Chili Cheese Burrito That's Better Than Takeout
Ingredients
Equipment
Method
- In a large skillet, heat 1 tablespoon of vegetable oil over medium-high heat. Add 1 pound of ground beef, cooking it while breaking it into small pieces with a spatula. Brown the meat for about 6-8 minutes.
- Stir in 1 chopped yellow onion and 1 diced green bell pepper. Sauté for 5-7 minutes until tender.
- Add 3 minced garlic cloves, chili powder, cumin, smoked paprika, garlic powder, onion powder, cayenne pepper, dried oregano, ground cinnamon, salt and black pepper. Stir for about 1 minute.
- Stir in 15 ounces of tomato sauce, 14.5 ounces of diced tomatoes with green chiles, 1 can of kidney beans, and 1 can of pinto beans. Mix well.
- Reduce heat to low, cover, and let simmer for 1-2 hours, stirring occasionally.
- Taste and adjust seasoning with additional salt and black pepper as needed.
- Heat the burrito-sized flour tortillas in a dry skillet for about 30 seconds on each side or microwave for 15-20 seconds.
- Take a warm tortilla, spoon a generous amount of the chili mix, and sprinkle shredded cheddar cheese over it.
- Fold in the sides of the tortilla, then roll tightly from bottom up.
- Serve warm and enjoy!


Leave a Reply