
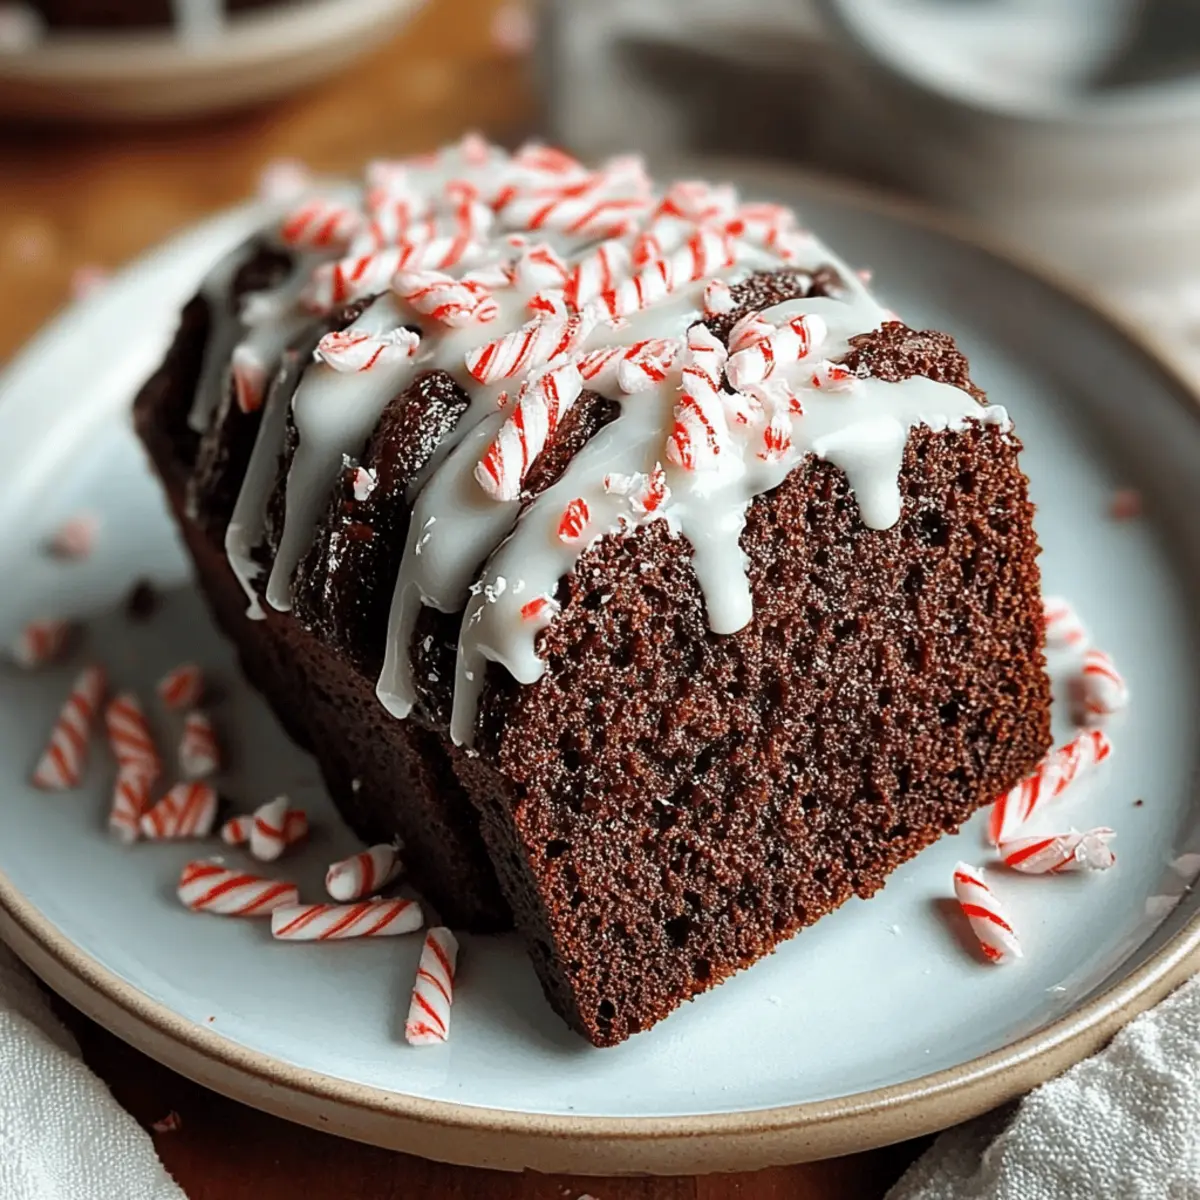
There's nothing quite like the cozy scent of Chocolate Peppermint Bread wafting through the kitchen during the holiday season. As soon as this loaf comes out of the oven, you’ll be wrapped in a festively warm embrace of rich chocolate and refreshing peppermint flavors, inviting you to savor every slice. This easy recipe not only caters to your sweet cravings but also makes for a delightful centerpiece at gatherings or the perfect holiday gift. Plus, it’s incredibly versatile—feel free to add in chocolate chips or a swirl of cream cheese for a fun twist. Ready to discover the magic of baking this scrumptious treat? Let’s dive into the holiday spirit with each delicious bite!
Why is Chocolate Peppermint Bread a Must-Try?
Irresistible Flavor: The blissful combination of rich chocolate and refreshing peppermint makes every bite a delightful treat, perfect for holiday celebrations.
Easy to Make: This recipe is designed for home bakers of all levels, ensuring a hassle-free experience from mixing to baking.
Versatile Options: Feel free to customize your loaf! Add chocolate chips, nuts, or even a cream cheese swirl for added decadence.
Perfect for Gifting: This festive bread is not only a delicious dessert but also makes for a thoughtful gift that surely impresses friends and family.
A Festive Tradition: Baking this bread fills your home with holiday aromas, creating a warm and inviting atmosphere for gatherings.
Crowd-Pleaser: Whether served warm or at room temperature, your guests will surely rave about the flavors of this Chocolate Peppermint Bread, making it a delightful treat for all.
Chocolate Peppermint Bread Ingredients
• Delight in the festive flavors!
For the Bread
- All-purpose flour – Essential for structure; swap with a gluten-free flour blend if needed.
- Unsweetened cocoa powder – Provides rich chocolate flavor; Dutch-processed cocoa gives a deeper taste.
- Baking soda – A crucial leavening agent; make sure it’s fresh for the best rise.
- Baking powder – Adds extra leavening; use a double-acting variety for ideal results.
- Salt – Balances the sweetness and enhances flavor.
- Granulated sugar – Sweetness can be adjusted to your taste for a lighter bread.
- Light brown sugar – Adds moisture and subtle caramel notes; dark brown sugar can enrich the flavor.
- Buttermilk – Ensures moisture and tenderness; substitute with milk plus one tablespoon of acid (like vinegar) when necessary.
- Vegetable oil – Provides moisture and fat; melt coconut oil or unsalted butter as alternatives.
- Eggs – Acts as a binding agent; use room temperature eggs for even mixing.
- Vanilla extract – Enhances flavor; opt for pure extract for the best results.
- Boiling water – Activates cocoa powder for moisture and richness.
- Semi-sweet chocolate chips – Bursts of chocolate in every slice; feel free to choose milk or dark chocolate based on what you love.
- Crushed peppermint candies – Adds festive crunch and flavor; consider chocolate-covered peppermint candies for an exciting twist.
- Peppermint extract – The core flavor; use sparingly as it's quite potent.
For the Glaze
- Powdered sugar – Provides sweetness for the glaze; sift before mixing for a smooth texture.
- Milk – Adjusts consistency; start with two tablespoons and add more for your desired thickness.
- Pinch of salt – Helps to balance sweetness in the glaze.
This irresistible Chocolate Peppermint Bread is sure to become a holiday favorite in your home!
Step‑by‑Step Instructions for Chocolate Peppermint Bread
Step 1: Preheat Oven and Prepare Pan
Begin by preheating your oven to 350°F (175°C). While the oven warms up, take a 9x5 inch loaf pan and generously grease it with butter or cooking spray, then lightly dust it with flour to ensure your Chocolate Peppermint Bread releases easily after baking.
Step 2: Whisk Dry Ingredients
In a large mixing bowl, combine 1 and ½ cups of all-purpose flour, ½ cup of unsweetened cocoa powder, 1 teaspoon of baking soda, 1 teaspoon of baking powder, and ½ teaspoon of salt. Whisk these ingredients together until evenly mixed, ensuring no clumps remain, which will create a delightful texture in your bread.
Step 3: Blend the Sugars
In a separate bowl, take ¾ cup of granulated sugar and ½ cup of light brown sugar. Use a whisk or fork to blend them together until there are no more lumps. This step is crucial for achieving a smooth and even sweetness throughout your Chocolate Peppermint Bread.
Step 4: Combine Wet Ingredients
In another bowl, whisk together ¾ cup of buttermilk, ⅓ cup of vegetable oil, 2 large eggs, 1 teaspoon of vanilla extract, and ½ teaspoon of peppermint extract. Make sure your ingredients are at room temperature for the smoothest blend. This combination brings moisture and flavor essential for a tender bread.
Step 5: Mix Wet and Dry Ingredients
Gradually pour the wet mixture into the bowl of dry ingredients, using a spatula to gently fold them together until just combined. Be careful not to overmix; a few flour streaks are completely fine, as this will maintain the light texture of your Chocolate Peppermint Bread.
Step 6: Add Boiling Water
Carefully stir in 1 cup of boiling water into the batter. It will look quite thin, but this is expected! The heat of the water helps activate the cocoa powder, enhancing its richness. Ensure you mix just until incorporated for the best results.
Step 7: Fold in Chocolates and Peppermint
Now, gently fold in 1 cup of semi-sweet chocolate chips and ½ cup of crushed peppermint candies. Reserve a few for topping later. This step infuses your Chocolate Peppermint Bread with delightful chocolate bursts and festive crunch, making every bite divine.
Step 8: Bake the Bread
Pour the batter into the prepared loaf pan, smoothing the top with a spatula. Place it in the preheated oven and bake for 55 to 65 minutes. The bread is done when a toothpick inserted in the center comes out clean, with only a few moist crumbs attached.
Step 9: Cool the Bread
Once baked, remove the pan from the oven and let it cool in the pan for 10 to 15 minutes. Then, carefully transfer the Chocolate Peppermint Bread to a wire rack to cool completely. This cooling process is vital for achieving the perfect texture before slicing.
Step 10: Prepare the Glaze
As the bread cools, whisk together 1 cup of powdered sugar, 2 tablespoons of milk, ½ teaspoon of peppermint extract, and a pinch of salt in a bowl. Adjust the milk until the glaze reaches your desired consistency—smooth and pourable but not too runny.
Step 11: Add the Glaze and Toppings
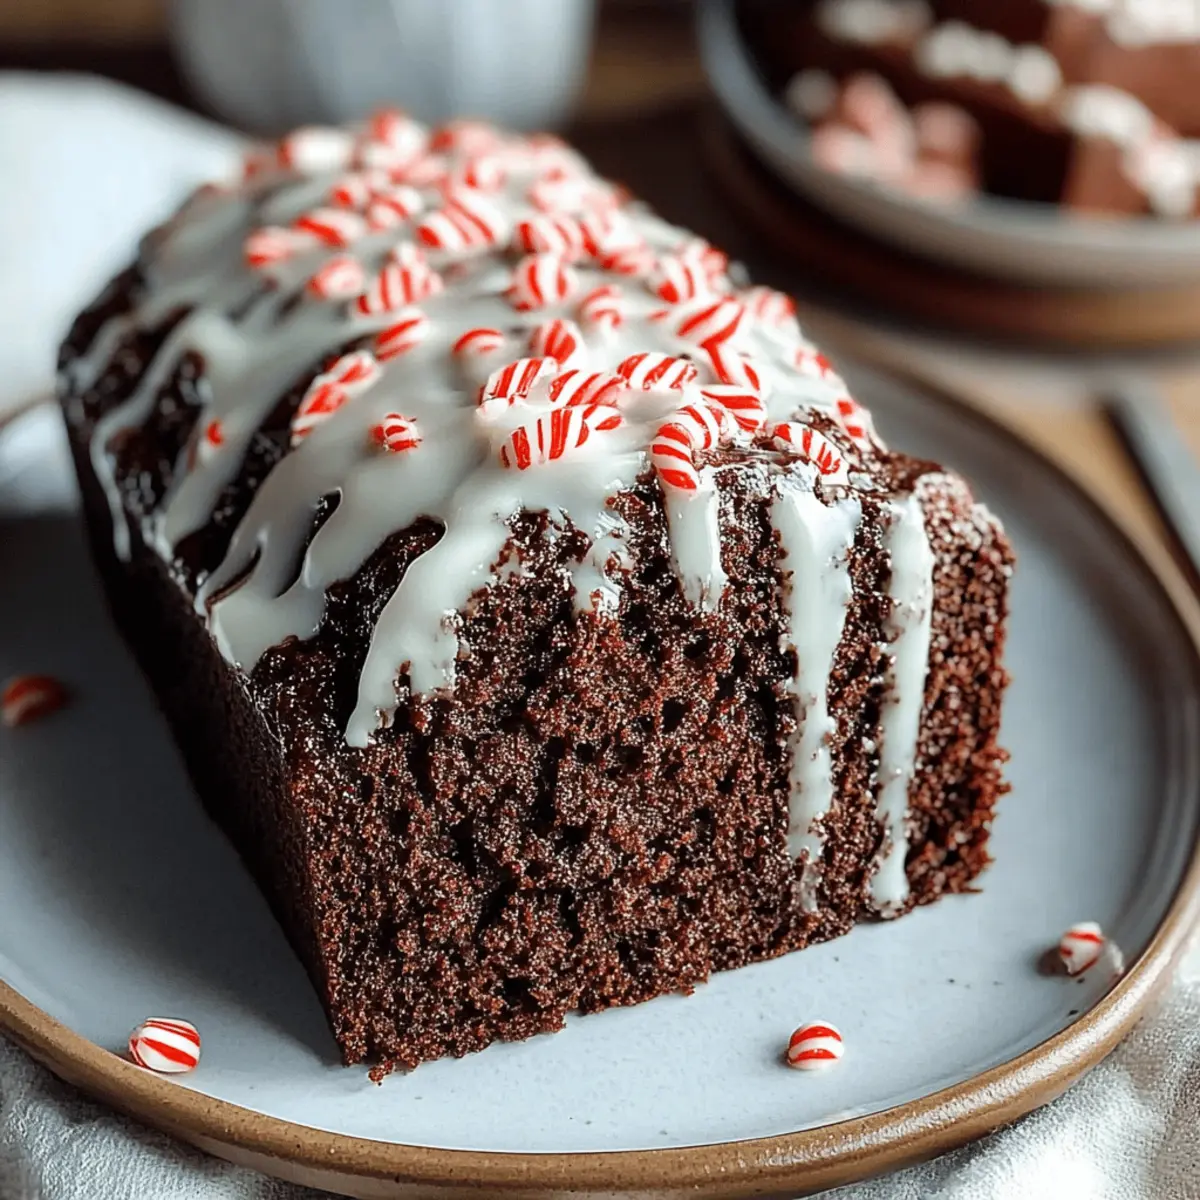
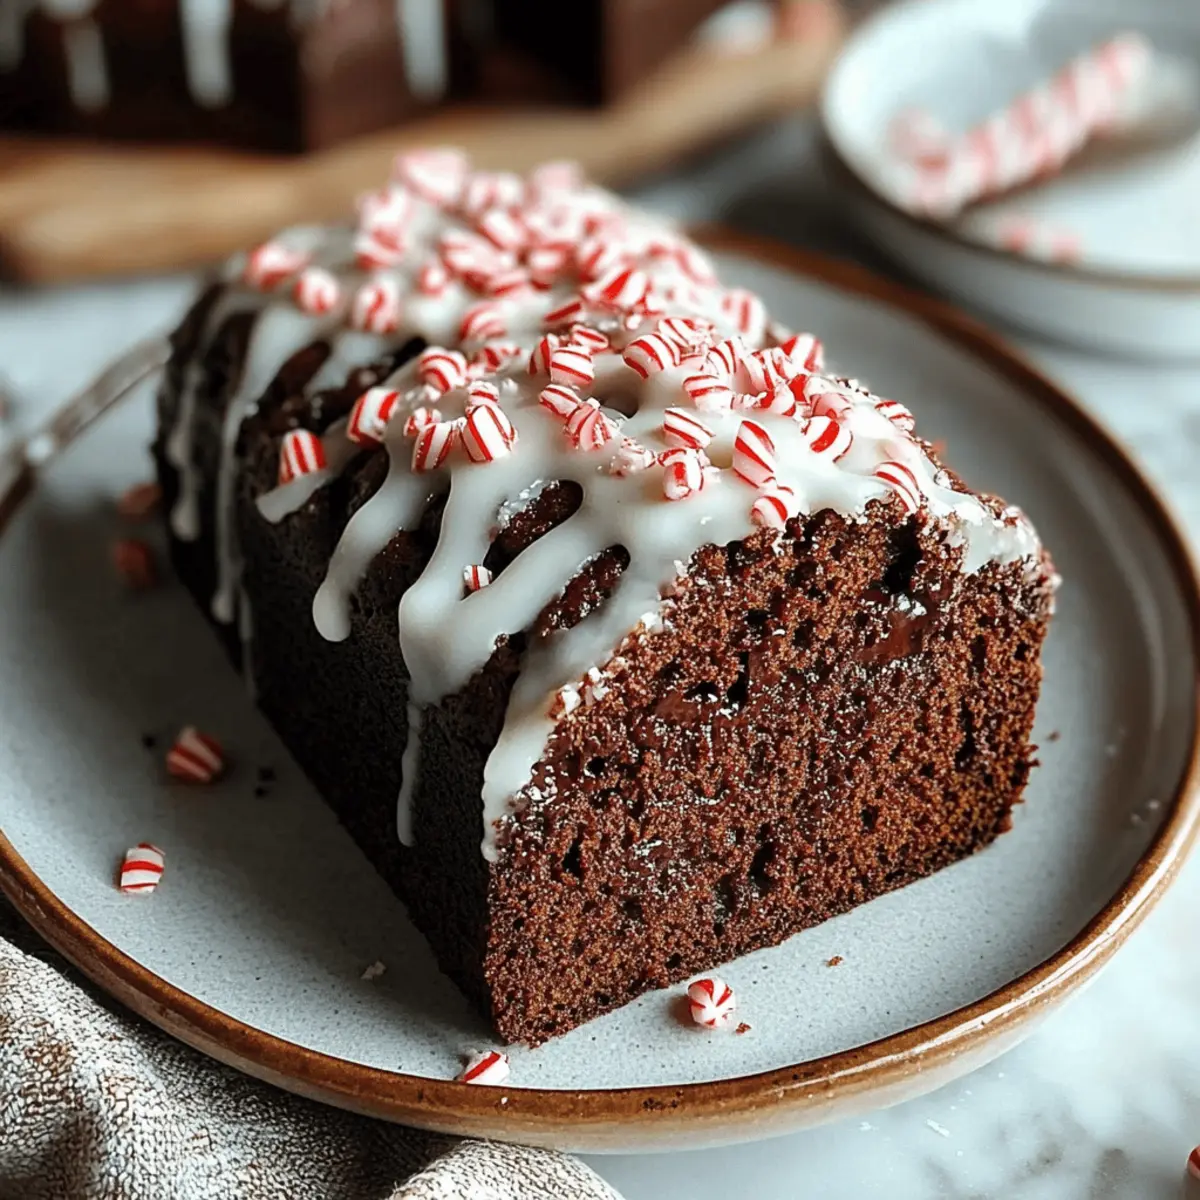
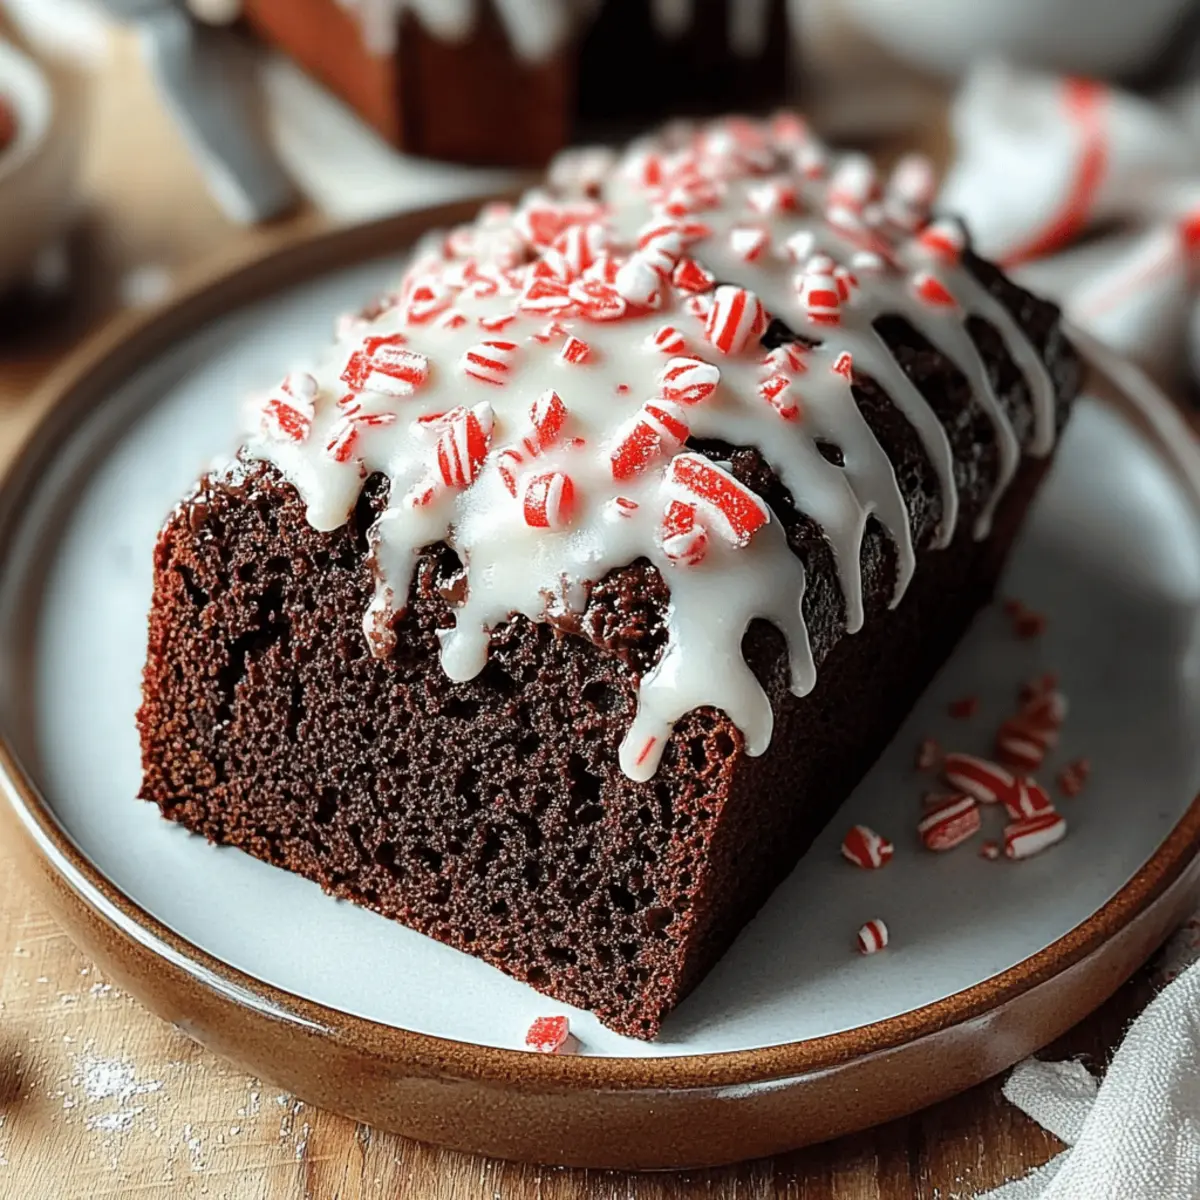
Once the bread has completely cooled, drizzle your delicious glaze over the top. Sprinkle the reserved crushed peppermint candies on top of the glaze for an extra festive touch. This final step adds both visual appeal and a dash of crunch to your Chocolate Peppermint Bread.
Step 12: Set the Glaze and Slice
Allow the glaze to set for at least 15-20 minutes before slicing your delicious Chocolate Peppermint Bread. This ensures the glaze adheres nicely while enhancing the flavors, making each slice a beautiful and festive treat. Enjoy every bite of this holiday delight!
Expert Tips for Chocolate Peppermint Bread
-
Choose Quality Ingredients: Using high-quality cocoa powder and chocolate chips will significantly enhance the flavors of your Chocolate Peppermint Bread.
-
Avoid Overmixing: Mix the batter gently and stop as soon as the flour is incorporated. Overmixing can lead to dense bread instead of a light, tender crumb.
-
Check Baking Time: Ovens can vary, so start checking your bread at the 55-minute mark. A toothpick should come out clean with a few moist crumbs, but avoid overbaking.
-
Complete Cooling: Allow the bread to cool completely before slicing. This helps maintain its structure and prevents crumbling.
-
Peppermint Extract Caution: Be careful with peppermint extract; a few drops go a long way. Too much can overpower the other flavors in your Chocolate Peppermint Bread.
Chocolate Peppermint Bread Variations
Feel free to explore the endless possibilities that come with Chocolate Peppermint Bread!
- Nuts: Add chopped walnuts or pecans for a delightful crunch. The nutty flavor pairs beautifully with the rich chocolate and refreshing peppermint.
- Cream Cheese Swirl: Incorporate a cream cheese swirl for added creaminess. Blend cream cheese with a sprinkle of sugar and drop spoonfuls into the batter before swirling gently.
- Chocolate Types: Experiment with different types of chocolate. White chocolate chips can add a lovely contrast, while dark chocolate increases the richness of each slice.
- Mint Chocolate Chips: Swap in mint chocolate chips for an intensified flavor experience. They bring an extra minty burst to each bite, complementing the peppermint perfectly.
- Sugar Substitute: For a lighter option, replace some or all of the sugar with a sugar substitute. This tweak makes the bread more friendly for those mindful of sweetness.
- Spice it Up: Add a pinch of cinnamon or nutmeg for a warm, spicy aroma. These spices can elevate your peppermint bread into something wonderfully cozy, especially during the holidays.
- Candy Cane Topping: Crush up candy canes for your glaze topping. Not only do they add a festive touch, but they also introduce additional peppermint flavor and a delightful crunch!
- Chocolate Peppermint Bark: Fold in pieces of chocolate peppermint bark for an indulgent treat. The combination of textures and flavors creates a delightful surprise in every slice.
With these variations, your Chocolate Peppermint Bread will become an unforgettable centerpiece for your festive gatherings. Enjoy the process of crafting your own delicious twist on this holiday classic!
Make Ahead Options
These Chocolate Peppermint Bread are perfect for meal prep enthusiasts! You can mix the dry ingredients (flour, cocoa powder, baking soda, baking powder, and salt) and store them in an airtight container for up to 3 days ahead of baking. Additionally, the wet ingredients can be prepared and refrigerated for up to 24 hours—just remember to let them come to room temperature before mixing. To finish, simply combine the prepped components, add boiling water, and fold in the chocolate chips and peppermint candies as instructed. This way, you'll have freshly baked Chocolate Peppermint Bread ready with minimal effort, ensuring it's just as delicious as if you made it from scratch on the day of your gathering!
How to Store and Freeze Chocolate Peppermint Bread
Room Temperature: Store in an airtight container for up to 3 days to maintain freshness. Keep it in a cool, dry place away from sunlight for best results.
Fridge: You can refrigerate the bread for up to 1 week in an airtight container. This will help it stay moist and delightful without sacrificing flavor.
Freezer: For longer storage, wrap the cooled Chocolate Peppermint Bread tightly in plastic wrap and then in aluminum foil. It lasts up to 2 months in the freezer.
Reheating: When ready to enjoy, thaw overnight in the fridge and gently reheat in the oven at 350°F (175°C) for about 10-15 minutes to restore its warm, fresh-baked texture.
What to Serve with Chocolate Peppermint Bread
Indulge in a feast of flavors by combining this delightful loaf with complementary sides and treats that elevate your festive experience.
-
Vanilla Ice Cream: The creamy richness of vanilla ice cream provides a lovely contrast to the rich chocolate and peppermint, making every bite a delight.
-
Whipped Cream: Soft, fluffy whipped cream on the side adds a light and airy touch, enhancing the dessert's festive charm. It’s a classic pairing that never disappoints!
-
Hot Cocoa: A warm cup of hot cocoa with whipped cream and a sprinkle of peppermint makes for a cozy, indulgent treat alongside your Chocolate Peppermint Bread.
-
Coffee or Espresso: The robust flavors of coffee or a shot of espresso balance the sweetness, making your dessert experience truly sophisticated and comforting.
-
Peppermint Bark: A side of peppermint bark lets you enjoy more of that holiday peppermint flavor while providing a delightful crunch to complement the soft bread.
-
Chocolate Sauce Drizzle: A drizzle of chocolate sauce can take your slices to the next level, emphasizing the rich chocolate notes in the bread.
-
Chopped Nuts: Sprinkling chopped walnuts or pecans on top of a slice adds a delightful crunch and nutty flavor that pairs beautifully with the softness of the bread.
-
Fruit Salad: A refreshing fruit salad bursting with seasonal fruits balances the sweetness and adds a vibrant splash of color to your dessert table.
-
Spiced Cider: A warm cup of spiced cider is perfect for warming your spirits, bringing out the flavors of the holiday season in every sip.
-
Gingerbread Cookies: For an extra festive touch, serve alongside gingerbread cookies for a traditional holiday treat that complements the bread's flavors beautifully.
Chocolate Peppermint Bread Recipe FAQs
How do I select the right peppermint candies for this recipe?
Absolutely! When choosing peppermint candies, look for vibrant, unbroken pieces without dark spots or an overly sticky texture, which might indicate age. Crushed peppermint candies add delightful crunch, and if you're feeling adventurous, opt for chocolate-covered varieties for a unique twist.
How should I store Chocolate Peppermint Bread to keep it fresh?
For optimal freshness, store your Chocolate Peppermint Bread in an airtight container at room temperature for up to 3 days. If you choose to refrigerate, it can stay delicious for up to one week. Just make sure it’s wrapped well to prevent drying out or absorbing unwanted odors.
Can I freeze Chocolate Peppermint Bread, and if yes, how?
Very! To freeze, first ensure your bread is completely cooled. Wrap it tightly in plastic wrap, followed by aluminum foil to prevent freezer burn. This way, your Chocolate Peppermint Bread can last up to 3 months. When you're ready to enjoy, simply thaw it in the fridge overnight and reheat it at 350°F (175°C) for 10-15 minutes.
What if my Chocolate Peppermint Bread comes out dense or dry?
Good question! If your bread is dense, it might be due to overmixing. Always mix until just combined. For dryness, check your measuring techniques—make sure you're using the spoon-and-level method for flour and not packing it into the cup. If you're using less buttermilk, consider adding a tad of milk for more moisture.
Is this recipe suitable for people with gluten allergies?
Absolutely! You can easily make this Chocolate Peppermint Bread gluten-free by substituting all-purpose flour with a gluten-free flour blend. Just be sure to check that all other ingredients, such as baking powder and chocolate chips, are certified gluten-free.
Indulgent Chocolate Peppermint Bread for Festive Moments
Ingredients
Equipment
Method
- Preheat oven to 350°F (175°C) and grease a 9x5 inch loaf pan.
- In a large bowl, whisk together flour, cocoa powder, baking soda, baking powder, and salt until no clumps remain.
- In another bowl, blend granulated sugar and brown sugar until lump-free.
- Whisk buttermilk, vegetable oil, eggs, vanilla extract, and peppermint extract together until smooth.
- Gradually fold the wet ingredients into the dry ingredients until just combined.
- Stir in boiling water until mixed, the batter will be thin.
- Fold in chocolate chips and crushed peppermint candies, reserving some for topping.
- Pour batter into the loaf pan and bake for 55-65 minutes until a toothpick comes out clean.
- Cool in the pan for 10-15 minutes, then transfer to a wire rack.
- Whisk together powdered sugar, milk, peppermint extract, and salt for the glaze.
- Drizzle glaze over cooled bread and sprinkle with reserved crushed peppermint candies.
- Allow glaze to set for 15-20 minutes before slicing.


Leave a Reply