
As I stood in my kitchen, the crisp autumn air sneaking through the window, I was struck by the nostalgic magic of Halloween—the air filled with laughter, and the promise of sweet treats beckoned. That’s when I decided to whip up these Spooky Halloween Rice Krispie Treats, a fun no-bake creation that’s sure to bring smiles to both kids and adults alike. Not only are they incredibly quick to prepare, but they also invite endless creativity with decorating. You can transform these gooey, crunchy delights into festive ghosts, pumpkins, and other whimsical shapes that spark joy at any Halloween gathering. So, grab your candy melts and let’s dive into a world of deliciously spooky fun—what shape will you create?

Why Are These Halloween Treats So Fun?
Quick and Easy: This recipe is a breeze; with no baking required, you’ll have delicious treats ready in no time.
Festive Creativity: Transform these Rice Krispie Treats into spooky shapes, from ghosts to pumpkins, making them perfect for Halloween celebrations.
Kid-Friendly Fun: Everyone can join in! Kids and adults alike will love decorating and personalizing their creations.
Nostalgic Charm: Bringing back memories of childhood, these treats evoke the magic of Halloween, adding a touch of nostalgia to your festivities.
Deliciously Chewy: Each bite is a delightful balance of gooey marshmallow and crispy cereal, creating a texture that's truly irresistible.
Perfect Party Treat: Impress your guests with these vibrant, whimsical Halloween Rice Krispie Treats that are sure to be the hit of any gathering. Plus, check out our ideas for Serving Suggestions to make your display even more festive!
Halloween Rice Krispie Treats Ingredients
For the Base Treats
• Rice Krispie cereal – Provides structure and crunch; any puffed rice cereal works as a substitute.
• Mini marshmallows – Create that gooey texture essential for binding; feel free to swap with homemade marshmallow fluff if preferred.
• Unsalted butter – Adds richness and flavor to the treats; margarine can be used as a dairy-free option.
For the Decorations
• Green candy melts – Perfect for decorating and adding vibrant colors; white chocolate or colored chocolate chips are great alternatives.
• Black candy melts – Adds depth and visual appeal in designs; dark chocolate can also serve as a substitute.
• Royal icing eyes – Use these for decoration to create spooky expressions; chocolate chips or edible markers can work as substitutes for faces.
• Black jimmies sprinkles – Enhances the visual appeal; any festive sprinkles or colored sugars can be used as alternatives.
Step‑by‑Step Instructions for Spooky Halloween Rice Krispie Treats
Step 1: Prepare the Pan
Begin by lining a 9x13-inch baking pan with parchment paper or lightly greasing it with butter to ensure easy removal later. This step is essential for setting up your workspace for these delightful Halloween Rice Krispie Treats. Make sure the parchment paper hangs over the edges for a simple lift-out once your treats are ready.
Step 2: Melt the Marshmallows
In a large pot over low heat, combine 4 tablespoons of unsalted butter and let it melt completely. Once the butter is melted, add the mini marshmallows, stirring continuously until the mixture is smooth and fully melted, which should take about 3-5 minutes. Be sure to monitor closely to avoid scorching; the mixture should be shiny and gooey.
Step 3: Combine with Cereal
Once the marshmallow mixture is ready, remove it from heat and quickly fold in the Rice Krispie cereal. Stir until all the cereal is evenly coated with the melted marshmallows, usually within 2-3 minutes. The texture will be sticky and pliable, which is what you want for forming your Halloween Rice Krispie Treats.
Step 4: Press into the Pan
Using buttered hands or a sheet of parchment paper, gently press the mixture into the prepared pan. Aim for a uniform thickness of about 1-2 inches, avoiding the temptation to pack it too tightly, as this could make the treats hard instead of chewy. You should see the mixture take shape in the pan.
Step 5: Cool and Cut
Allow your Halloween Rice Krispie Treats to set at room temperature for 30-60 minutes. Once they have cooled and firmed up, take them out of the pan by lifting the parchment paper. Place them on a cutting board and slice them into squares or festive Halloween shapes using cookie cutters for added fun.
Step 6: Decorate
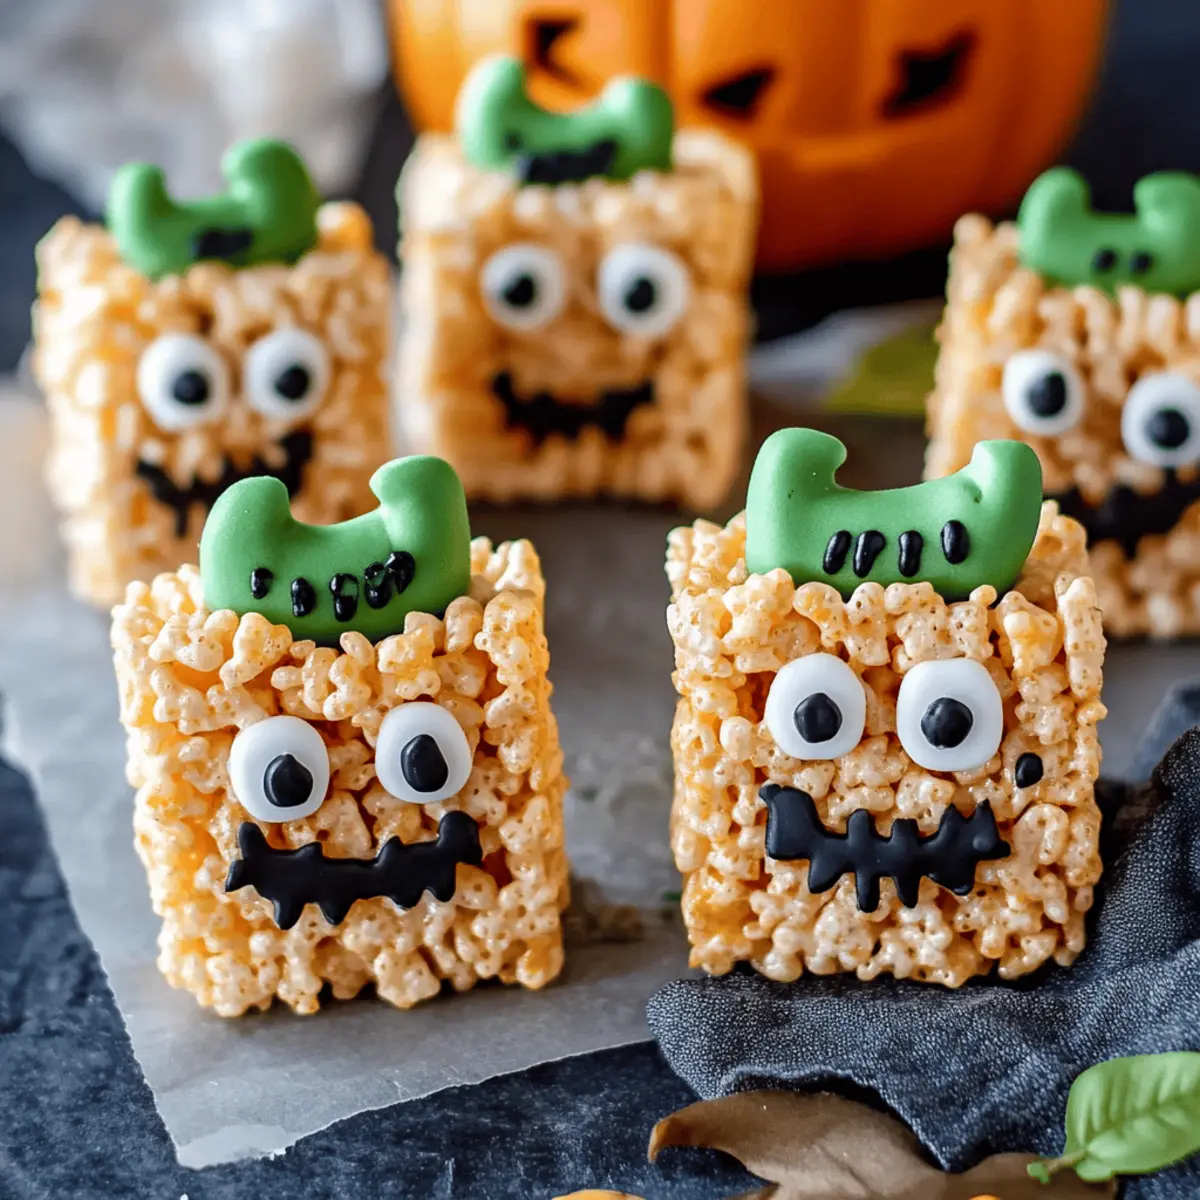
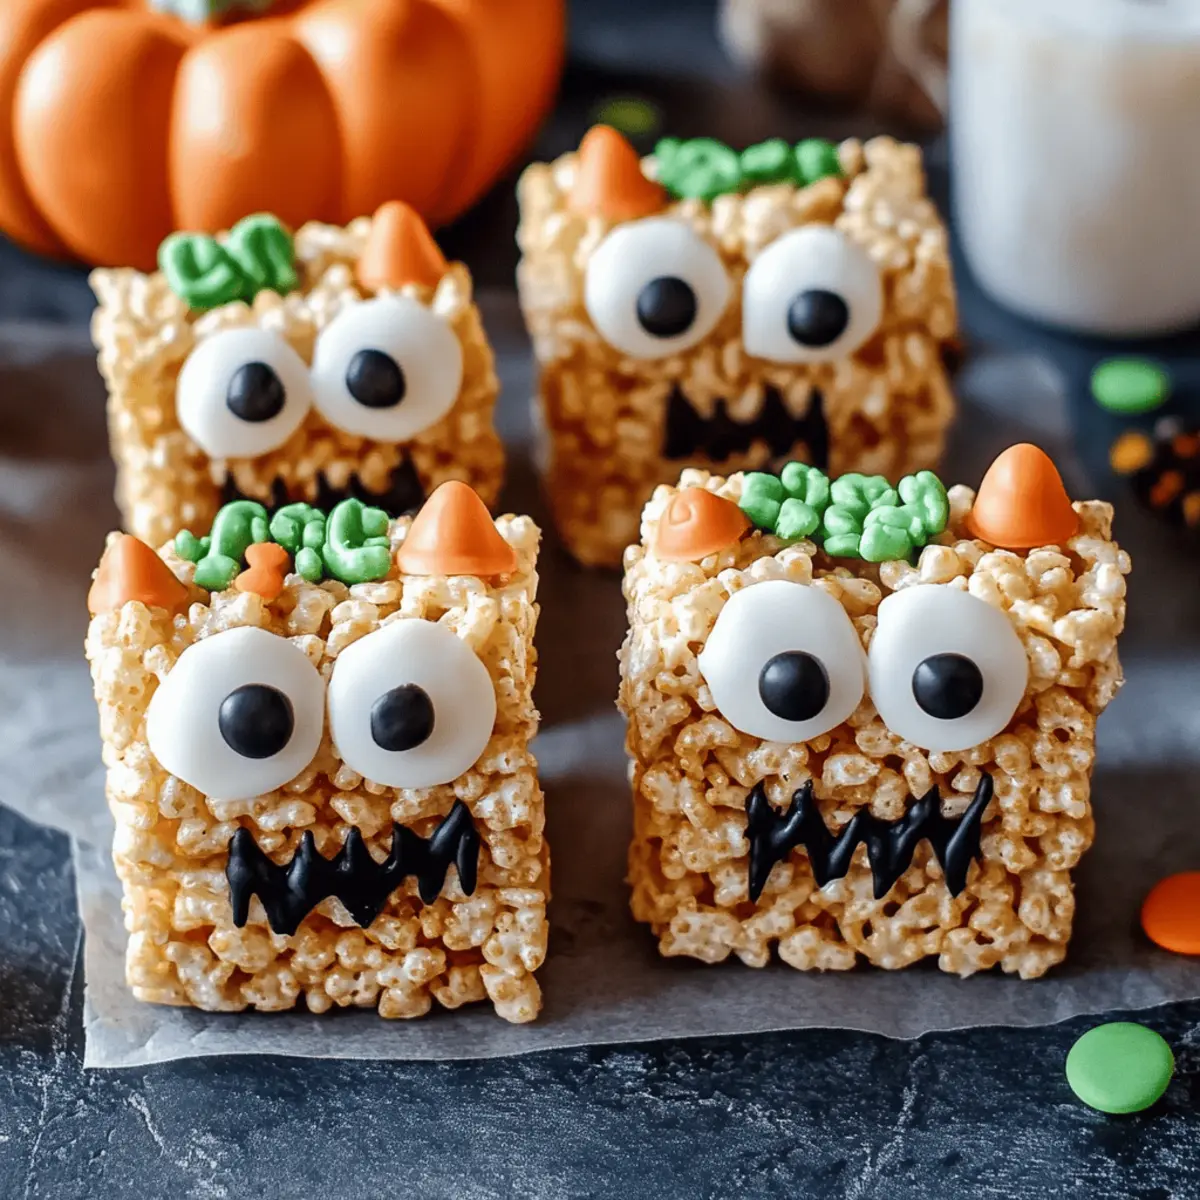
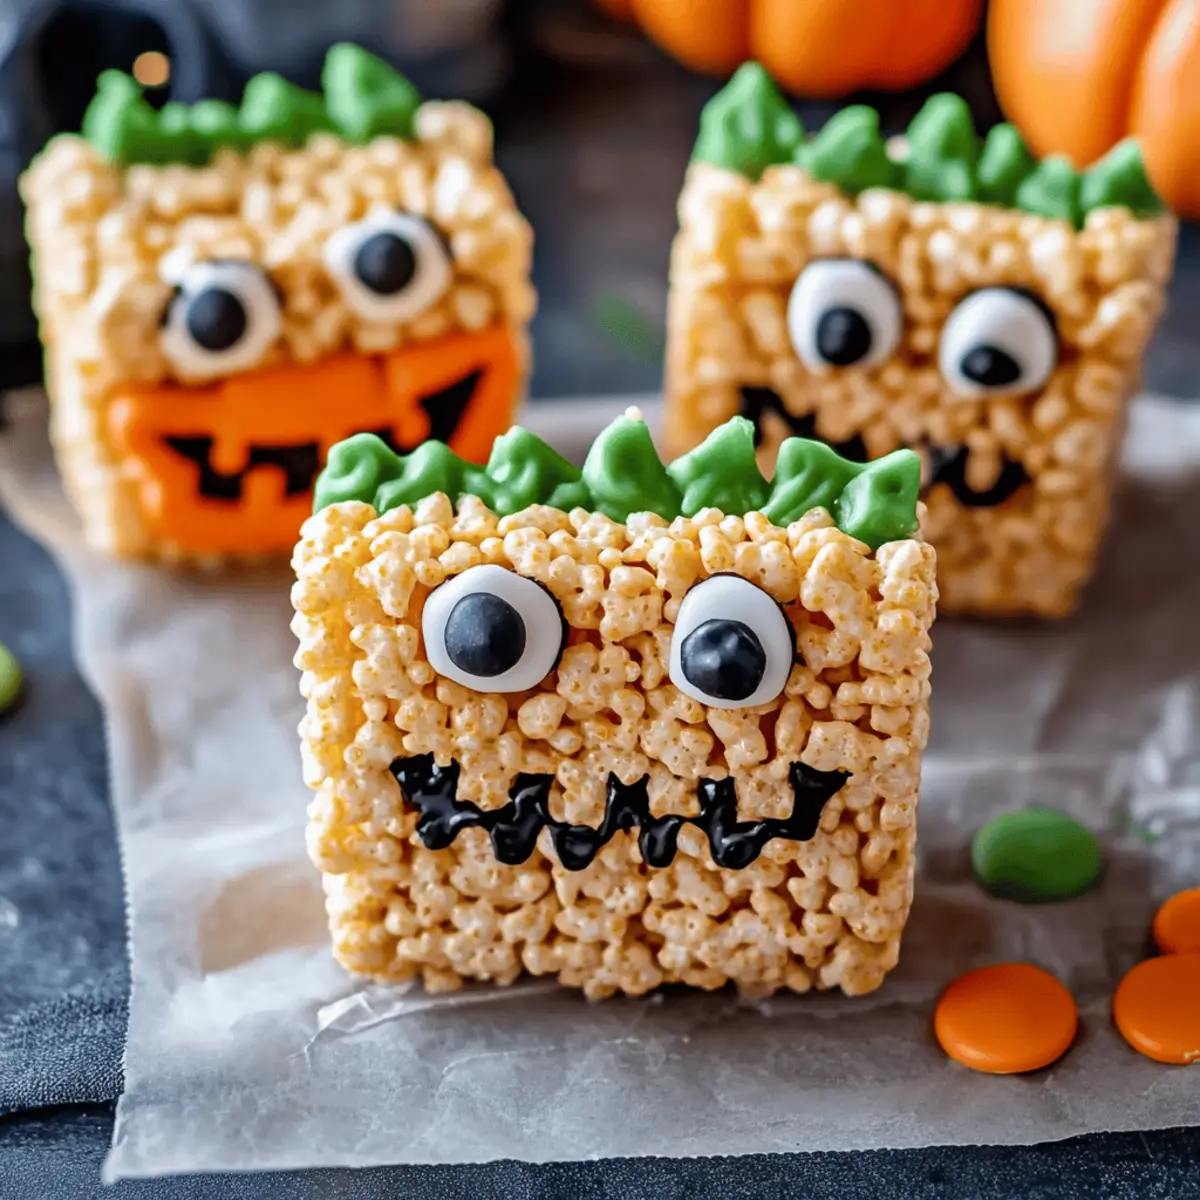
To add a spooky touch, melt green and black candy melts in separate bowls according to package instructions, typically in the microwave in 30-second intervals. Drizzle the melted candies over your treats or use them to adhere royal icing eyes and black jimmies sprinkles. Let your creativity flow—this is the fun part!
Step 7: Set and Serve
Once decorated, let your treats set completely, typically for about 15-30 minutes, to ensure the decorations adhere. If you're in a hurry, place them in the refrigerator for a few minutes to speed up the setting process. Your Spooky Halloween Rice Krispie Treats are now ready to delight guests and trick-or-treaters alike.
Step 8: Storage
Store any leftovers in an airtight container at room temperature for up to 3 days, placing parchment paper between layers to prevent sticking. If they start to harden, a brief 5-10 second zap in the microwave can restore their delectable softness, ensuring your treats remain chewy for days!
How to Store and Freeze Halloween Rice Krispie Treats
Room Temperature: Store leftover Halloween Rice Krispie Treats in an airtight container at room temperature for up to 3 days. This keeps them fresh and chewy.
Airtight Storage: To prevent sticking, place parchment paper between layers of treats in your container. This simple step preserves their whimsical shapes and decorations.
Freezing: For longer storage, freeze the treats in an airtight container for up to 2 months. Thaw them at room temperature before serving for the best texture.
Reheating: If your treats become hard, simply microwave them for 5-10 seconds to restore their delightful softness—perfect for enjoying at a later date!
Make Ahead Options
These Spooky Halloween Rice Krispie Treats are a fantastic option for meal prep, saving you precious time during the busy Halloween season! You can prepare the base treats up to 24 hours in advance by following the instructions through cooling and cutting them into desired shapes. To maintain their quality, store them in an airtight container at room temperature, ensuring parchment paper is layered between each treat to prevent sticking. When you’re ready to decorate, simply melt the candy melts and add the icing eyes and sprinkles. The result? Just as delicious, festive treats that will have everyone excited, with minimal last-minute effort on your part!
What to Serve with Spooky Halloween Rice Krispie Treats?
Elevate your Halloween festivities with delicious pairings that will delight every ghost and goblin at your table.
-
Chilling Apple Cider: The crisp, refreshing taste of apple cider complements the sweetness of the treats, adding a festive vibe.
-
Pumpkin Pie: A classic fall dessert, pumpkin pie offers a creamy contrast to the crunchy textures of the Rice Krispie treats.
-
Chocolate Dipped Fruit: Fresh strawberries or bananas dipped in chocolate provide a luscious, fruity contrast that balances sugary treats.
-
Decorated Halloween Cupcakes: Serve whimsical cupcakes alongside your treats for a colorful, fun dessert table that continues the festive theme.
-
Spooky Cheese Platter: A mix of tangy cheeses and crunchy crackers adds savory notes to your sweet treats, creating a balanced snack option.
-
Ghostly Marshmallow Milkshakes: Whip up some themed milkshakes with marshmallow fluff and ghostly decorations to entice kids and adults alike.
-
Monster Smoothies: Healthy, colorful fruit smoothies can provide a nutritious option for balance, enticing picky eaters with their vibrant hues.
-
Hot Chocolate Bar: Set up a hot cocoa station with toppings like whipped cream and sprinkles, a cozy pairing for the sweet Rice Krispie treats.
-
Festive Trail Mix: Combine nuts, seeds, and Halloween-themed candies for a crunchy, protein-packed snack that keeps energy levels up during parties.
-
Crisp Green Salad: A fresh salad with seasonal ingredients can be refreshing amidst the sweetness, offering a delightful contrast that balances your spread.
Halloween Rice Krispie Treats Variations
Feel free to mix things up and let your creativity shine with these fun twists on your Halloween treats!
-
Dairy-Free: Use plant-based butter and dairy-free candy melts for a delightful, inclusive treat. This way, everyone can enjoy the fun without worry.
-
Chocolate Lovers: Add a generous handful of chocolate chips into the cereal mixture for a rich, chocolaty twist. The contrast of gooey chocolate and crispy rice is simply divine!
-
Nutty Surprise: Incorporate chopped nuts or sunflower seeds to add a delightful crunch. Not only does this enhance texture, but it also infuses a nutty richness that beautifully complements the sweetness.
-
Pumpkin Spice Twist: Mix in a teaspoon of pumpkin spice for a seasonal flavor explosion. The warm, cozy notes will evoke the essence of fall, making these treats all the more festive!
-
Fruity Fun: Dried cranberries or chopped apples can be mixed in for a touch of fruity flair. This will not only balance the sweetness but also add a chewiness that’s pleasantly surprising.
-
Treat Pops: Transform your treats into pops by forming them over skewers. Drizzle melted candy and colorful sprinkles—a perfect handheld option for your Halloween gathering!
-
Spicy Kick: For those who love a little heat, add a dash of cayenne or chili powder to the melted marshmallow mixture. The subtle spice will create a unique contrast to the sweet, making every bite exciting!
-
Festive Colors: Play with different colors of candy melts, like orange or purple, to make each batch reflect Halloween's spirit. Your kids will love getting involved in choosing colors and designing their spooky treats!
These variations invite the chance to express your culinary creativity, allowing you to have fun with flavors and presentations. For more ideas on how to elevate your festive display, check out our Serving Suggestions!
Expert Tips for Halloween Rice Krispie Treats
-
Butter Your Hands: Use buttered hands or parchment paper to press the mixture into the pan; this prevents sticking and keeps the treats soft rather than hard.
-
Cool Completely: Allow the treats to cool fully before cutting; this ensures they hold their shape and are easier to decorate without crumbling.
-
Decorate Creatively: Embrace your inner artist! Make spooky faces with candy melts and decorate with sprinkles to enhance your Halloween Rice Krispie Treats’ festive appeal.
-
Alternate Ingredients: Don't hesitate to swap ingredients like chocolate chips for candy melts or add fun mix-ins—experimenting can lead to delightful surprises!
-
Store Wisely: Keep your treats in an airtight container, layering them with parchment paper to maintain both their shape and chewiness throughout the week.
Spooky Halloween Rice Krispie Treats Recipe FAQs
How do I choose the right Rice Krispie cereal?
Absolutely! Any puffed rice cereal works, but I recommend using Rice Krispies for that classic crunch and nostalgic flavor. If you prefer a gluten-free option, check for certified gluten-free puffed rice cereals available in stores.
What is the best way to store Halloween Rice Krispie Treats?
To keep your treats fresh, store them in an airtight container at room temperature for up to 3 days. Be sure to place parchment paper between layers to prevent them from sticking together, ensuring that their festive shapes remain intact.
Can I freeze Halloween Rice Krispie Treats?
Yes, you can freeze these treats! For optimal freshness, cut them into squares first, then place them in an airtight container or freezer bag. They can be frozen for up to 2 months. Just remember to thaw them at room temperature before enjoying to maintain that delightful chewiness.
What should I do if my treats become hard?
Very rarely, your treats might become a bit harder than intended. If that happens, simply pop them in the microwave for 5-10 seconds. This little trick revitalizes the gooey texture, making them delectable again. Just be careful not to overheat, as you want them soft, not melted!
Are Halloween Rice Krispie Treats suitable for kids with allergies?
It's important to be mindful! These treats typically contain gluten and dairy from the marshmallows and butter. For a nut-free option, always double-check ingredient labels. If your child has specific allergies, consider using allergy-friendly substitutes like dairy-free butter and gluten-free cereal to accommodate their needs.
What are good decoration alternatives for Halloween Rice Krispie Treats?
The more the merrier in the decoration department! If you can't find royal icing eyes, chocolate chips or mini gummy candies can be a fun substitute. You can also use colored icing or edible markers to draw faces, and feel free to get creative with sprinkles or edible glitter to add a little extra spook!
Delicious Halloween Rice Krispie Treats Your Kids Will Love
Ingredients
Equipment
Method
- Prepare the baking pan by lining it with parchment paper or lightly greasing it with butter.
- In a large pot over low heat, melt 4 tablespoons of unsalted butter, then add the mini marshmallows and stir until smooth.
- Once melted, fold in the Rice Krispie cereal until evenly coated.
- Press the mixture into the prepared pan with buttered hands or parchment paper to ensure even thickness.
- Cool the treats at room temperature for 30-60 minutes, then cut into squares or shapes.
- Melt green and black candy melts, drizzle over treats, and add decorations as desired.
- Let the decorations set for 15-30 minutes, then serve and enjoy!
- Store leftovers in an airtight container at room temperature for up to 3 days.


Leave a Reply