
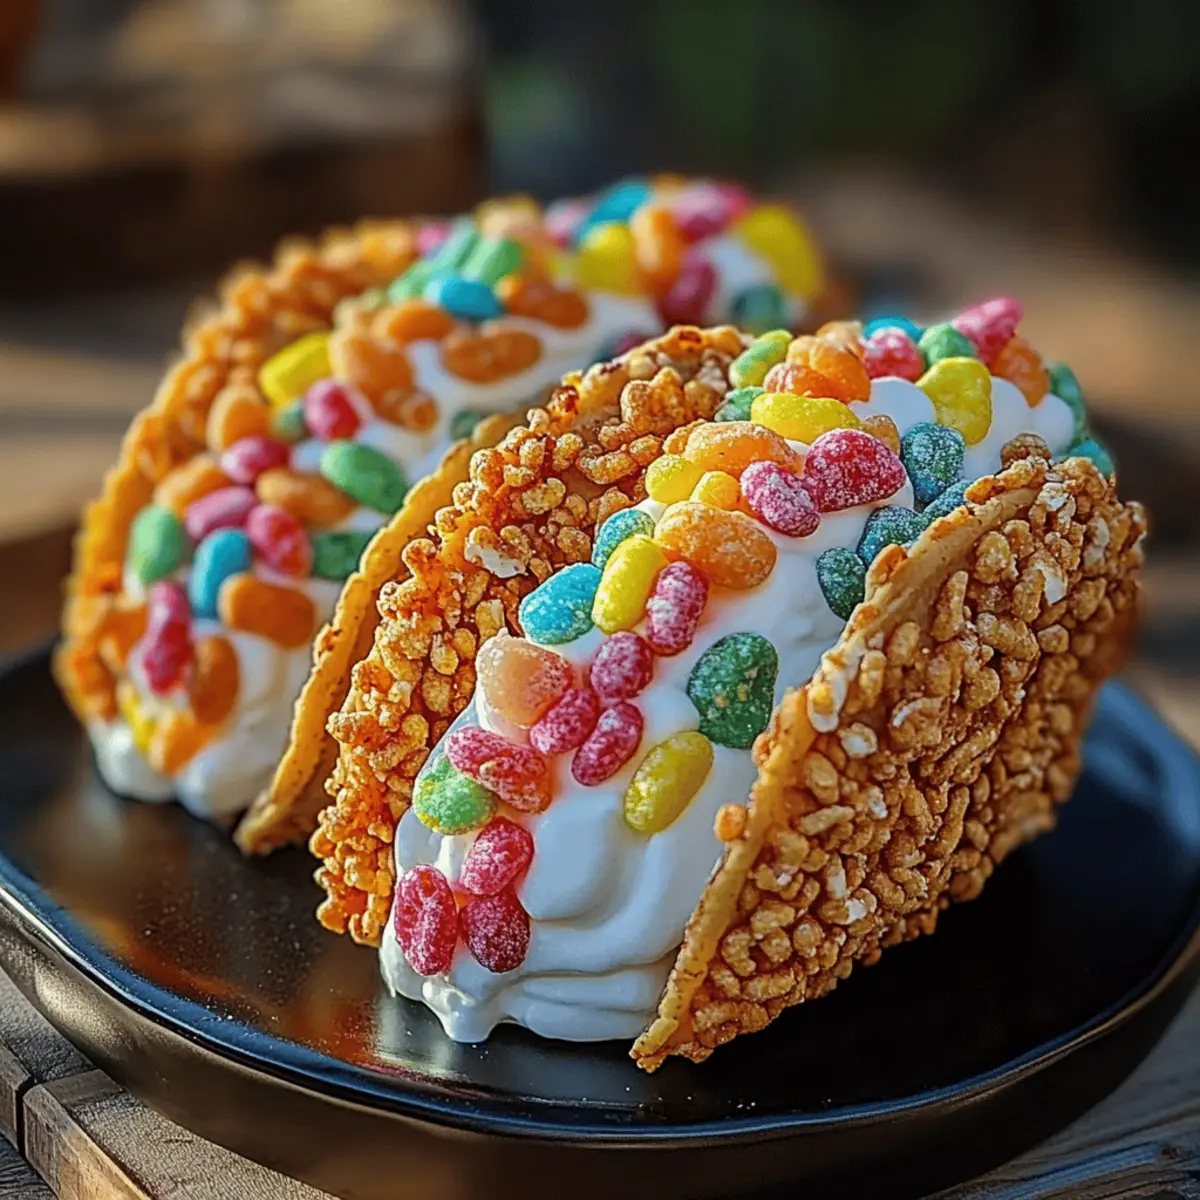
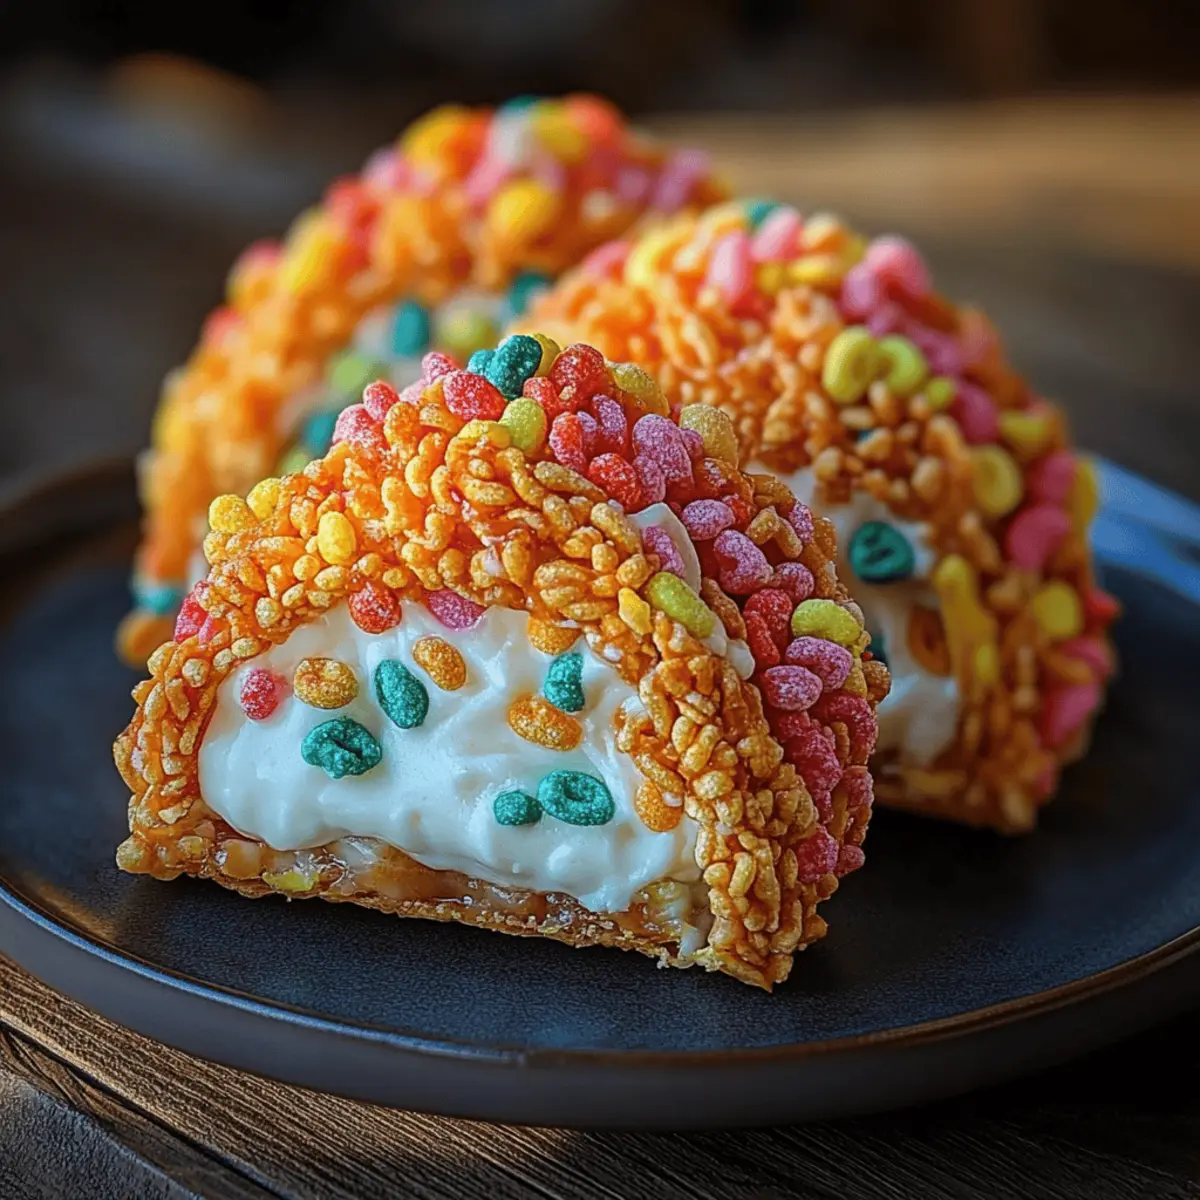
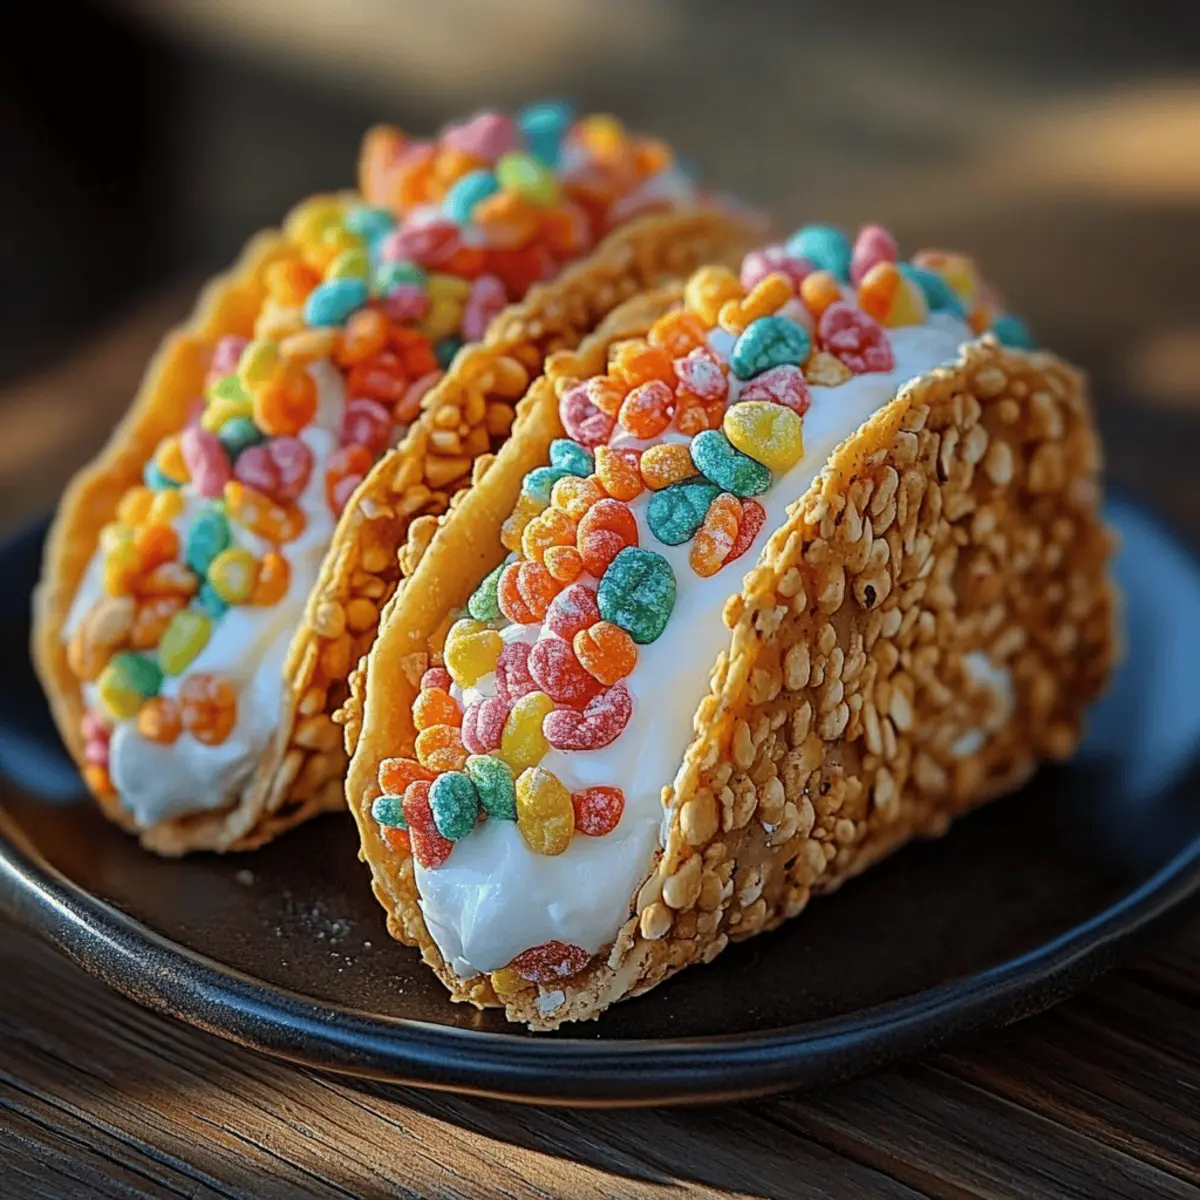
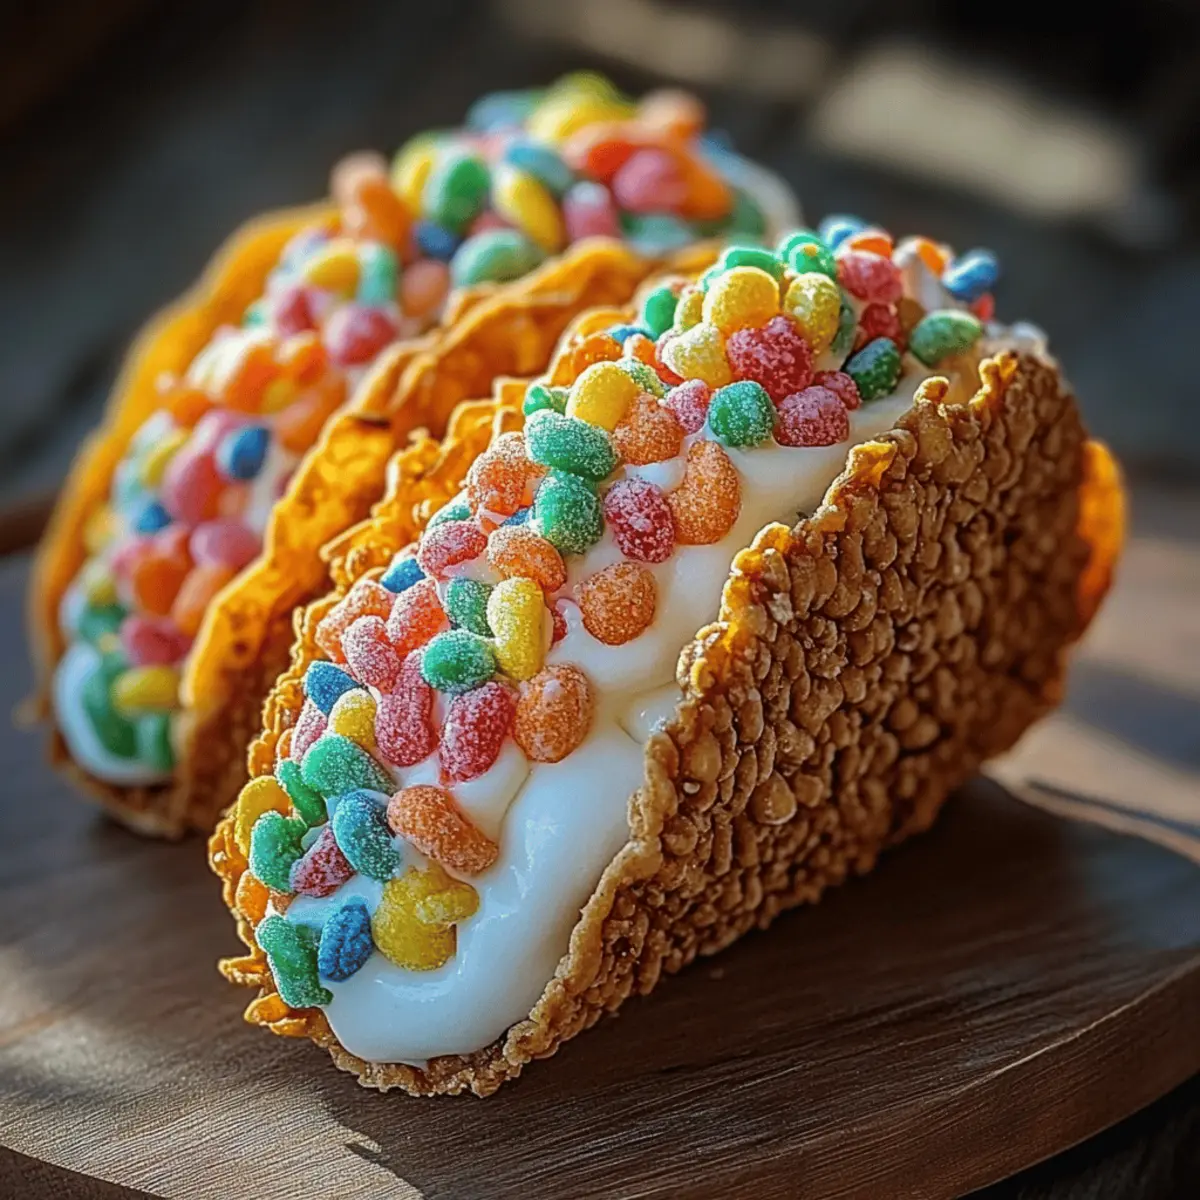
The sizzle of a baking sheet brings me right back to my childhood, when rainbow-colored cereal was the breakfast of champions and dessert was always a reason to celebrate. Enter my Fruity Pebbles Cheesecake Tacos, a whimsical blend of creamy cheesecake enveloped in a crispy taco shell, fusing nostalgia with pure delight. Not only is this dessert visually captivating, but it’s also incredibly easy to whip up, making it the ideal choice for parties or casual family gatherings. With each bite, you’ll experience the joy of a fun, colorful treat that’s sure to turn any gathering into a festive occasion. Curious about how to make this delightful dessert? Let's dive into the recipe!
Why are Fruity Pebbles Cheesecake Tacos irresistible?
Decadent Delight: Each taco is filled with a rich cheesecake filling that melds perfectly with the crispy shell, offering an indulgent experience your taste buds will adore.
Vibrant Colors: With the lively hues of Fruity Pebbles, these tacos are not only delicious but also a feast for the eyes, making them a hit at any gathering.
Easy Preparation: You’ll be surprised at how simple it is to create these delectable tacos, requiring just a handful of ingredients and minimal baking skills.
Fun for Everyone: Perfect for kids and adults alike, the playful combination of flavors is guaranteed to spark joy and satisfy cravings at birthday parties, potlucks, and family gatherings.
Customizable Options: Feel free to get creative! Swap in seasonal fruits or different toppings for endless variations that keep your dessert game exciting. For more ideas on toppings, check out my guide on fun dessert variations.
Fruity Pebbles Cheesecake Tacos Ingredients
For the Taco Shells
- Fruity Pebbles cereal – Provides the colorful flavor base; feel free to substitute with any equally vibrant cereal.
- Unsalted butter (2 tablespoons, melted) – Binds the mixture; coconut oil serves as a great dairy-free alternative.
- Granulated sugar (1 tablespoon) – Adds sweetness; you can reduce the amount for a less sugary taco shell.
For the Cheesecake Filling
- Cream cheese (8 ounces, softened) – Creates that classic creamy texture; mascarpone can enrich the filling for a delicious twist.
- Granulated sugar (½ cup) – Sweetens the filling; consider using powdered sugar for a smoother consistency.
- Sour cream (¼ cup) – Enhances creaminess and adds tang; Greek yogurt serves as a lighter option.
- Vanilla extract (1 teaspoon) – Infuses depth of flavor; no substitutes recommended as it's essential.
- Heavy cream (¼ cup) – Whipped into the filling for extra lightness; or use whipped coconut cream for a non-dairy version.
For Decorating and Topping
- Fruity Pebbles (1 cup, finely crushed) – Perfect for a colorful sprinkle on your tacos; crushed granola works for a different flavor profile.
- Whipped cream – A delightful topping option for added indulgence; choose dairy-free whipped for a vegan twist.
- Fresh berries – Introduce a burst of freshness and seasonal color; customize with your favorites.
- Chocolate shavings – Add a decorative finish and texture; crushed nuts can give a nutty crunch instead.
- Extra Fruity Pebbles – For that extra crunch on top, making each bite even more delightful!
Get ready to whip up these delightful Fruity Pebbles Cheesecake Tacos that are sure to impress at any gathering!
Step‑by‑Step Instructions for Fruity Pebbles Cheesecake Tacos
Step 1: Prepare Taco Shells
Begin by pulsing 2 cups of Fruity Pebbles in a food processor until they reach a fine powder. In a mixing bowl, combine the powdered cereal with 2 tablespoons of melted unsalted butter and 1 tablespoon of granulated sugar. Preheat your oven to 350°F (175°C), then scoop the mixture into small circles on a lined baking sheet, shaping them into taco forms. Bake for 8-10 minutes until lightly golden, then drape warm shells over a rack to cool and hold their shape.
Step 2: Make Cheesecake Filling
In a large bowl, beat 8 ounces of softened cream cheese with ½ cup of granulated sugar until creamy and smooth. Gradually mix in ¼ cup of sour cream and 1 teaspoon of vanilla extract until fully combined. Next, pour in ¼ cup of heavy cream and whip the mixture until it becomes light and fluffy, giving it a delightful texture. Chill the filling in the refrigerator for at least 30 minutes to firm up.
Step 3: Assemble Tacos
Once the taco shells have cooled, crush additional Fruity Pebbles to create a decorative topping. Dip the edges of each taco shell into the crushed cereal for added crunch. Carefully fill each shell with the chilled cheesecake mixture, using a piping bag or spoon for ease. Top off your Fruity Pebbles Cheesecake Tacos with luscious whipped cream, a sprinkle of fresh berries, chocolate shavings, and more Fruity Pebbles for a colorful finish.
Step 4: Serve Immediately
These Fruity Pebbles Cheesecake Tacos are best enjoyed fresh, so serve them right after assembling. This ensures the crispy taco shell retains its delightful crunch against the creamy cheesecake filling. Arrange them on a fun serving tray to showcase the vibrant colors, and watch your family and friends delight in this whimsical dessert!
Make Ahead Options
These Fruity Pebbles Cheesecake Tacos are perfect for busy weeknights or entertaining! You can prepare the taco shells and cheesecake filling up to 24 hours in advance. To do this, create the shells by shaping and baking them, then let them cool completely before storing them in an airtight container to maintain their crispness. Next, make the cheesecake filling and chill it in the refrigerator. When you're ready to serve, simply fill the taco shells with the chilled filling, decorate with crushed Fruity Pebbles and your choice of toppings, and enjoy a magically delicious dessert that tastes just as fresh as when it was made!
How to Store and Freeze Fruity Pebbles Cheesecake Tacos
Airtight Container: Store any leftover assembled tacos in an airtight container for up to 1-2 days to maintain their freshness and prevent sogginess.
Freezing: For longer storage, freeze the taco shells separately from the cheesecake filling. Wrap the shells tightly in plastic wrap and aluminum foil to last up to 1 month!
Reheating Instructions: If you’ve frozen the shells, reheat them in a preheated oven at 350°F (175°C) for about 5-10 minutes until crispy before assembling again with the cheesecake filling.
Assemble Fresh: For the best texture and flavor, it’s recommended to assemble the Fruity Pebbles Cheesecake Tacos just before serving.
Fruity Pebbles Cheesecake Tacos Variations
Feel free to indulge your creativity and customize your tacos for a delightful twist!
-
Cocoa Crunch: Substitute Fruity Pebbles with Cocoa Pebbles to create a delicious chocolate-flavored treat.
-
Fruity Freshness: Layer fresh sliced strawberries or bananas inside for a burst of fruity flavor alongside the cheesecake.
-
Flavor Infusion: Use flavored cream cheese, such as strawberry or blueberry, to enhance your filling with exciting new tastes. This can transform every bite into a sweet surprise for your palate.
-
Mini Tacos: Opt for mini taco shells for adorable bite-sized versions, perfect for sharing at parties or treating yourself to a fun snack! These little delights pack the same creamy goodness into a smaller package.
-
Nutty Crunch: Swap chocolate shavings with crushed nuts to add a delightful nutty flavor and extra texture to your tacos.
-
Coconut Delight: Replace heavy cream with whipped coconut cream for a lighter, non-dairy option that’s still indulgent. Your guests will love the tropical flair!
-
Colorful Sprinkles: Top the tacos with colorful sprinkles along with Fruity Pebbles for added fun and visual appeal. Kids will definitely get a kick out of this twist!
-
Zesty Citrus: Incorporate a hint of lime or lemon zest into the cheesecake filling for a refreshing zing that brightens up the flavors. It’s a delightful surprise that encourages a touch of summer with each bite!
For more delectable variations and ideas for toppings, don't forget to explore my guide on fun dessert variations and elevate your dessert experience!
Tips for the Best Fruity Pebbles Cheesecake Tacos
-
Perfect Shells: Ensure the taco shells are not overbaked; they should be lightly golden for that perfect crunchy texture without being too hard.
-
Chill Time: Allow the cheesecake filling to chill for at least 30 minutes; this ensures it sets properly and becomes fluffier for easier filling.
-
Fresh Ingredients: Use fresh cream cheese and heavy cream for the filling; this makes a big difference in achieving that rich, creamy texture.
-
Mind the Assembly: Assemble the Fruity Pebbles Cheesecake Tacos just before serving to prevent any sogginess in the shells.
-
Creative Toppings: Feel free to get creative with toppings; seasonal fruits or different flavored whipped creams can elevate your dessert experience!
-
Careful Handling: Remember to handle warm taco shells carefully; they are fragile, and a little extra caution can prevent breakage.
What to Serve with Fruity Pebbles Cheesecake Tacos
Imagine a vibrant dessert table filled with a medley of colorful dishes that bring delight to the senses.
-
Crispy Fruit Salad: A refreshing mix of seasonal fruits harmonizes beautifully with the sweet cheesecake, providing a light, tangy contrast to each bite. The crunch of apples and the juiciness of berries make it a perfect complement.
-
Chocolate Milkshake: A thick, creamy milkshake pairs wonderfully with the fruity flavors, adding an indulgent touch that feels nostalgic and fun for all ages. The chocolate acts as a rich counterpoint to the sweet and colorful tacos.
-
Rainbow Sprinkles Cupcakes: These playful cupcakes echo the vibrant theme, adding both texture and sweetness. Each bite brings an explosion of vanilla flavor, making them a delightful addition to your dessert spread.
-
Whipped Cream Cheese Dip: Serve this light dip with graham crackers or fruit slices. It’s perfect for those who crave a creamy texture to accompany the tacos, and the slight tanginess complements the sweetness wonderfully.
-
Pineapple Coconut Smoothie: Chill down the festivities with this tropical smoothie. Its bright flavor and creamy texture pair beautifully with the fruity experience, creating a refreshing beverage option.
-
Sour Cherry Sauce: Drizzle this tangy sauce over the tacos for an unexpected burst of flavor. Its tartness offsets the sweetness, creating a layered taste that will surprise and delight your guests.
-
Vanilla Ice Cream: A classic scoop of vanilla ice cream beside the tacos adds a creamy element that enhances every bite. As it melts, it melds into the fruity chaos, creating an indulgent treat everyone will love.
-
Mini Macarons: These delicate French treats not only look stunning on the table, but their buttercream filling complements the flavors of the tacos without overwhelming them. Consider fruity flavors that echo the Fruity Pebbles theme!
-
Sparkling Lemonade: Fizz and a hint of tartness elevate the dessert experience, adding a refreshing element that cleanses the palate beautifully between each delicious taco bite.
Fruity Pebbles Cheesecake Tacos Recipe FAQs
How do I choose the right Fruity Pebbles for this recipe?
Absolutely! When selecting Fruity Pebbles, look for a box that displays vibrant, bright colors without any signs of moisture or damage. Fresh cereal will ensure that your taco shells have the best flavor and texture. Opt for a box that feels full and hasn’t been sitting on the shelf for too long.
What’s the best way to store leftover Fruity Pebbles Cheesecake Tacos?
Very! Store any leftover assembled tacos in an airtight container in the refrigerator for up to 1-2 days. Keep in mind that the shell may lose some of its crunch, so it’s best to assemble the tacos fresh. If you have leftover filling or taco shells, you can store them separately and assemble just before serving for optimal taste and texture.
Can I freeze the taco shells and cheesecake filling separately?
Of course! To freeze, wrap the taco shells tightly in plastic wrap and then cover them with aluminum foil; they can last up to 1 month in the freezer. The cheesecake filling can be placed in a freezer-safe container, and you should label it with the date. When you’re ready to enjoy, simply thaw the filling in the refrigerator overnight and reheat the shells in a preheated oven at 350°F (175°C) for about 5-10 minutes until crispy, then assemble.
What if the taco shells break while shaping them?
It's very common! If you find that your taco shells are breaking, it may be that they need to be a little thicker or that they weren’t baked long enough. To prevent issues, ensure the mixture is well-formed on the baking sheet. If needed, you can also make mini taco shells, which are easier to handle and just as delightful!
Are there any dietary considerations for this recipe?
Absolutely! For those with dietary restrictions, you can use dairy-free alternatives, like coconut oil instead of butter and coconut cream instead of heavy cream in the filling. This recipe is vegetarian-friendly, but always check labels to ensure there are no hidden allergens. If serving to children or pets, be cautious with portion sizes, especially because of the sugar content from the cereal and fillings.
Indulgent Fruity Pebbles Cheesecake Tacos for Sweet Fun
Ingredients
Equipment
Method
- Begin by pulsing 2 cups of Fruity Pebbles in a food processor until they reach a fine powder. In a mixing bowl, combine the powdered cereal with 2 tablespoons of melted unsalted butter and 1 tablespoon of granulated sugar. Preheat your oven to 350°F (175°C). Scoop the mixture into small circles on a lined baking sheet, shaping them into taco forms. Bake for 8-10 minutes until lightly golden, then drape warm shells over a rack to cool and hold their shape.
- In a large bowl, beat 8 ounces of softened cream cheese with ½ cup of granulated sugar until creamy and smooth. Gradually mix in ¼ cup of sour cream and 1 teaspoon of vanilla extract until fully combined. Pour in ¼ cup of heavy cream and whip the mixture until it becomes light and fluffy. Chill the filling in the refrigerator for at least 30 minutes to firm up.
- Once the taco shells have cooled, crush additional Fruity Pebbles to create a decorative topping. Dip the edges of each taco shell into the crushed cereal for added crunch. Carefully fill each shell with the chilled cheesecake mixture using a piping bag or spoon for ease. Top off your Fruity Pebbles Cheesecake Tacos with luscious whipped cream, a sprinkle of fresh berries, chocolate shavings, and more Fruity Pebbles for a colorful finish.
- These Fruity Pebbles Cheesecake Tacos are best enjoyed fresh, so serve them right after assembling. This ensures the crispy taco shell retains its delightful crunch against the creamy cheesecake filling.


Leave a Reply