
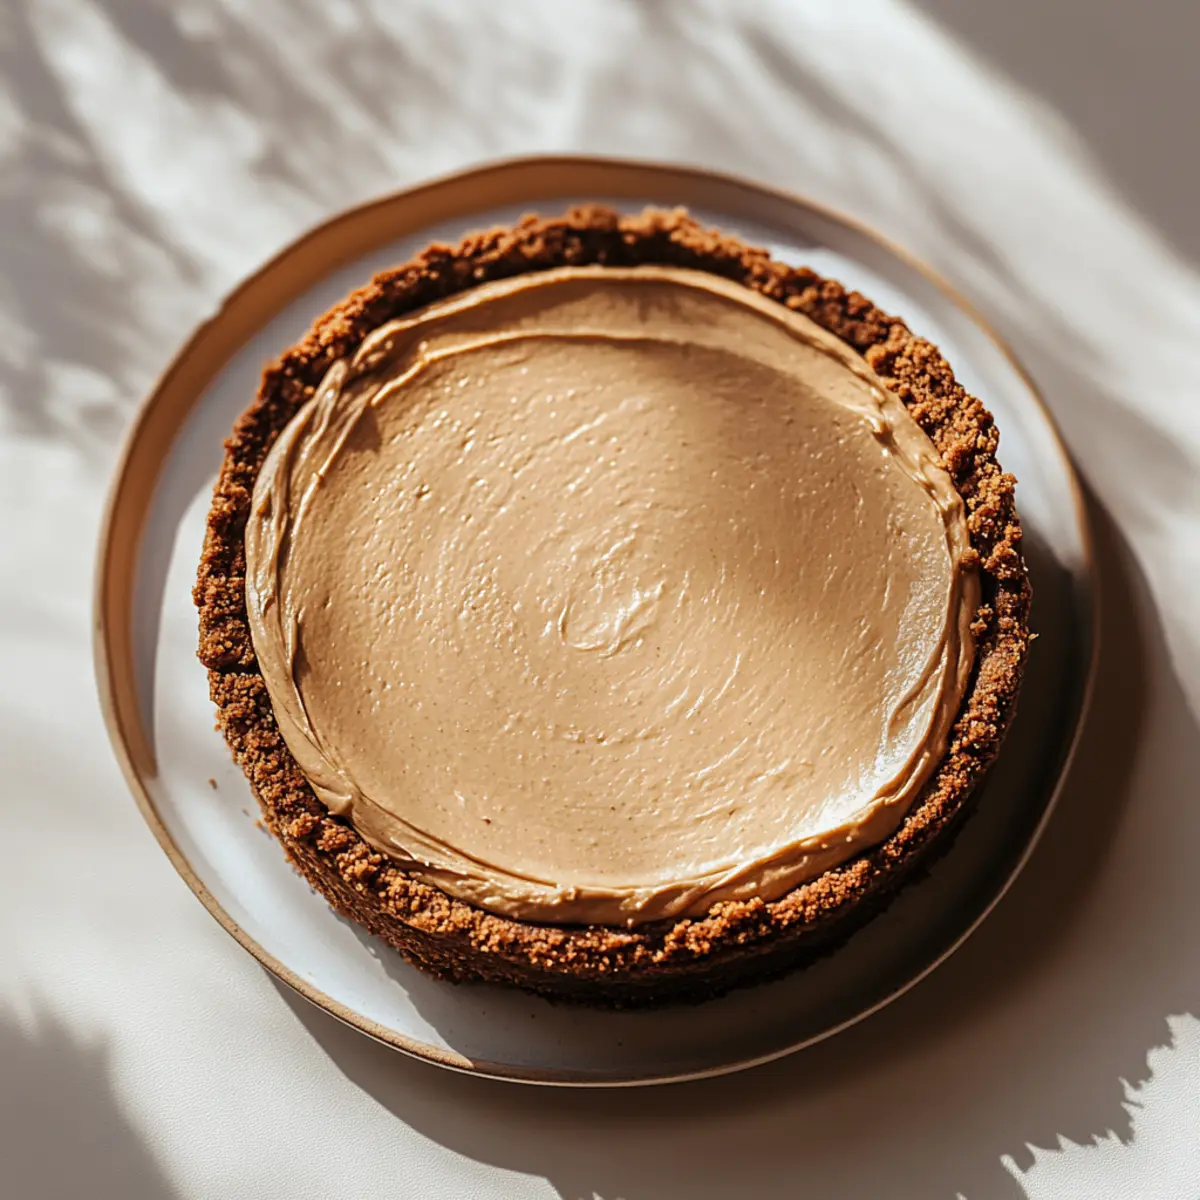
As the sun begins to set, I can’t help but think of those wonderful moments spent in the kitchen, crafting something special. This Creamy No-Bake Biscoff Cheesecake is the perfect culmination of easy preparation and delightfully rich flavors. With just a handful of ingredients, you’ll create a dessert that not only satisfies those sweet cravings but also impresses family and friends alike. The buttery crunch of the Biscoff cookie crust pairs beautifully with the velvety filling, making it a go-to for any gathering or cozy night in. Plus, the no-bake aspect means it’s a breeze to whip up without the oven heating up your home. Have you ever tasted bliss in cheesecake form? Let’s dive into this treat and discover how easy it is to make!

Why is No-Bake Biscoff Cheesecake a Must-Try?
Effortless Preparation: This recipe eliminates the need for baking, making it perfect for home cooks who are short on time or experience. Just mix, assemble, and let chill!
Decadent Flavor: The signature blend of spiced Biscoff cookies infuses the cheesecake with a unique sweetness, providing an indulgent flavor profile that will leave everyone wanting more.
Crowd-Pleasing Delight: Whether you're hosting a dinner party or enjoying a quiet night in, this cheesecake is sure to impress your guests and spark joy at any gathering.
Versatile Serving Options: Pair it with fresh fruit or a drizzle of chocolate for an elevated touch, or serve it plain for a classic dessert experience.
Make-Ahead Magic: With the ability to prepare in advance and store in the fridge, this cheesecake is as convenient as it is delicious. Perfect for spontaneous get-togethers! You might also love exploring other no-bake desserts for more stress-free treats.
No-Bake Biscoff Cheesecake Ingredients
For the Crust
• Biscoff Cookies – Provides a buttery, spiced cookie flavor for the crust; substitute with graham crackers for a milder taste.
• Melted Butter – Binds the cookie crumbs together and creates a rich, crunchy texture.
For the Filling
• Cream Cheese – Acts as the primary structure and richness for the filling; use full-fat for stability and flavor.
• Heavy Whipping Cream – Contributes to the light, airy texture of the filling; opt for a whip with similar fat content for best results.
• Powdered Sugar – Sweetens the filling, ensuring a smooth texture; you can reduce the amount to suit your taste.
• Biscoff Spread – Adds a rich, caramelized flavor and glossy finish to the cheesecake; substitute with any spiced cookie butter if unavailable.
Optional Toppings
• Crushed Biscoff Cookies – Sprinkled on top for added crunch and presentation.
• Warmed Biscoff Spread – Drizzled for an extra layer of indulgence; perfect for those who crave more of that rich flavor.
Dive into this no-bake Biscoff cheesecake adventure and delight in its creamy goodness!
Step‑by‑Step Instructions for No-Bake Biscoff Cheesecake
Step 1: Prepare the Crust
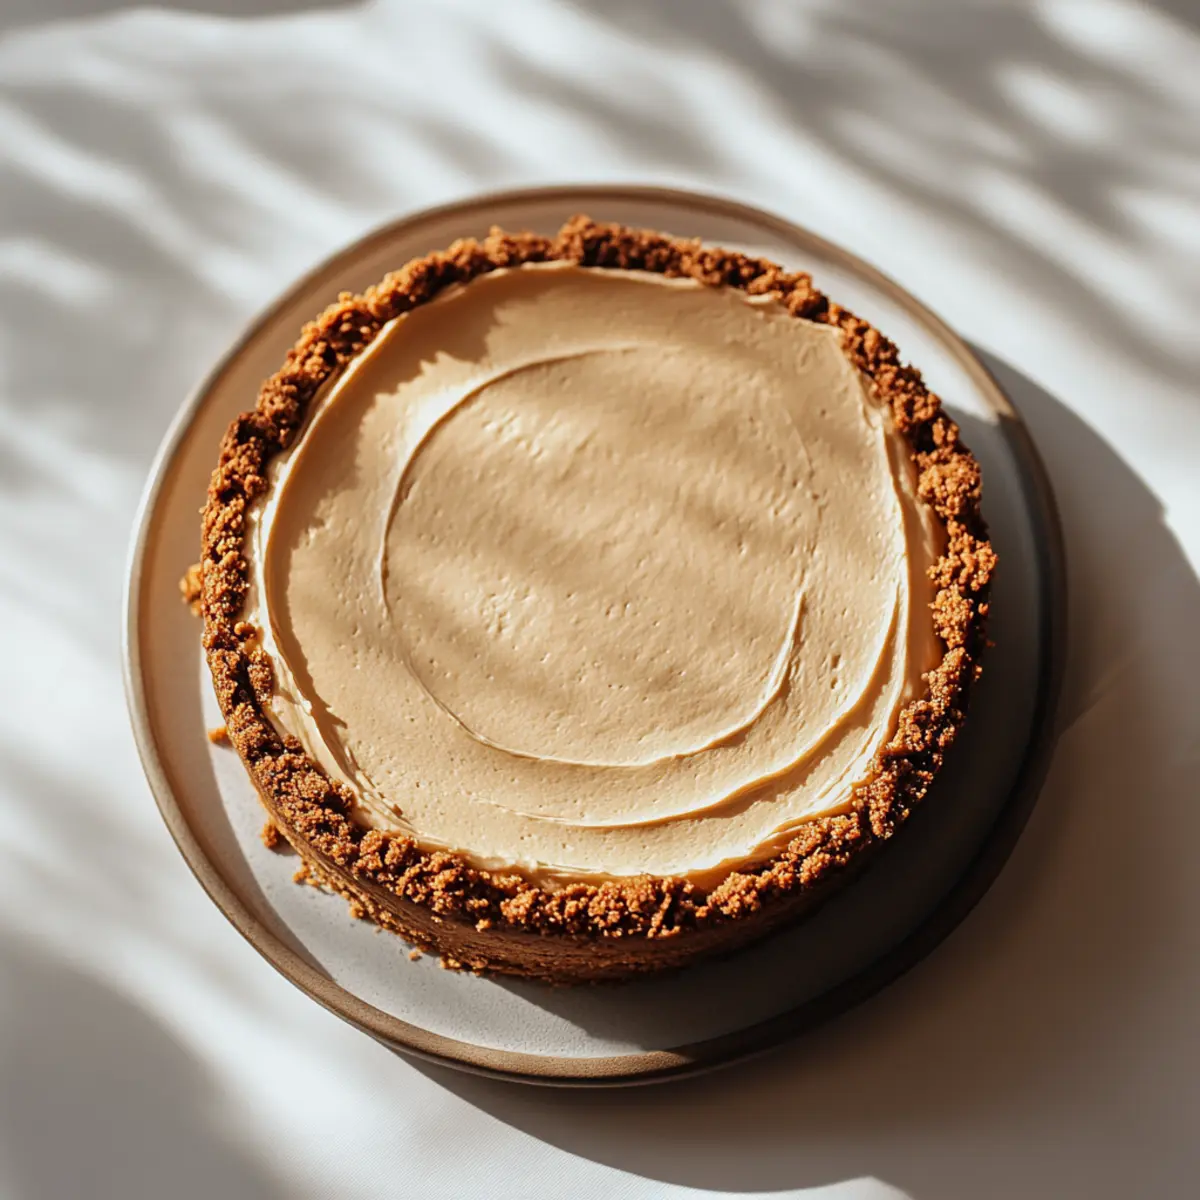
Begin by crushing approximately 24 Biscoff cookies into fine crumbs using a food processor or zip-top bag with a rolling pin. In a bowl, mix the crumbs with melted butter until fully combined. Press this mixture firmly into the base of a 9-inch springform pan, creating an even layer. Refrigerate for about 15 minutes to allow the crust to set.
Step 2: Make the Filling
In a large mixing bowl, beat 16 ounces of cream cheese using an electric mixer on medium speed until smooth and creamy, which should take about 2–3 minutes. Gradually add 1 cup of powdered sugar, continuing to mix until incorporated and the mixture is free of lumps. This base will create a rich and delicious filling for your No-Bake Biscoff Cheesecake.
Step 3: Add Flavoring
Next, gently fold in 1 cup of heavy whipping cream into the cream cheese mixture. Use a spatula to combine until fluffy and well blended for a light texture. Then, add ½ cup of Biscoff spread to the mixture, carefully mixing until the spread is evenly dispersed and you achieve a luscious, caramelized flavor throughout.
Step 4: Assemble the Cheesecake
Pour the creamy filling over the prepared crust in the springform pan. Use a spatula to smoothly spread the filling to the edges, creating an even surface. Tap the pan lightly on the counter to remove any air bubbles trapped in the filling. This will ensure a beautiful finish for your No-Bake Biscoff Cheesecake.
Step 5: Chill the Cheesecake
Cover the springform pan with plastic wrap and chill in the refrigerator for at least 6 hours, or preferably overnight for optimal texture and flavor development. This important step allows the cheesecake to fully set, ensuring every slice is firm yet creamy.
Step 6: Serve and Enjoy
Once chilled, carefully remove the cheesecake from the springform pan. Slice with a warm knife for clean edges, and consider topping with additional crushed Biscoff cookies or a drizzle of warmed Biscoff spread for an elegant touch. Serve the cheesecake cold, and watch as faces light up with delight!
No-Bake Biscoff Cheesecake Variations
Feel free to get creative and customize your cheesecake to match your taste and preferences!
-
Dairy-Free: Substitute cream cheese with a vegan cream cheese alternative and use coconut cream instead of heavy whipping cream.
-
Chocolate Delight: Add melted dark chocolate (about ½ cup) to the filling for a luscious chocolate layer enhancing the dessert’s flavor.
-
Nutty Twist: Fold in crushed nuts like pecans or almonds into the filling base to introduce a delightful crunch and rich essence.
-
Fruity Freshness: Incorporate fresh strawberries or raspberries into the filling for a burst of color and fruity flavor that brightens this dessert.
-
Spiced Up: For a warming touch, mix in a teaspoon or two of cinnamon, nutmeg, or ginger to the filling for an aromatic twist.
-
Mini Cheesecakes: Create individual servings by layering the crust and filling in small glasses or jars; it's a charming presentation for gatherings.
-
Salted Caramel Drizzle: Top each slice with a drizzle of salted caramel sauce before serving to add a rich contrast to the creamy filling.
-
Herbal Infusion: Add a hint of fresh mint or basil into the filling for a surprising and refreshing herbal note that pairs beautifully with Biscoff.
Let your imagination run wild with these variations, and watch how each twist creates a new memory around your table!
How to Store and Freeze No-Bake Biscoff Cheesecake
Fridge: Keep your cheesecake covered with plastic wrap or in an airtight container for up to 4 days. This helps maintain its creamy texture and rich flavor.
Freezer: If you wish to store slices, freeze them individually wrapped in plastic wrap and then placed in a freezer-safe container for up to 1 month.
Thawing: To enjoy frozen slices, simply transfer them to the fridge and let them thaw overnight. This ensures they regain their creamy consistency without any ice crystals.
Serving Suggestions: Always serve chilled for the best experience. Consider topping with an extra drizzle of Biscoff spread right after thawing for that indulgent finish!
Expert Tips for No-Bake Biscoff Cheesecake
-
Ingredient Temperature: Ensure that your cream cheese is at room temperature for easy blending, while the heavy whipping cream should remain cold for optimal fluffiness.
-
Chill Time Matters: Allowing the cheesecake to chill overnight enhances flavor and texture, so resist the urge to skip this step for the best results!
-
Crust Pressing: When forming the crust, press the crumbs firmly into the pan to avoid it crumbling when serving. A firm base supports the luscious filling perfectly.
-
Serving Slices: Use a warm knife to slice the cheesecake cleanly. This prevents the filling from sticking to the knife, ensuring each slice remains beautiful.
-
Taste Adjustments: Adjust the sweetness of the filling by varying the amount of powdered sugar. You can always start with less and add more if needed when making your No-Bake Biscoff Cheesecake.
What to Serve with No-Bake Biscoff Cheesecake?
Elevate your dessert experience with delightful pairings that enhance every bite of this creamy creation.
- Fresh Berries: Juicy strawberries or raspberries add a vibrant contrast, brightening the rich flavors of the cheesecake.
- Whipped Cream: A dollop of lightly sweetened whipped cream provides a light, airy texture that perfectly balances the dessert’s richness.
- Chocolate Drizzle: A warm chocolate drizzle introduces a touch of decadence, inviting a delightful interplay between sweet and creamy.
- Coffee: A cup of freshly brewed coffee creates a classic pairing; its bold flavor complements the sweetness of the cheesecake beautifully.
- Mint Leaves: Garnishing with fresh mint leaves adds a refreshing touch, bringing a pop of color and invigorating aroma.
- Vanilla Ice Cream: A scoop of vanilla ice cream brings a delightful chill, creating a heavenly contrast with the cheesecake’s creamy texture.
- Nuts: Chopped pistachios or almonds sprinkle a delightful crunch, providing texture that beautifully contrasts the smooth filling.
- Spiced Tea: Pairing with chai or spiced tea warms the palate, enhancing the comforting flavors of the cheesecake with every sip.
- Coconut Flakes: Toasted coconut adds a tropical twist that beautifully blends with Biscoff, creating an exotic touch to your dessert table.
Make Ahead Options
These No-Bake Biscoff Cheesecake delights are a perfect choice for meal prep enthusiasts! You can prepare the crust and filling up to 24 hours in advance, keeping everything fresh and delicious. To do this, assemble the crust and filling as instructed, then chill the cheesecake in the refrigerator overnight. This allows the flavors to meld beautifully while ensuring a lovely, creamy texture. When you’re ready to serve, simply slice the cheesecake with a warm knife for clean edges, and consider topping it with extra crushed Biscoff cookies or a drizzle of warmed Biscoff spread for that extra special touch. Prep ahead for stress-free entertaining that saves time and delivers indulgent dessert joy!
No-Bake Biscoff Cheesecake Recipe FAQs
How do I choose the best Biscoff cookies for the crust?
Absolutely! When selecting Biscoff cookies, look for ones that are firm and free from dark spots. They should have a fresh, spiced aroma. If unable to find Biscoff cookies, feel free to substitute with graham crackers for a similar texture and taste.
How should I store my no-bake Biscoff cheesecake?
Cover your cheesecake with plastic wrap or store it in an airtight container in the refrigerator for up to 4 days. Keeping it sealed helps maintain its creamy texture and prevents it from absorbing any odors from your fridge.
Can I freeze slices of the no-bake cheesecake?
Yes, you can! Wrap individual slices in plastic wrap, then place them in a freezer-safe container. They can be frozen for up to 1 month. Just remember to thaw them in the refrigerator overnight for a smooth, creamy texture when you’re ready to enjoy.
What if my cream cheese mixture isn’t smooth?
No worries! If your cream cheese mixture isn’t smooth after mixing, it’s likely because the cream cheese wasn’t at room temperature. Try beating it more vigorously, and if you’re still having issues, add a splash of heavy cream to smooth it out. Just be cautious not to overwhip the cream.
Are there any dietary considerations for making this recipe?
Absolutely! This no-bake Biscoff cheesecake is vegetarian, but if you have any allergies or dietary restrictions, consider this: for gluten-free options, use gluten-free cookies and ensure that your spreads and powders are certified gluten free. Always check for potential allergens in ingredients, such as dairy for those with lactose intolerance.
Can I use a different type of cookie spread if I can’t find Biscoff?
Yes! If you can’t find Biscoff spread, any other spiced cookie butter or similar nut spreads like Speculoos works wonderfully. Just ensure it has a similar consistency and flavor profile to get that rich taste in your cheesecake.

Indulge in Heaven with No-Bake Biscoff Cheesecake
Ingredients
Equipment
Method
- Begin by crushing approximately 24 Biscoff cookies into fine crumbs using a food processor or zip-top bag with a rolling pin.
- In a bowl, mix the crumbs with melted butter until fully combined. Press this mixture firmly into the base of a 9-inch springform pan, creating an even layer.
- Refrigerate for about 15 minutes to allow the crust to set.
- In a large mixing bowl, beat 16 ounces of cream cheese using an electric mixer on medium speed until smooth and creamy, which should take about 2–3 minutes.
- Gradually add 1 cup of powdered sugar, continuing to mix until incorporated and the mixture is free of lumps.
- Gently fold in 1 cup of heavy whipping cream into the cream cheese mixture using a spatula to combine until fluffy and well blended.
- Add ½ cup of Biscoff spread to the mixture, carefully mixing until evenly dispersed.
- Pour the creamy filling over the prepared crust in the springform pan and smoothly spread the filling to the edges.
- Tap the pan lightly on the counter to remove any air bubbles trapped in the filling.
- Cover the springform pan with plastic wrap and chill in the refrigerator for at least 6 hours, or preferably overnight for optimal texture and flavor development.
- Once chilled, carefully remove the cheesecake from the springform pan. Slice with a warm knife for clean edges.
- Consider topping with additional crushed Biscoff cookies or a drizzle of warmed Biscoff spread before serving.


Leave a Reply