
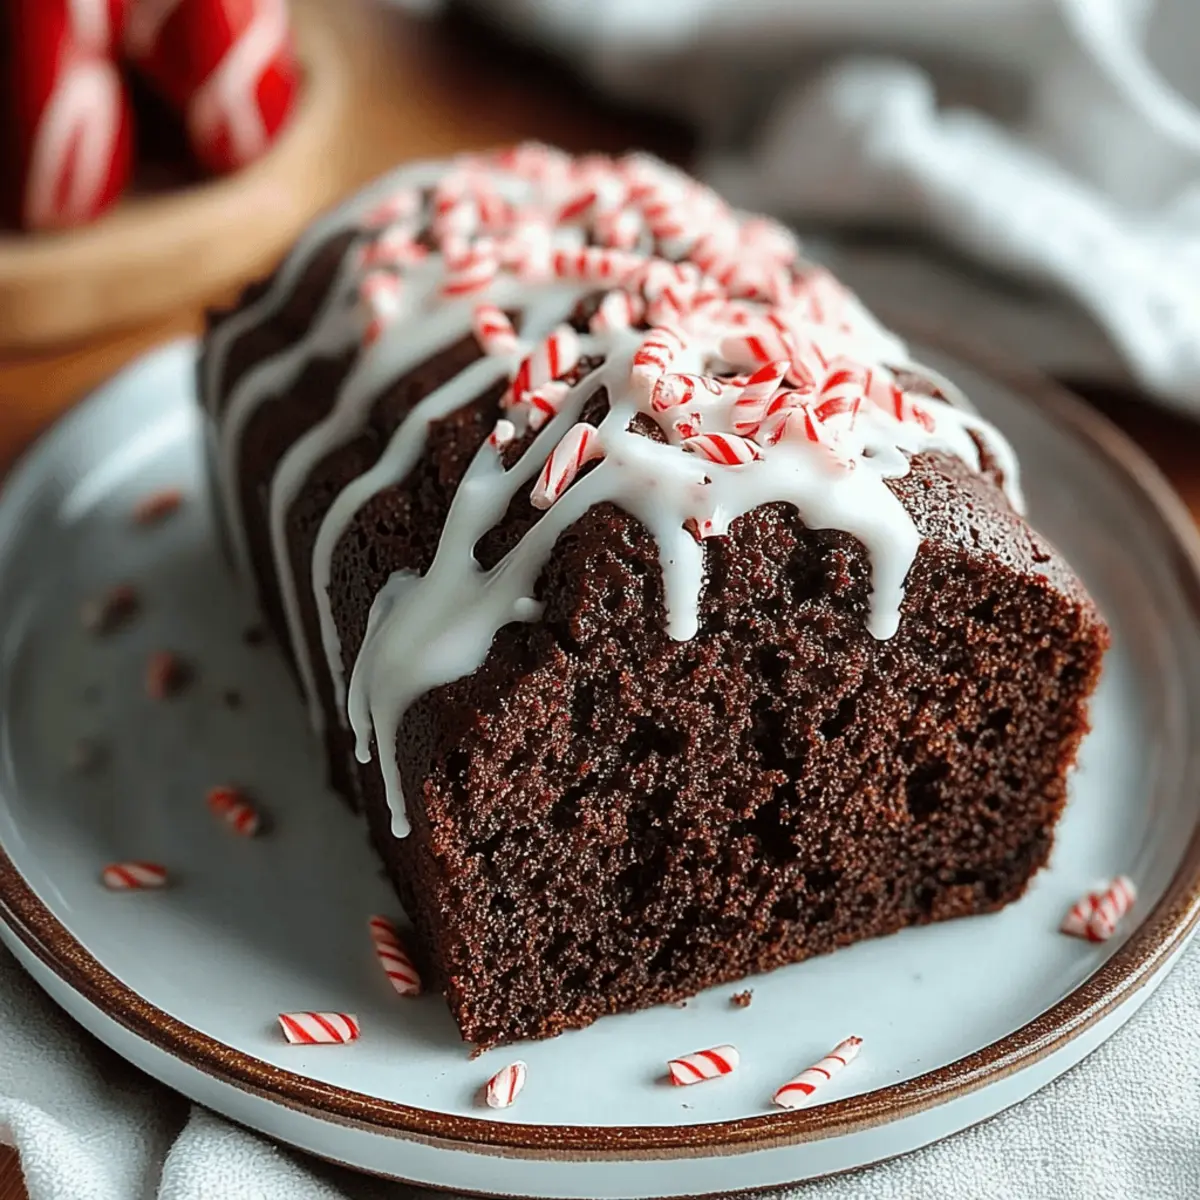
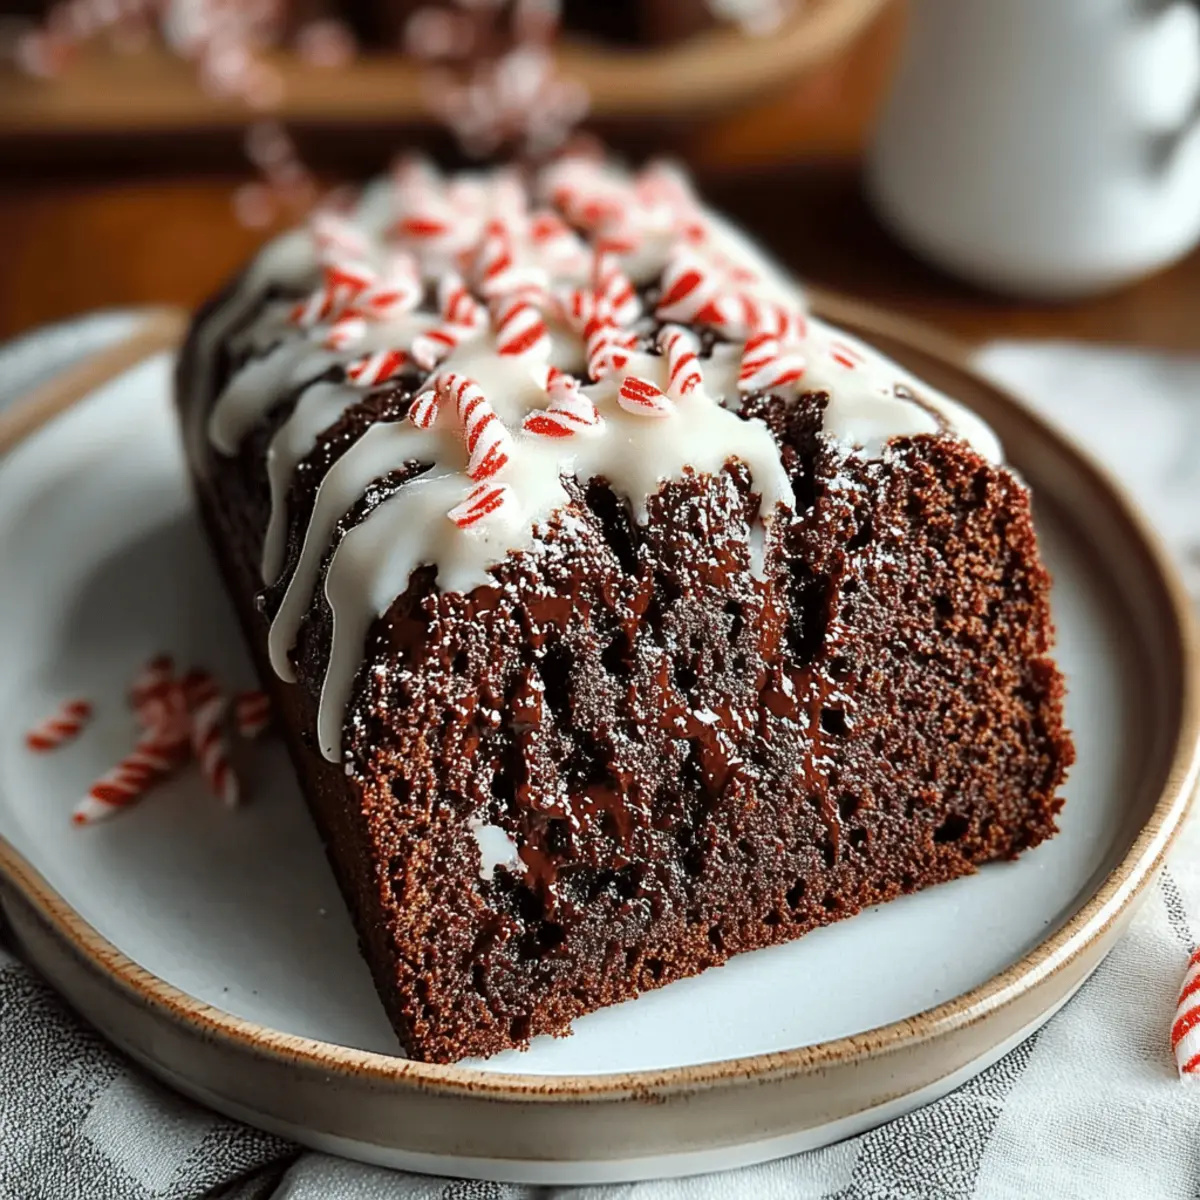
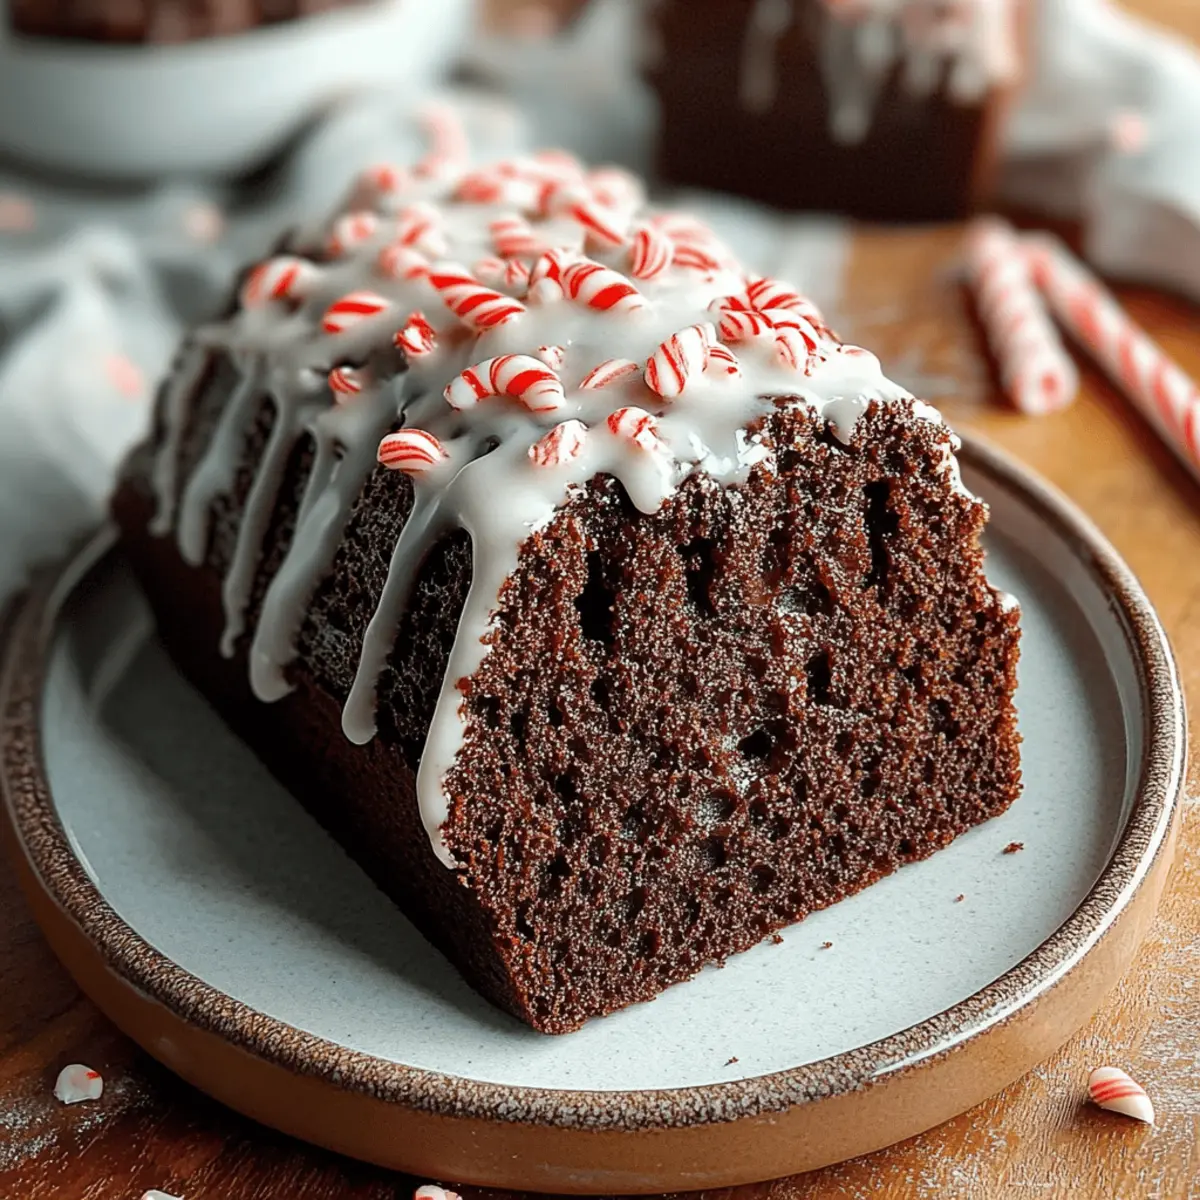
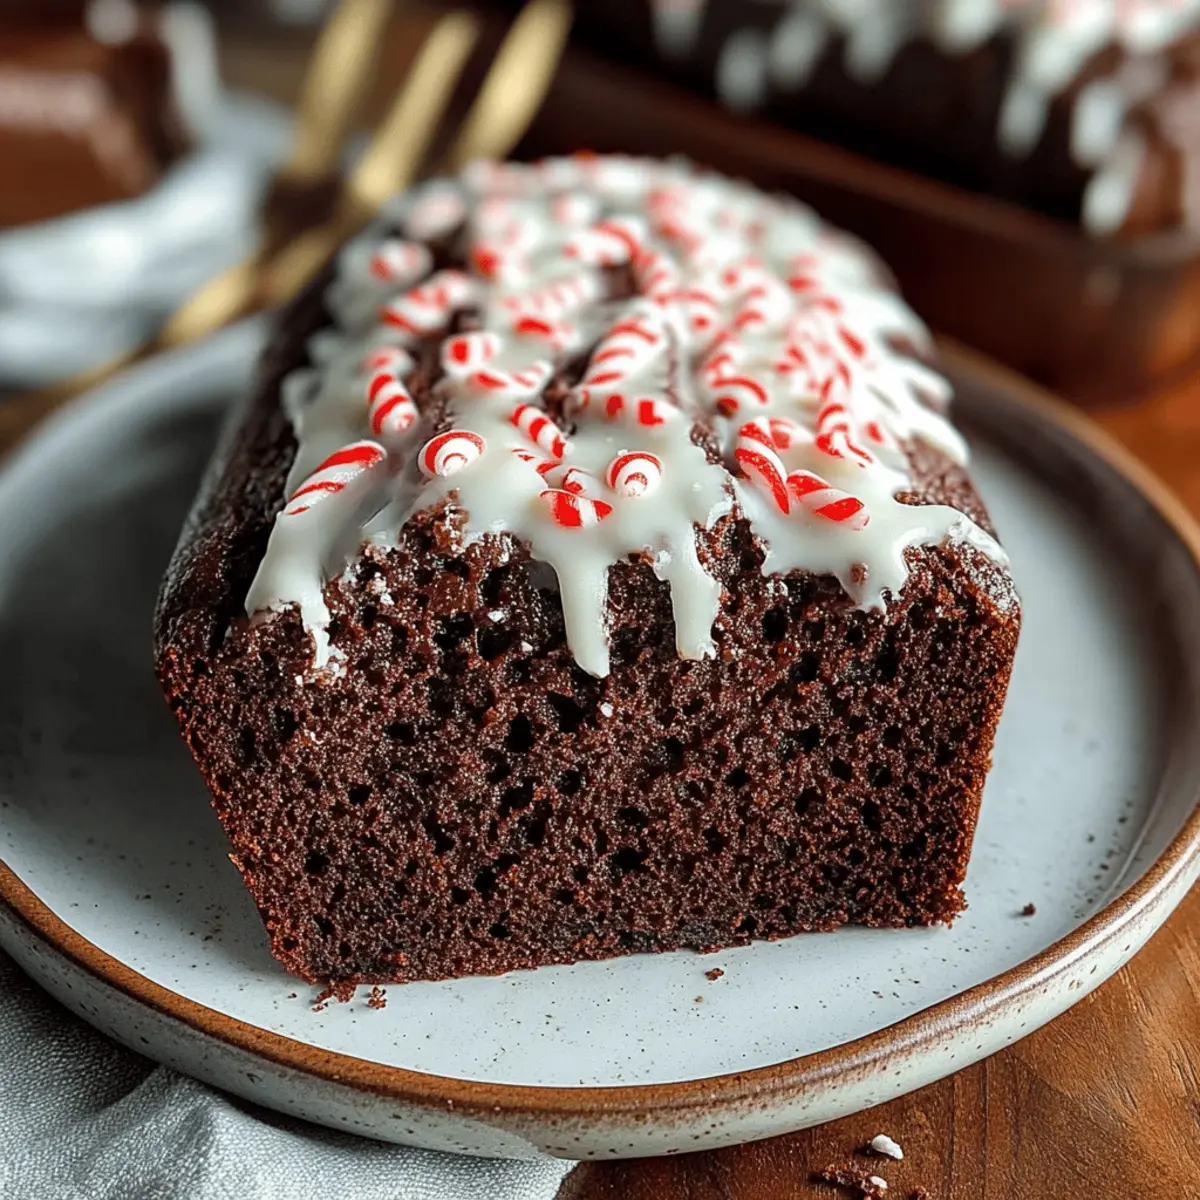
The moment the first hint of winter arrives, my thoughts drift to the warm, comforting smells of the kitchen—especially the delightful blend of chocolate and peppermint. This Chocolate Peppermint Bread is not just any loaf; it’s a festive celebration in every slice. Perfect for holiday gatherings or as a heartfelt gift, this easy recipe creates a moist, tender bread that will impress your loved ones while satisfying your sweet tooth. With minimal prep time and the heartwarming aroma wafting through your home, you’ll find it hard to resist diving into this delicious treat. Can you imagine yourself serving warm slices drizzled with glaze, or perhaps surprising someone special with a loaf wrapped in festive paper? Let’s make those baking dreams a reality!
Why is Chocolate Peppermint Bread a Must-Try?
Irresistible Combination: The fusion of rich chocolate and refreshing peppermint creates a festive flavor profile that captures the holiday spirit.
Easy to Make: Even if you’re a beginner in the kitchen, this simple recipe requires minimal time and ingredients, making it perfect for spontaneous baking sessions.
Perfect for Gifting: Package a loaf in decorative wrapping, and you've got an ideal holiday gift for friends and family who appreciate homemade treats.
Moist and Decadent: With a texture that’s both tender and moist, this bread is a dessert experience in itself, ensuring that every bite is a delight.
Versatile Serving Options: Whether enjoyed warm or with a scoop of ice cream, this bread lends itself to varied serving suggestions that elevate any occasion.
Chocolate Peppermint Bread Ingredients
• Everything you need for a festive treat!
For the Bread
- All-purpose flour – Provides the structure of the bread; can substitute with gluten-free flour mix.
- Unsweetened cocoa powder – Adds rich chocolate flavor; opt for Dutch-processed for a deeper taste.
- Baking soda – Acts as a leavening agent to help the bread rise; ensure it’s fresh for optimal results.
- Baking powder – Works alongside baking soda for added lift; check expiration date for effectiveness.
- Salt – Enhances flavor and balances sweetness; use sea salt for a subtle texture difference.
- Granulated sugar – Sweetens the bread; brown sugar can be used for a moister texture.
- Light brown sugar – Adds depth of flavor and moisture; can replace entirely with granulated sugar if necessary.
- Buttermilk – Adds moisture and tenderness; substitute with milk plus 1 tablespoon of vinegar or lemon juice.
- Vegetable oil – Keeps the bread moist; can be replaced with melted coconut oil or unsweetened applesauce.
- Large eggs – Provides richness and helps bind ingredients; eggs can be replaced with flax eggs for a vegan option.
- Vanilla extract – Adds warmth and enhances flavor; use pure vanilla for the best taste.
- Boiling water – Blooms the cocoa, creating a moist batter; do not skip; it’s essential.
- Semi-sweet chocolate chips – Adds bursts of chocolate throughout the bread; swap with dark chocolate for deeper flavor.
- Crushed peppermint candies – Offers a festive crunch and minty flavor; store-bought or homemade both work.
- Peppermint extract – Intensifies the peppermint flavor; use sparingly, as it can be overpowering.
For the Glaze
- Powdered sugar – For making the glaze; use icing sugar for quick glazing.
- Milk – Adjusts glaze consistency; almond milk or soy milk can be used as a non-dairy alternative.
- Pinch of salt – Balances sweetness in the glaze.
Dive into the holiday spirit with this delightful Chocolate Peppermint Bread that is sure to become a family favorite!
Step‑by‑Step Instructions for Chocolate Peppermint Bread
Step 1: Preheat the Oven and Prepare the Pan
Begin by preheating your oven to 350°F (175°C). While the oven warms up, take a 9x5 inch loaf pan and grease it well with butter or non-stick spray. This step is crucial to ensure your Chocolate Peppermint Bread releases easily after baking, giving you that perfect, clean slice you desire.
Step 2: Mix Dry Ingredients
In a large mixing bowl, whisk together all-purpose flour, unsweetened cocoa powder, baking soda, baking powder, and salt until thoroughly combined. The dry mix should have an even color and texture, free of lumps. This mixture will form the foundation of your moist Chocolate Peppermint Bread, creating that rich chocolatey base you crave.
Step 3: Combine Sugars
In a separate bowl, mix your granulated sugar and light brown sugar, using a fork or whisk to break up any lumps. This step is important for achieving that perfect sweetness in your Chocolate Peppermint Bread. The sugars should appear light and fluffy, ready to blend seamlessly into your wet ingredients in the next step.
Step 4: Whisk Wet Ingredients
Get another bowl and whisk together the buttermilk, vegetable oil, large eggs, vanilla extract, and peppermint extract. Ensure everything is well combined and fluid, as this mix brings moistness and flavor to your bread. The combined mixture should be smooth, with no separation, ready to enhance your Chocolate Peppermint Bread with richness.
Step 5: Combine Wet and Dry Ingredients
Gradually add the wet mixture to the dry ingredients, folding gently with a spatula until just combined. Be careful not to overmix to maintain a tender texture. You’ll see a thick batter forming; this is a good sign that the Chocolate Peppermint Bread is on its way to becoming delightfully fluffy.
Step 6: Add Boiling Water
Slowly add the boiling water to your batter while mixing on low speed or stirring gently with a spatula. The batter will appear thin; this is normal and necessary for achieving the ultimate moistness in your Chocolate Peppermint Bread. Ensure the water is hot as it helps bloom the cocoa for richer flavor.
Step 7: Fold in Chocolate Chips and Peppermint
With the batter ready, gently fold in the semi-sweet chocolate chips and crushed peppermint candies, reserving some for topping later. This step adds delightful bursts of chocolate and a festive crunch throughout the bread. The mixture should be well combined without any streaks of flour remaining.
Step 8: Bake the Bread
Pour the batter into your prepared loaf pan, smoothing the top with a spatula. Sprinkle the reserved chocolate chips and crushed peppermint over the surface for an extra festive touch. Place in the 350°F (175°C) oven and bake for 55-65 minutes until a toothpick inserted in the center comes out clean, indicating your Chocolate Peppermint Bread is perfectly done.
Step 9: Cool the Bread
Once out of the oven, let the bread cool in the pan for about 10-15 minutes. This pause allows it to set and makes transferring easier. Then, carefully flip it out onto a wire rack to cool completely. This step is essential for achieving the right texture when slicing into your Chocolate Peppermint Bread.
Step 10: Prepare the Glaze
In a separate bowl, whisk together the powdered sugar, milk, peppermint extract, and a pinch of salt until smooth and glossy. The glaze should flow easily but not be too runny. This sweet topping will enhance the flavor of your already delicious Chocolate Peppermint Bread, adding an irresistible finish.
Step 11: Drizzle the Glaze
Once your bread is completely cool, drizzle the prepared glaze over the top using a spoon or a piping bag for a more decorative touch. Allow the glaze to set for about 15-20 minutes before slicing. This waiting period is crucial for those beautiful, clean slices of Chocolate Peppermint Bread that you can’t wait to show off!
Expert Tips for Chocolate Peppermint Bread
• Quality Ingredients: Use high-quality cocoa powder and chocolate chips for a richer flavor that elevates your Chocolate Peppermint Bread.
• Avoid Overmixing: Mix your batter just until combined. Overmixing can result in a dense texture; we want moist and light bread!
• Check for Doneness: Insert a toothpick into the center a few minutes before the baking time ends to prevent overbaking.
• Cool Completely: Allow the bread to cool completely before slicing. This helps maintain its structure and avoid crumbling.
• Experiment with Add-ins: Feel free to customize your recipe by adding nuts or an extra splash of peppermint extract for an enhanced flavor experience.
Make Ahead Options
These Chocolate Peppermint Bread loaves are perfect for busy home cooks looking to save time during the festive season! You can easily prepare the batter up to 24 hours in advance; simply store it in the refrigerator. To maintain the bread's delightful quality, keep it tightly covered in plastic wrap or in an airtight container. When you're ready to bake, simply pour the chilled batter into the greased loaf pan and add a few extra minutes to the baking time to compensate for the cooler temperature. For serving, you can make the glaze in advance as well—just whisk it together and refrigerate until you’re ready to drizzle it over the cooled Chocolate Peppermint Bread. Enjoy the convenience of having this deliciousness ready to go while you focus on creating cherished holiday memories!
What to Serve with Chocolate Peppermint Bread
Indulge in the warmth of the holiday season with a delightful spread that beautifully complements the cozy flavors of this festive bread.
-
Creamy Mashed Potatoes: The velvety texture of mashed potatoes offers a contrast to the soft, chocolatey loaf, creating a comforting meal.
-
Rich Vanilla Ice Cream: A scoop of vanilla ice cream on the side will provide a delightful creaminess, enhancing every decadent bite of the bread. This combo is a sweet and cooling treat!
-
Whipped Cream: Light and airy whipped cream adds a luxurious touch, making your chocolate peppermint experience even more festive and indulgent.
-
Fresh Berries: A medley of strawberries and raspberries brings a bright, tart element, balancing the sweetness of the loaf and refreshing the palate.
-
Hot Cocoa: Warm up your gathering with a mug of hot cocoa, whose chocolatey richness pairs perfectly with the peppermint notes, making it an ideal winter beverage.
-
Peppermint Tea: Serve with a soothing cup of peppermint tea, enhancing the bread’s flavors while wrapping guests in a gentle warmth that complements the holiday spirit.
-
Chocolate Mint Cookies: For a delightful dessert platter, pair it with soft mint chocolate cookies to further entice your guests’ taste buds and elevate the chocolaty theme.
-
Spiced Apple Cider: A glass of warm spiced apple cider not only hugs you with warmth but also introduces a cozy spice element that beautifully mingles with the peppermint.
-
Gingerbread Cookies: Add a batch of gingerbread cookies for a nostalgic touch, where the spices perfectly harmonize with the holiday vibes of the chocolate peppermint bread.
How to Store and Freeze Chocolate Peppermint Bread
Room Temperature: Store your Chocolate Peppermint Bread in an airtight container at room temperature for up to 3 days for optimal freshness and flavor.
Fridge: If you'd like to keep it longer, refrigerate the bread for up to a week. Wrap it well to prevent it from drying out.
Freezer: For longer storage, freeze the bread wrapped tightly in plastic wrap and then foil for up to 3 months. Thaw overnight in the fridge before enjoying.
Reheating: To reheat, slice and warm individual pieces in the microwave for about 10-15 seconds, or enjoy slightly toasted for that fresh-out-of-the-oven taste.
Chocolate Peppermint Bread Variations
Feel free to bring your own twist to this delicious recipe and make it uniquely yours with these engaging variations!
-
Nutty Delight: Add chopped walnuts or pecans for a delightful crunch that complements the rich chocolate flavor.
-
Sweet Swaps: Substitute white chocolate chips for a creamier, sweeter profile, perfect for those with a sweet tooth.
-
Festive Peppermint Bark: Incorporate crushed peppermint bark into the batter for an elevated texture and added flavor that shouts holiday cheer.
-
Swirled Cream Cheese: Try adding a swirl of cream cheese filling for a rich, tangy contrast to the sweet chocolate and mint.
-
Spice It Up: Add a dash of cinnamon or nutmeg to your dry ingredients for a warm, spiced twist that pairs beautifully with chocolate and peppermint.
-
Dairy-Free Option: Substitute buttermilk with a non-dairy milk and vinegar blend for a vegan-friendly version without compromising taste.
-
Gluten-Free Bread: Swap all-purpose flour for a gluten-free flour blend to make this treat suitable for those avoiding gluten.
-
Extra Peppermint: For a stronger minty flavor, mix in additional crushed peppermint candies or a bit more peppermint extract to your glaze.
These delightful variations allow you to create a Chocolate Peppermint Bread that not only impresses but also perfectly suits your taste!
Chocolate Peppermint Bread Recipe FAQs
How do I know if my ingredients are ripe or fresh?
Fresh ingredients are key to a successful Chocolate Peppermint Bread. For baking, ensure your baking soda and baking powder are within their expiration dates, as they lose effectiveness over time. When it comes to flour, it should be free from any lumps, and cocoa powder should smell rich and decadent. Always check your eggs for freshness by placing them in a bowl of water: if they sink, they’re good; if they float, it’s time to toss them!
How should I store my Chocolate Peppermint Bread?
You can store your Chocolate Peppermint Bread in an airtight container at room temperature for up to 3 days. If you want to keep it for a longer time, wrap it tightly in plastic wrap and store it in the refrigerator for up to a week. Just make sure to keep it well-wrapped to avoid drying out; no one wants a stale slice during the holidays!
Can I freeze Chocolate Peppermint Bread, and how?
Absolutely! This is a great way to make your Chocolate Peppermint Bread last longer. To freeze, first allow the bread to cool completely. Then, wrap it tightly in plastic wrap followed by a layer of aluminum foil to prevent freezer burn. It can be frozen for up to 3 months. When you're ready to enjoy it, simply thaw it overnight in the fridge and serve it at room temperature or warmed!
What should I do if my bread turns out too dense?
If your Chocolate Peppermint Bread turns out dense, be cautious about two main factors: overmixing the batter and the accuracy of your measuring. Make sure to mix the wet and dry ingredients until just combined, as overmixing introduces too much air, which can make it heavy. Additionally, accurate measurement of ingredients like flour is critical—spoon it into your measuring cup and level it off instead of scooping directly from the bag.
Is Chocolate Peppermint Bread safe for those with allergies?
This recipe contains common allergens such as eggs, dairy, and gluten. If you’re making it for someone with allergies, consider adjusting the recipe: use flax eggs in place of large eggs for a vegan option, and choose gluten-free flour and non-dairy milk alternatives. Always check ingredient labels if you're using store-bought items, such as chocolate chips and peppermint candies, to avoid hidden allergens!
Can I make this recipe ahead of time?
Yes, you can make Chocolate Peppermint Bread a day in advance! Allow it to cool completely before wrapping it tightly to keep it fresh overnight. It actually tastes even better the next day as the flavors meld together. Just remember to drizzle the glaze on closer to the serving time for that deliciously fresh finish!
Irresistibly Decadent Chocolate Peppermint Bread Recipe
Ingredients
Equipment
Method
- Preheat your oven to 350°F (175°C) and grease a 9x5 inch loaf pan.
- Whisk together flour, cocoa powder, baking soda, baking powder, and salt in a bowl.
- Mix granulated sugar and light brown sugar in a separate bowl until fluffy.
- Whisk together buttermilk, vegetable oil, eggs, vanilla extract, and peppermint extract until combined.
- Gradually add the wet mixture to the dry ingredients, folding gently until just combined.
- Add boiling water to the batter, mixing until thin but well incorporated.
- Fold in chocolate chips and crushed peppermint, reserving some for topping.
- Pour the batter into the prepared loaf pan and sprinkle the reserved toppings on.
- Bake for 55-65 minutes until a toothpick inserted comes out clean.
- Cool the bread in the pan for 10-15 minutes, then transfer to a wire rack.
- Whisk together powdered sugar, milk, peppermint extract, and a pinch of salt to make the glaze.
- Drizzle the glaze over the cooled bread and let it set before slicing.


Leave a Reply