
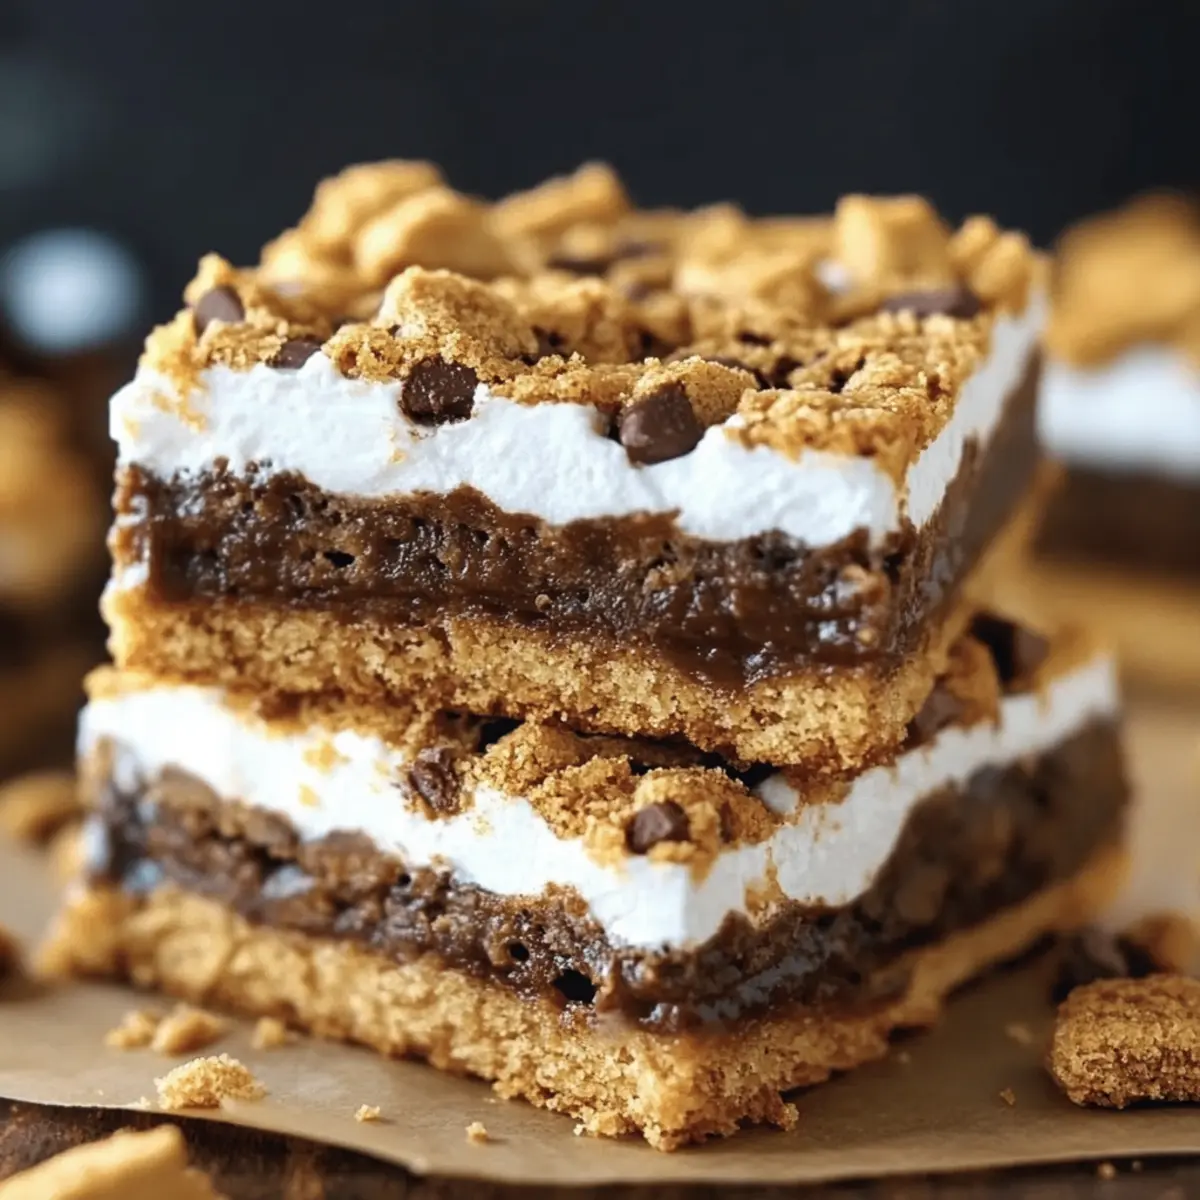
There’s something undeniably magical about the first bite of a homemade dessert that takes you right back to your childhood. These Easy S’mores Bars are my answer to those nostalgic cravings, blending the irresistible flavors of a campfire favorite into a simple yet delightful bar. With just 30 minutes of prep, you’ll be rewarded with a buttery graham cracker crust, melted Hershey chocolate, and gooey toasted marshmallows that’ll make any gathering feel like a celebration. Perfect for cozy evenings at home or picnics in the park, this dessert serves as a quick and enjoyable escape from the mundane. So, are you ready to whip up some sweet memories? Let’s dive into this easy s'mores bars recipe!
Why Are These S'mores Bars a Must-Try?
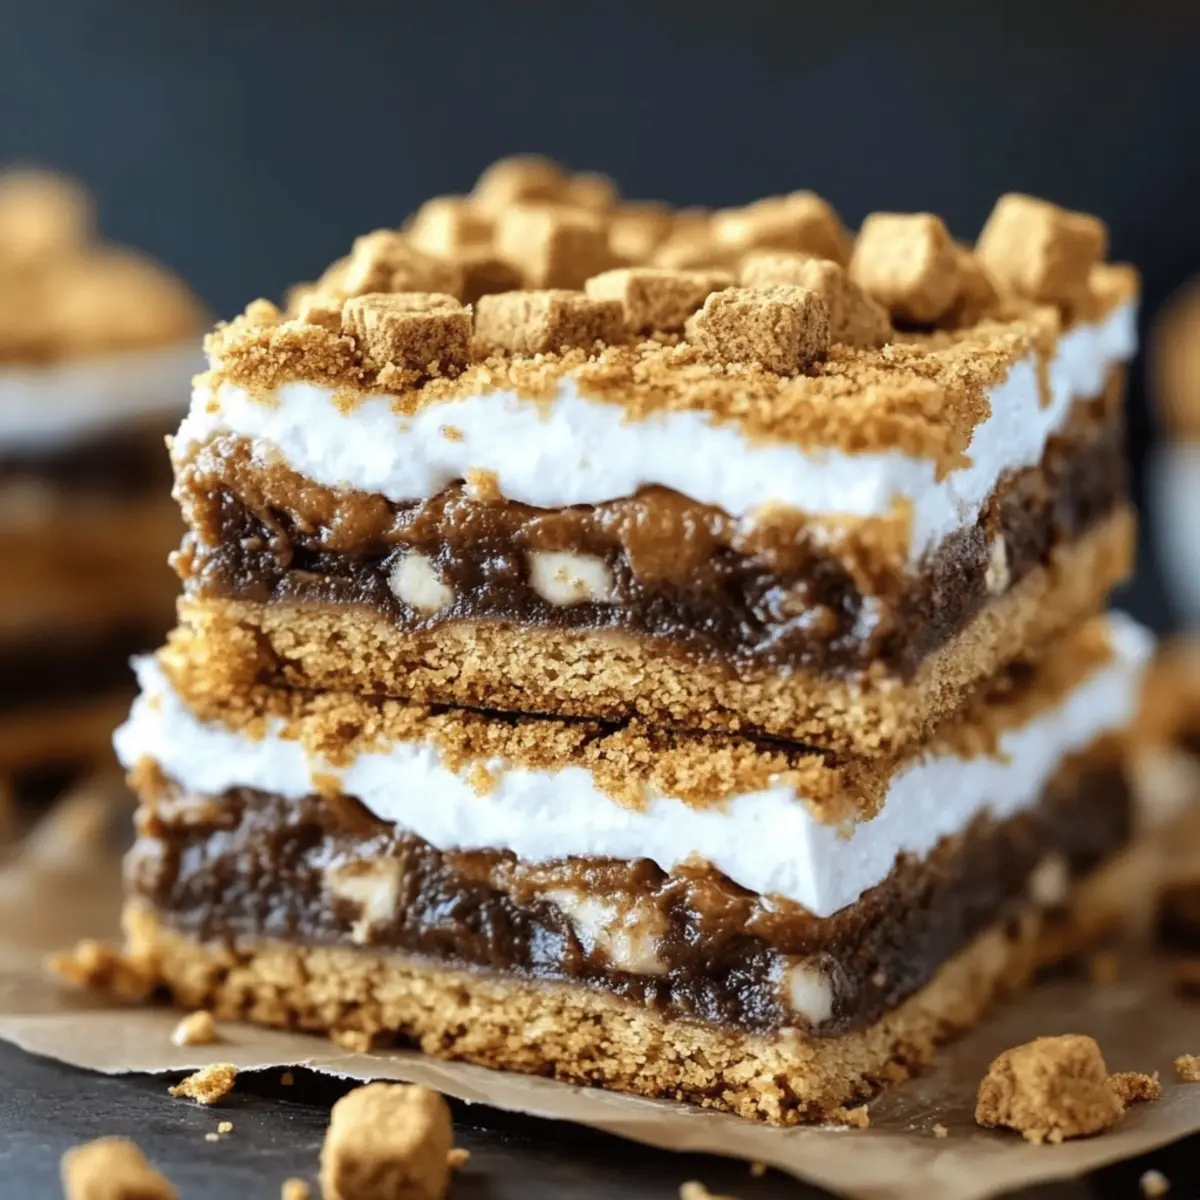
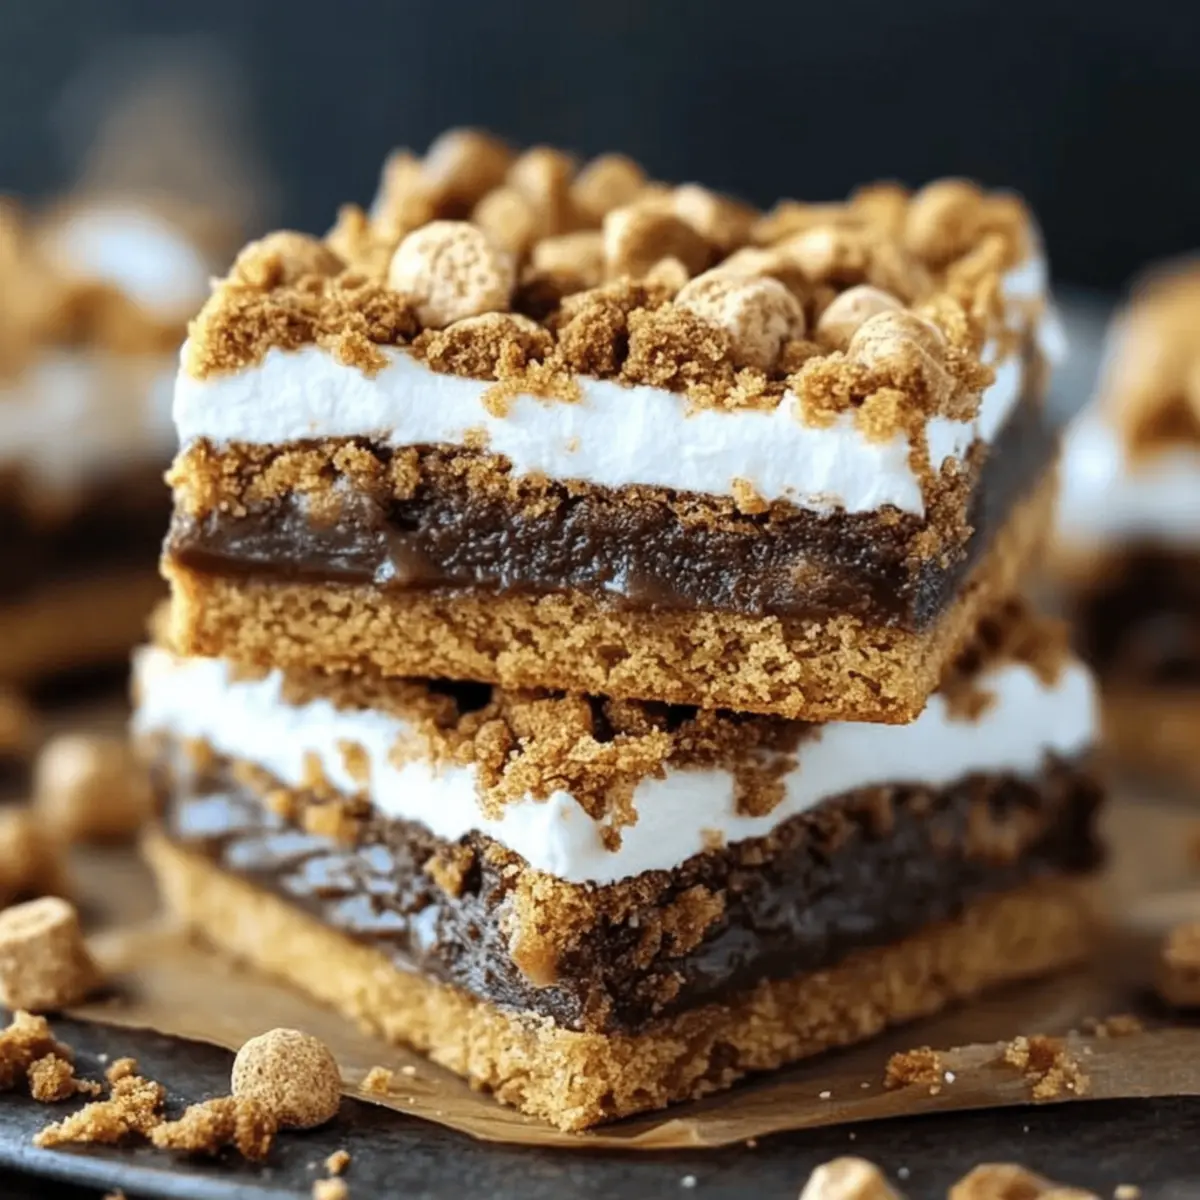
Irresistible flavor: These Easy S’mores Bars encapsulate the perfect blend of buttery graham cracker, rich chocolate, and gooey marshmallows—each bite transports you to a cozy campfire night.
Quick and simple: With just a 30-minute prep time, you can satisfy your dessert cravings without spending all day in the kitchen.
Versatile: Customize your bars with your favorite chocolate or unique toppings like caramel drizzle or nuts, making every batch a delightful surprise.
Crowd-pleaser: They're ideal for parties, family gatherings, or just a cozy evening at home. Pair them with ice cream for an extra indulgent treat!
Easy to store: Keep them fresh in an airtight container for a week—if they last that long! These bars are the perfect solution to your sweet tooth that also make for great homemade gifts.
S’mores Bars Ingredients
• Get ready to create your delicious S’mores Bars!
For the Crust
- Graham Cracker Crumbs – The backbone of the crust, providing that beloved crispy texture; ensure they are finely crushed for better binding.
- Butter (8-12 Tablespoons, melted) – This rich ingredient binds the crumbs together and enhances flavor; start with 10 tablespoons for the perfect consistency.
- Powdered Sugar (½ Cup) – Adds just the right amount of sweetness to balance the chocolate; without it, your bars could taste too rich.
For the Chocolate Layer
- Hershey Chocolate Bars (4 bars, ~4.4 ounces each) – Opt for full bars as they melt smoothly, creating a deliciously rich layer; chocolate chips won’t achieve the same melty magic.
For the Topping
- Mini Marshmallows (1 package) – The gooey top layer that browns beautifully, delivering that signature s’mores experience; pack them closely for optimal roasting.
Unleash your inner chef and savor the nostalgia of campfire treats in every bite of these delightful S’mores Bars!
Step‑by‑Step Instructions for Easy S’mores Bars
Step 1: Preheat Your Oven
Begin by preheating your oven to 350°F (175°C). This ensures that your baking environment is perfect for crafting your Easy S’mores Bars. While the oven heats up, gather your ingredients and baking equipment and get ready to create that irresistible graham cracker crust.
Step 2: Prepare Your Baking Pan
Next, grease a 9x13-inch baking pan generously with non-stick butter spray. This makes for easy removal and helps your Easy S’mores Bars maintain their shape. Make sure to cover all corners and edges thoroughly to avoid any sticking later.
Step 3: Mix the Crust Ingredients
In a medium bowl, combine the graham cracker crumbs, powdered sugar, and melted butter. Stir the mixture well until all the crumbs are evenly coated and crumbly. This combination will create the base for your S’mores Bars, providing the perfect structure and texture once baked.
Step 4: Shape the Crust
Using your fingers or the back of a spatula, press the crumb mixture evenly into the bottom and up the sides of the prepared pan. Ensure a firm and uniform layer, which is key for supporting the chocolate and marshmallow topping in your Easy S’mores Bars.
Step 5: Bake the Crust
Place the crust in the preheated oven and bake for 5-8 minutes. Keep an eye on it; you want the edges to be golden brown. This baking time allows the crust to harden slightly, making it a sturdy base for the delicious chocolate layer to come.
Step 6: Cool the Crust
Once baked, remove the pan from the oven and let the crust cool slightly for about 5 minutes. This brief cooling allows it to firm up further, ensuring that it will hold the layers of chocolate and marshmallows without getting soggy as you finish your Easy S’mores Bars.
Step 7: Add the Chocolate Layer
Unwrap the Hershey chocolate bars and place them evenly on top of the warm crust. Spread them out to cover the entire surface. The warmth of the crust will begin to melt the chocolate, creating a luscious layer that will tie together your S’mores Bars beautifully.
Step 8: Melt the Chocolate
Return the pan to the oven for about 3 minutes, just until the chocolate is shiny and begins to melt. Don’t worry about spreading the chocolate just yet; it will smooth out as it melts, setting the stage for your gooey topping.
Step 9: Add the Marshmallows
After the chocolate has melted, allow it to cool for 1-2 minutes. Then, take the mini marshmallows and pack them closely on top of the melted chocolate. This tight packing ensures that every bite of your Easy S’mores Bars is filled with that delightful gooey texture.
Step 10: Broil the Marshmallows
Switch your oven to broil, and carefully watch as the marshmallows brown. Broil for about 2 minutes, keeping a close eye to prevent burning. The marshmallows should turn a beautiful golden brown, giving your S’mores Bars that signature toasted flavor.
Step 11: Allow to Cool
Remove the pan from the oven and let your Easy S’mores Bars cool completely at room temperature. For an even firmer texture, consider refrigerating them for a short while. This cooling time is essential for slicing the bars neatly without them falling apart.
Step 12: Slice and Serve
Using a warmed sharp knife (to prevent sticking), cut the cooled S’mores Bars into squares or rectangles. Enjoy this sweet treat at your gatherings, or store them in an airtight container—if they last that long!
Expert Tips for Easy S’mores Bars
Non-Stick Assurance: Use a thin layer of non-stick spray on the pan to ensure your S’mores Bars release easily without breaking apart.
Watch the Broil: Keep a close eye while broiling the marshmallows; they can go from perfectly toasted to burnt in mere seconds.
Crust Consistency: Avoid overbaking the crust; remove it when edges are golden so it stays soft and chewy, balancing the texture with the gooey toppings.
Warmed Knife Trick: Warm your knife under hot water for easy cutting. This prevents sticking and helps achieve neat, clean slices of your delicious S’mores Bars.
Flavor Customization: Don’t hesitate to mix things up! Experiment with different chocolate types or add toppings like nuts or caramel to suit your taste.
S’mores Bars Variations & Substitutions
Feel free to get creative with these Easy S’mores Bars, adding your personal touch and flavor preferences to make them truly your own!
-
Nutty Twist: Sprinkle chopped nuts like pecans or almonds on top of the chocolate before adding marshmallows for added crunch and flavor.
-
Caramel Delight: Drizzle warm caramel sauce over the melted chocolate layer for a decadent addition that pairs perfectly with the sweet marshmallows.
-
Gluten-Free: Use gluten-free graham cracker crumbs or coconut flour to create a deliciously different crust that everyone can enjoy.
-
Chocolate Lover's: Swap Hershey chocolate bars for rich dark chocolate or assorted flavored bars—like mint chocolate or caramel-filled—for a gourmet twist.
-
Fruit Infusion: Layer thin slices of fresh strawberries or bananas on top of the chocolate before adding marshmallows, adding a delightful fruity flavor to every bite.
-
Coconut Dream: Mix shredded coconut into the graham cracker crust or sprinkle on top of the marshmallows for a tropical flavor that transports you to the beach.
-
Spiced Up: Add a sprinkle of cinnamon or a dash of cayenne pepper to the graham cracker crust for a warm, slightly spicy undertone that adds depth.
These variations ensure every batch can be uniquely yours, keeping dessert exciting and satisfying! If you want even more creative ideas, consider exploring other variations in our Nutty Chocolate Chip Cookies or spice up your collection with Decadent Brownies. Enjoy the journey of flavor!
What to Serve with Easy S’mores Bars
Indulging in Easy S’mores Bars creates a cozy and delightful atmosphere; complement this sweet treat with delicious pairings that elevate your dessert experience.
-
Vanilla Ice Cream: A scoop of creamy vanilla ice cream offers a refreshing contrast to the warm, gooey bars, enhancing their richness.
-
Fresh Berries: Juicy strawberries or raspberries add a pop of brightness and acidity, balancing the sweetness of the bars wonderfully.
-
Chocolate Drizzle: Drizzling melted chocolate over your S’mores Bars brings an extra layer of decadence and visual appeal, making every bite more tempting.
-
Hot Chocolate: A steaming mug of hot chocolate is a cozy companion, perfect for those cooler evenings when you're enjoying these delightful bars.
-
Caramel Sauce: Drizzled over the top, caramel sauce adds a lovely depth of flavor, creating a delicious blend of sweet notes that your guests will adore.
-
Whipped Cream: Light and airy whipped cream adds an elegant touch, softening the rich flavors of the bars while providing a creamy texture.
-
Nutty Trail Mix: Serve a small side of nutty trail mix to introduce a crunchy contrast, inviting your guests to enjoy a variety of textures with each bite.
-
Peppermint Tea: A calming cup of peppermint tea offers a refreshing palate cleanse after indulging in the bars, making it a perfect end to your meal.
Experience the joy of pairing flavors and textures, transforming each dessert moment into a cherished memory with friends and family!
How to Store and Freeze S’mores Bars
Room Temperature: Store your S’mores Bars in an airtight container at room temperature for up to 7 days, keeping them fresh and chewy.
Fridge: If you prefer a firmer texture, refrigerate the bars in an airtight container for up to a week. They'll stay delicious and easy to slice.
Freezer: For longer storage, freeze the S’mores Bars wrapped tightly in plastic wrap and aluminum foil for up to 2 months. Thaw in the fridge before enjoying.
Reheating: Warm individual bars in the microwave for 10-15 seconds for that fresh, gooey experience, just like when they were first made!
Make Ahead Options
These Easy S’mores Bars are perfect for meal prep enthusiasts! You can prepare the graham cracker crust up to 24 hours in advance, storing it tightly wrapped in plastic wrap at room temperature to maintain its crunch. Additionally, the chocolate layer can be prepped and spread on the crust a few hours ahead—just make sure to cover it with foil to keep it fresh. When you’re ready to serve, simply top the chilled chocolate with mini marshmallows and broil for about 2 minutes until golden brown. This approach not only saves you time but also ensures that your S’mores Bars remain just as delicious, making them a fantastic treat for busy weeknights!
Easy S’mores Bars Recipe FAQs
How do I choose the best graham crackers for the crust?
Absolutely! For the best results, look for graham crackers that are fresh and crispy. Check the package for any dark spots or damage, which may indicate age. The more finely you crush them, the more cohesive your crust will be, helping it hold together beautifully once baked.
What’s the best way to store my S’mores Bars?
To keep your S’mores Bars fresh, store them in an airtight container at room temperature for up to 7 days. If you prefer a firmer texture, you can refrigerate them for the same duration. Just make sure they are sealed well to prevent them from drying out!
Can I freeze S’mores Bars, and if so, how?
Yes, you can freeze your S’mores Bars! First, wrap them tightly in plastic wrap and then in aluminum foil to prevent freezer burn. They will stay delicious for up to 2 months. When you're ready to enjoy them, simply thaw in the fridge overnight for the best texture.
Why did my marshmallows burn while broiling?
Very! The broiling step can be tricky since marshmallows can quickly go from golden brown to burnt in seconds. I recommend keeping a close eye on them and setting a timer for 2 minutes so you can check frequently. If they begin to brown too fast, you can even turn off the broiler and leave them in the hot oven to finish toasting.
Are S’mores Bars safe for pets?
Unfortunately, S’mores Bars are not suitable for pets. Ingredients like chocolate and sugar pose potential health risks to animals. Always keep these sweet treats out of reach and share them only with fellow humans!
Can I make these S’mores Bars gluten-free?
Absolutely! To make gluten-free S’mores Bars, simply substitute traditional graham cracker crumbs with a gluten-free alternative. Many brands offer gluten-free graham crackers that will perform beautifully in this recipe without losing that beloved texture and flavor!
Irresistibly Easy S’mores Bars that Melt in Your Mouth
Ingredients
Equipment
Method
- Preheat your oven to 350°F (175°C).
- Grease a 9x13-inch baking pan generously with non-stick butter spray.
- In a medium bowl, combine the graham cracker crumbs, powdered sugar, and melted butter. Stir well.
- Press the crumb mixture evenly into the bottom and up the sides of the prepared pan.
- Place the crust in the preheated oven and bake for 5-8 minutes until golden brown.
- Once baked, remove the pan from the oven and let the crust cool slightly for about 5 minutes.
- Unwrap the Hershey chocolate bars and place them evenly on top of the warm crust.
- Return the pan to the oven for about 3 minutes, until the chocolate is shiny and begins to melt.
- Allow the chocolate to cool for 1-2 minutes, then pack the mini marshmallows closely on top.
- Switch your oven to broil, and broil the marshmallows for about 2 minutes until golden brown.
- Let the S’mores Bars cool completely at room temperature.
- Using a warmed knife, cut the cooled S’mores Bars into squares or rectangles.


Leave a Reply