
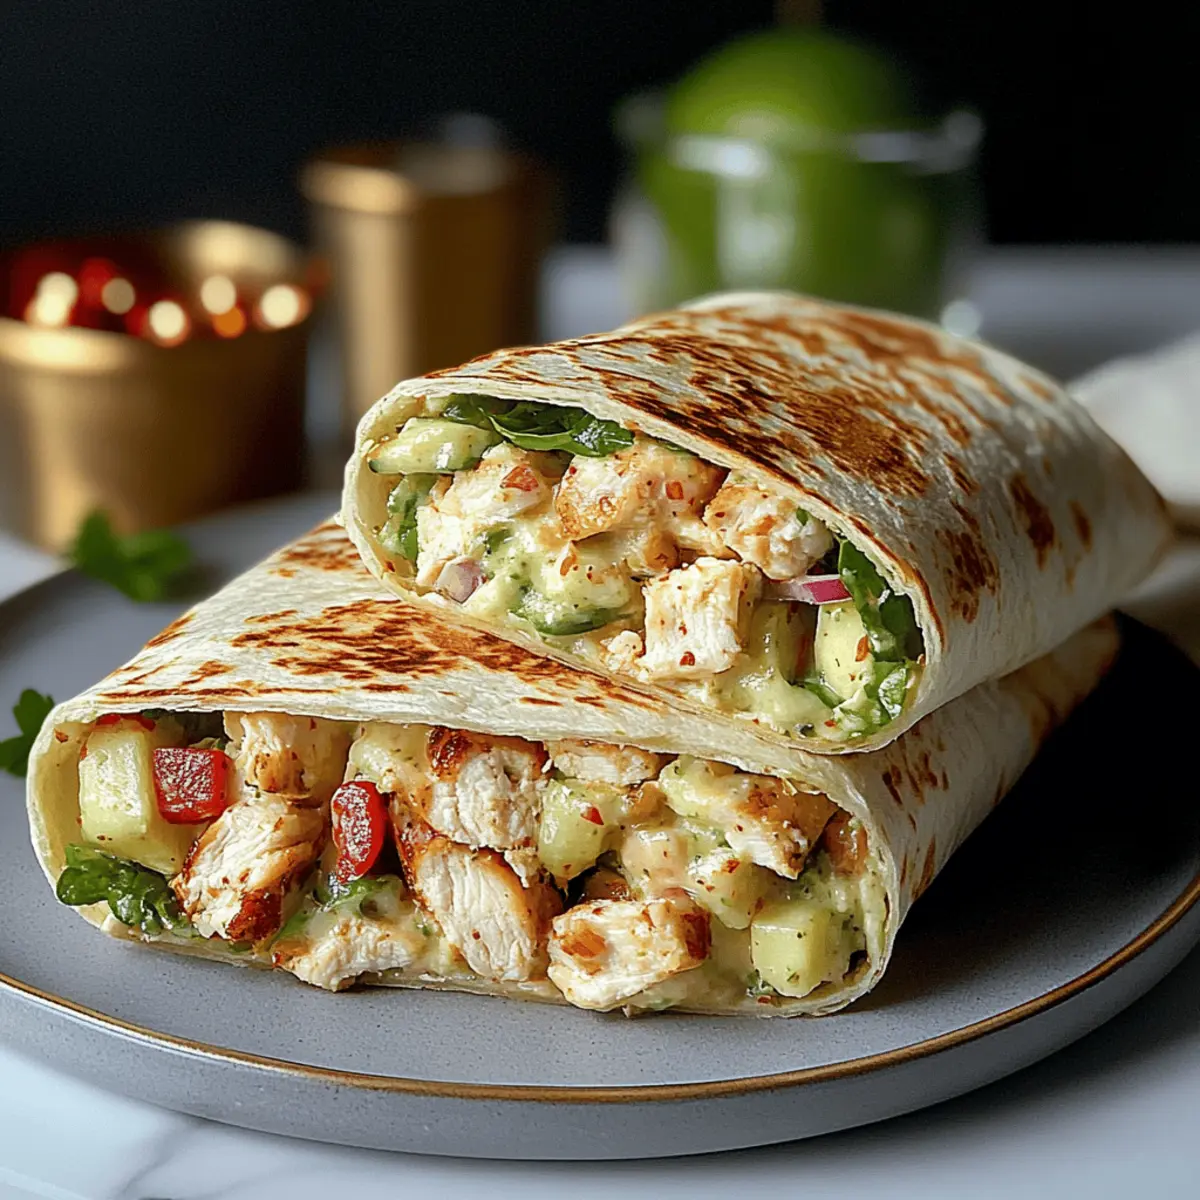
As I took a bite of my homemade Chicken Caesar Salad Wrap, I found myself transported to a sun-drenched patio, savoring every delicious layer of grilled chicken, crisp romaine, and creamy dressing, all wrapped up snugly in a soft tortilla. This easy-to-make wrap has become my go-to for a quick lunch or light dinner, and the best part? It’s incredibly customizable! Whether you prefer a whole wheat tortilla or want to elevate it with toppings like avocado or crispy bacon, there’s a version just waiting for your unique twist. It’s the perfect solution for anyone looking to swap out fast food for something fresh and vibrant. Curious about how to assemble this delightful wrap? Let’s dive in!
Why is this wrap a must-try?
Quick and Easy: This Chicken Caesar Salad Wrap comes together in no time, making it an ideal choice for busy days or spontaneous meals.
Endless Customization: Mix it up! Choose from whole wheat, gluten-free, or spinach wraps and add your favorite toppings like creamy avocado or crispy croutons.
Flavor Explosion: Each bite is a delightful balance of juicy grilled chicken, tangy dressing, and crunchy romaine, ensuring an irresistible taste experience.
Perfect for Any Meal: Whether packed for lunch, enjoyed as a light dinner, or shared at a picnic, these wraps easily fit any occasion.
Crowd-Pleaser: Even picky eaters will love these wraps, making them a hit for family dinners or gatherings. Want more tips on making your wraps exciting? Check out our guide on customizable lunch ideas.
Chicken Caesar Salad Wrap Ingredients
For the Chicken
- 1.5 lbs boneless, skinless chicken breasts – The main protein; swap with grilled tofu for a vegetarian delight.
- 1 tablespoon olive oil – Adds moisture while cooking; feel free to substitute with avocado oil.
- 1 teaspoon garlic powder – Boosts flavor; fresh minced garlic works beautifully, too.
- 1 teaspoon onion powder – Provides subtle depth; you can use fresh onions instead for a punchier flavor.
- ½ teaspoon paprika – Adds mild sweetness and color; try smoked paprika for an extra kick!
- ¼ teaspoon black pepper – Essential seasoning for balanced taste.
- ¼ teaspoon salt – Necessary for flavor enhancement.
For the Dressing
- ½ cup mayonnaise – Creamy base for the dressing; substitute with Greek yogurt for a lighter option.
- 2 tablespoons grated Parmesan cheese – Introduces savory notes; nutritional yeast is great as a vegan alternative.
- 1 tablespoon lemon juice – Brightens up the dressing; white vinegar can work if you're out of lemon.
- 1 teaspoon Dijon mustard – Adds a touch of tang; can be omitted for a milder taste.
- 1 clove garlic, minced – Fresh flavoring for an added kick.
- ¼ teaspoon Worcestershire sauce – Enhances umami flavor; soy sauce is perfect for a vegan swap.
- 1 tablespoon milk (or more, to thin) – Adjust dressings to your liking; plant-based milk works just as well.
For the Wrap
- 4 large flour tortillas (10-12 inch) – The base of your wrap; go for whole wheat or gluten-free tortillas if you prefer.
- 4 cups chopped romaine lettuce – Gives that refreshing crunch; mixed greens are a delightful substitute.
- ½ cup grated Parmesan cheese – Optional topping; feta is a delicious alternative if you want to mix things up.
- ½ cup croutons, coarsely crushed – Adds delightful crunch; crushed nuts are a perfect gluten-free swap.
Now that you have all your ingredients ready, let’s get assembling that delicious Chicken Caesar Salad Wrap!
Step‑by‑Step Instructions for Chicken Caesar Salad Wrap
Step 1: Prepare Chicken
Start by pounding the chicken breasts gently with a meat mallet to ensure they are of even thickness, about ½ inch. This guarantees even cooking. Lay them between two sheets of plastic wrap or use a zip-top bag to keep your workspace clean, making it easy to handle.
Step 2: Season Chicken
In a small bowl, mix together the olive oil, garlic powder, onion powder, paprika, black pepper, and salt. Rub this flavorful mixture all over the chicken breasts, ensuring they are well coated for a savory Chicken Caesar Salad Wrap. Let it marinate for at least 15 minutes to let the flavors meld.
Step 3: Cook Chicken
Preheat your grill to medium-high heat, about 375°F, or heat a skillet over medium. Grill or pan-fry the chicken breasts for 5-7 minutes on each side, or until they reach an internal temperature of 165°F and are nicely browned. You want them juicy and golden, a perfect addition to your wrap.
Step 4: Rest Chicken
Once cooked, transfer the chicken to a cutting board and allow it to rest for 5 minutes. This resting period helps retain the juices, making your chicken more flavorful and tender. While it rests, you can prepare the dressing.
Step 5: Slice Chicken
After resting, slice the chicken into thin strips, about ½ inch wide, ensuring easy layering in your Chicken Caesar Salad Wrap. The sliced chicken should be juicy and fragrant, ready to bring deliciousness to your wrap.
Step 6: Make Dressing
In a mixing bowl, whisk together the mayonnaise, grated Parmesan cheese, lemon juice, Dijon mustard, minced garlic, Worcestershire sauce, and black pepper until smooth. This creamy dressing binds all the flavors together, enhancing your Chicken Caesar Salad Wrap beautifully.
Step 7: Thin Dressing
Gradually add in the milk to the dressing, whisking continuously until you reach your desired consistency—creamy but pourable. You may need to adjust the amount of milk depending on how thick you prefer your dressing for the Chicken Caesar Salad Wrap.
Step 8: Chill Dressing
Cover and refrigerate the dressing for at least 30 minutes. Chilling not only enhances the flavors but also allows the ingredients to meld together, creating a deliciously tangy dressing that's perfect for drizzling over your wrap.
Step 9: Warm Tortillas (optional)
To make wrapping easier, warm the tortillas slightly. You can either pop them in a skillet for a few seconds or microwave them for 15-20 seconds. Warm tortillas become pliable and make assembling your Chicken Caesar Salad Wrap a breeze.
Step 10: Assemble Wraps
Lay a warm tortilla flat and begin layering with 1 cup of chopped romaine lettuce at the center, followed by sliced chicken strips. Drizzle generously with the creamy dressing and sprinkle more Parmesan cheese and croutons for crunch.
Step 11: Wrap
To roll your Chicken Caesar Salad Wrap, fold in the sides, then tightly roll from the bottom up to secure all the delicious fillings inside. This method helps keep everything in place while you enjoy your tasty creation.
Step 12: Serve
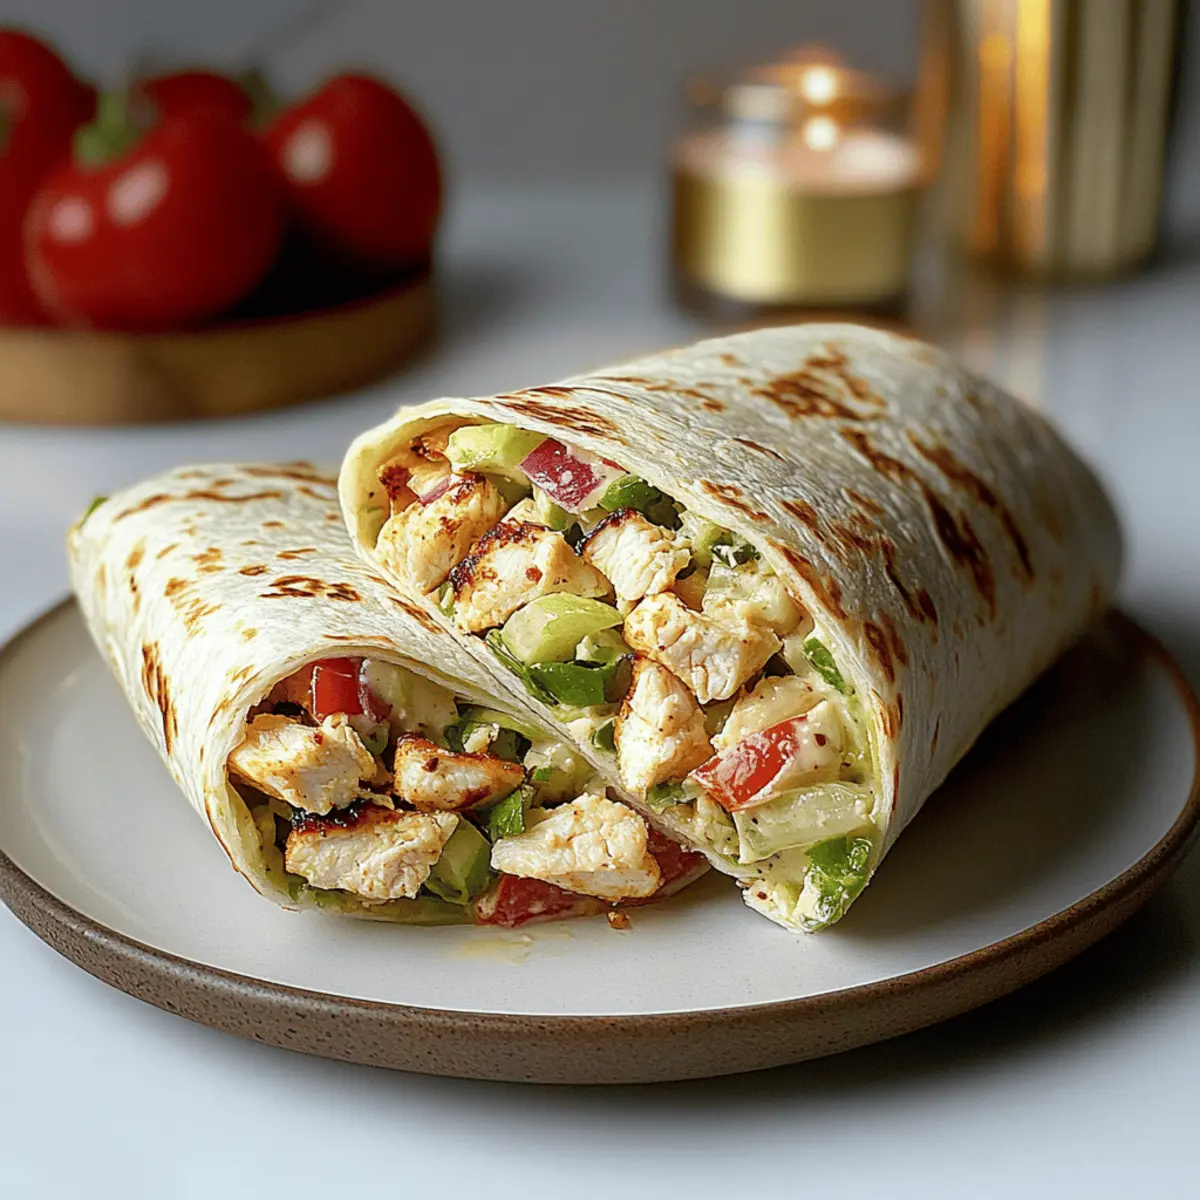
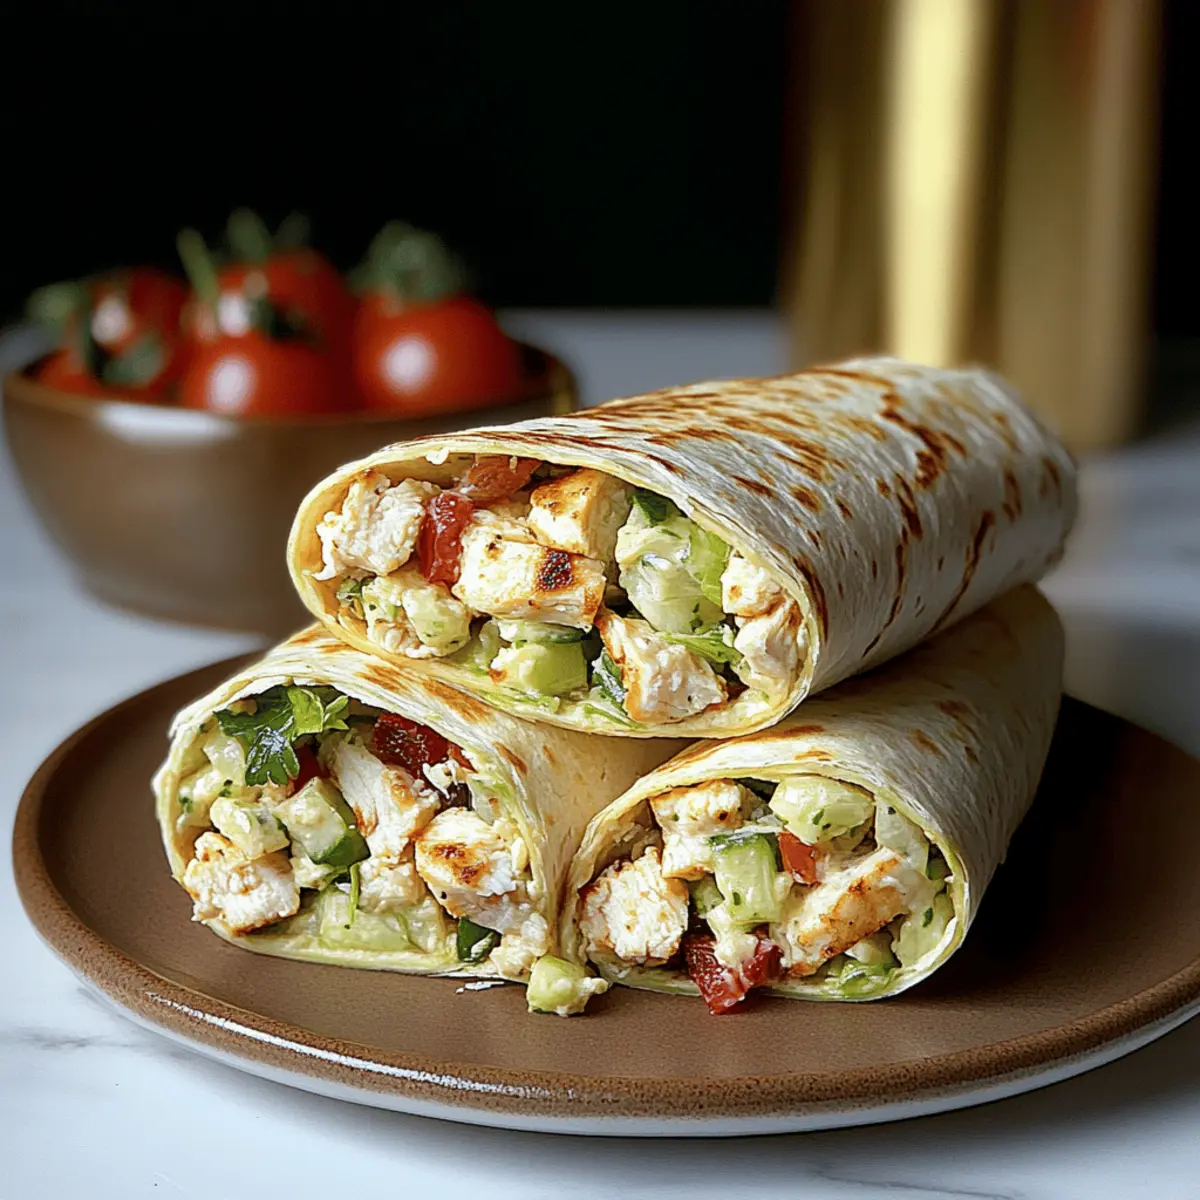
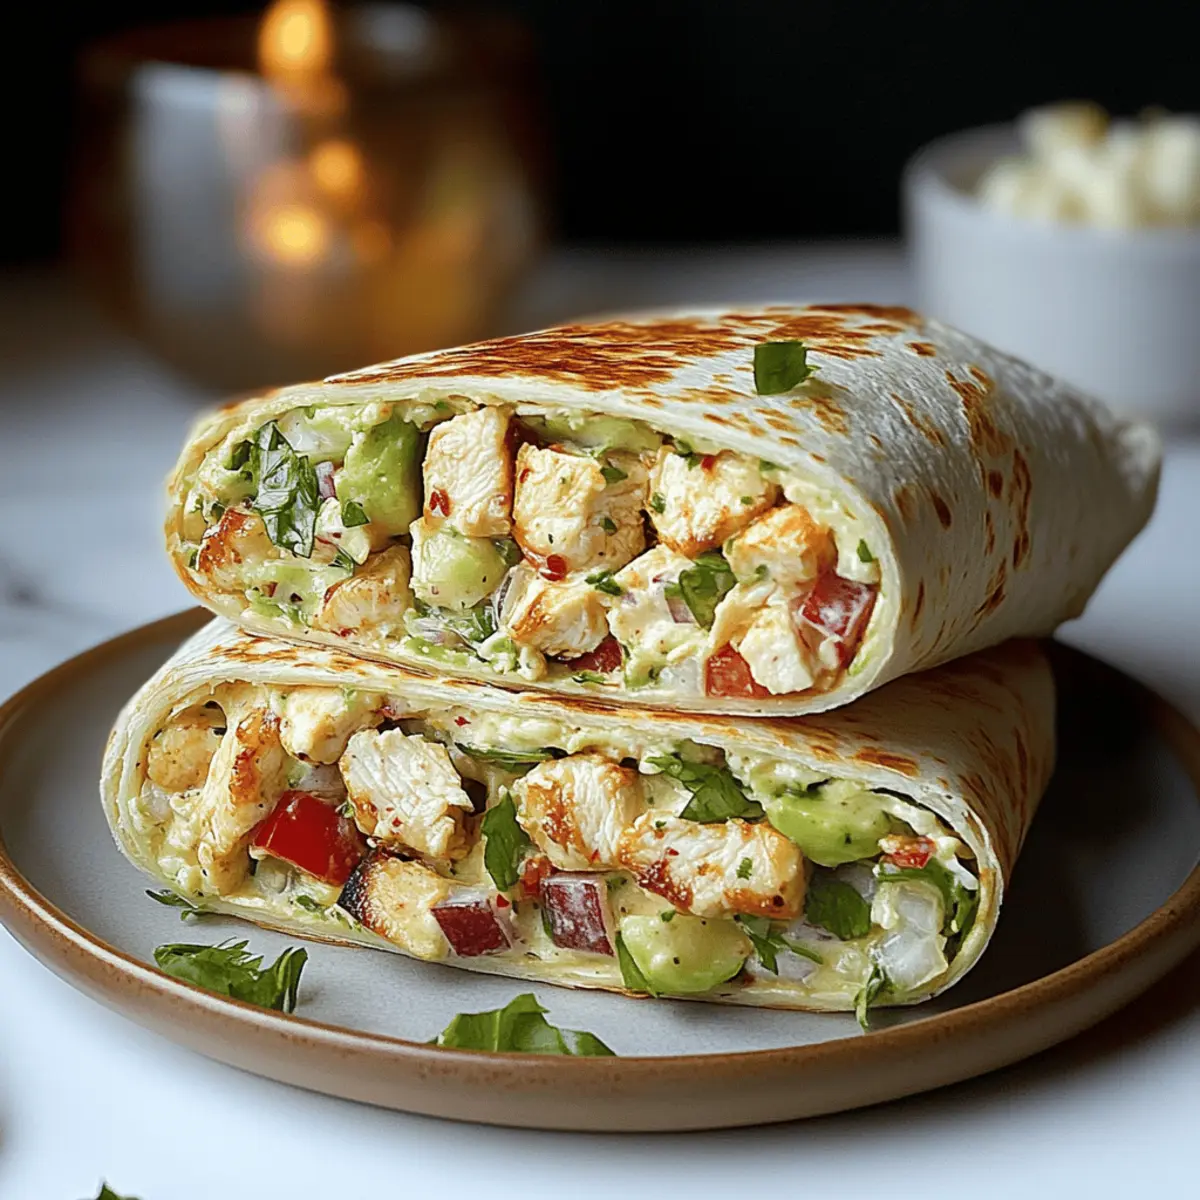
Slice the wrap in half diagonally if desired, showcasing the colorful layers within. Serve immediately to enjoy the delightful textures and flavors, savoring every bite of your homemade Chicken Caesar Salad Wrap!
Chicken Caesar Salad Wrap Variations
Feel free to let your creativity shine as you customize your Chicken Caesar Salad Wrap with these delightful ideas!
-
Whole Wheat: Use whole wheat tortillas for a nutty flavor and added fiber, making your meal a bit heartier.
-
Gluten-Free: Choose gluten-free tortillas or lettuce wraps for a satisfying meal without the gluten, perfect for those with dietary restrictions.
-
Creamy Avocado: Slice ripe avocado into the wrap for a creamy texture that pairs beautifully with the tangy dressing.
-
Crispy Bacon: Crumble crispy bacon for a smoky, savory touch that elevates the classic flavors of your chicken Caesar.
-
Roasted Chickpeas: Substitute croutons with roasted chickpeas for a crunchy, protein-packed twist that adds a nutty flavor.
-
Spicy Kick: Add sliced jalapeños or a dash of hot sauce to bring some heat, making every bite a flavor explosion!
-
Extra Veggies: Boost the nutrition by adding bell peppers or cucumbers for refreshing crunch, enhancing both flavor and texture.
-
Different Cheeses: Try using feta or goat cheese instead of Parmesan for a unique twist that will surprise your taste buds.
These variations are just the beginning of your delicious journey! Explore more ideas to make your wraps even more exciting with customizable lunch ideas or discover ways to personalize your meals with creative topping combinations. Enjoy the delightful process of making this classic dish uniquely yours!
How to Store and Freeze Chicken Caesar Salad Wrap
Fridge: Keep assembled Chicken Caesar Salad Wraps in an airtight container for up to 2 days. It’s best to store the dressing separately to prevent sogginess.
Freezer: If you need to save some wraps, individually wrap them in plastic wrap and then place them in a freezer-safe bag for up to 3 months.
Reheating: Thaw overnight in the fridge, then warm in a skillet or microwave until heated through. Be sure to add fresh toppings to keep them vibrant!
Meal Prep: For easy lunches, prepare the chicken and dressing ahead of time. Store separately in the fridge and assemble the Chicken Caesar Salad Wrap when ready to eat.
What to Serve with Chicken Caesar Salad Wrap
Elevate your meal with delightful sides and accompaniments that complement every flavor-packed bite of this wrap.
- Sweet Potato Fries: Perfectly crispy, they add a sweet and savory contrast to the creamy wrap that’s simply irresistible.
- Mixed Green Salad: A fresh salad with vibrant veggies introduces a lovely crunch and brightness, balancing the richness of the wrap.
- Chilled Gazpacho: This refreshing cold soup pairs beautifully, offering a zesty kick that awakens the palate alongside the wrap.
- Fruit Skewers: Juicy, colorful fruit adds a touch of natural sweetness and bursts of flavor, creating a cheerful and uplifting complement.
- Crispy Onion Rings: Their crunchiness and flavor harmony create a delightful treat that works wonderfully with the savory chicken wrap.
- Lemonade: A tall glass of this refreshing drink provides a zesty contrast, brightening each savory bite and quenching your thirst.
- Tzatziki Dip: Cool, creamy, and tangy, this yogurt-based dip can be served with pita chips for a fun appetizer before diving into the wrap.
- Chocolate Chip Cookies: For a sweet ending, classic cookies offer a comforting treat, rounding off your meal on a deliciously happy note!
Expert Tips for Chicken Caesar Salad Wrap
- Cook Chicken Properly: Ensure the chicken reaches an internal temperature of 165°F. This not only ensures safety but keeps the meat juicy and flavorful.
- Let it Rest: Always allow the chicken to rest after cooking. This step helps retain moisture, preventing dry bites in your Chicken Caesar Salad Wrap.
- Customize Wisely: Feel free to swap in various toppings or wraps. However, be careful not to overload your wrap, which can make it difficult to eat!
- Chill Dressing: Don't skip chilling the dressing for at least 30 minutes. This enhances the flavors, making the dressing even more delicious.
- Warm Tortillas: Warm your tortillas before assembling. It makes them more pliable, allowing for easier wrapping and better flavor absorption.
Make Ahead Options
These Chicken Caesar Salad Wraps are ideal for busy home cooks looking to save time without sacrificing flavor! You can grill and slice the chicken up to 3 days in advance, storing it in an airtight container in the fridge to keep it fresh and juicy. Additionally, the creamy dressing can be made ahead and refrigerated for up to 5 days; just give it a quick stir before serving to restore its texture. For assembly, layer the chilled chicken, lettuce, and dressing just before wrapping to ensure freshness. Keeping the wraps and dressing separate until ready to enjoy maintains that delightful crunch and prevents sogginess, giving you a delicious meal in no time!
Chicken Caesar Salad Wrap Recipe FAQs
How do I choose ripe ingredients for my Chicken Caesar Salad Wrap?
Absolutely! For the best Chicken Caesar Salad Wrap, look for chicken that is free of any dark spots and feels firm to the touch. Your romaine lettuce should be crisp with vibrant green leaves, avoiding any wilting. If you're using avocado, pick ones that yield slightly to gentle pressure but aren’t overly soft or bruised.
What is the best way to store my Chicken Caesar Salad Wrap?
Very good question! Store your assembled Chicken Caesar Salad Wrap in an airtight container in the fridge for up to 2 days. To maintain the freshness of the ingredients, keep the dressing separate until you’re ready to enjoy it. This will prevent the wrap from getting soggy and keep all the delightful textures intact.
Can I freeze my Chicken Caesar Salad Wraps?
Absolutely! To freeze, wrap each Chicken Caesar Salad Wrap individually in plastic wrap, then place them in a freezer-safe bag. They can be kept frozen for up to 3 months. When you’re ready to enjoy one, simply thaw it in the fridge overnight, then heat in the microwave or skillet until warmed through. Fresh toppings can be added afterward for extra flair!
What should I do if my Chicken Caesar Salad Wrap turns out soggy?
If your wraps are soggy, it’s often because the dressing has soaked into the tortillas. To troubleshoot this, make sure to store the dressing separately and add it just before eating. You can also try toasting your tortillas briefly in a skillet before assembly; this helps create a barrier that keeps moisture from causing sogginess!
Are there any dietary considerations with this recipe for pets or allergies?
Very much so! If you’re making Chicken Caesar Salad Wraps for someone with allergies, be sure to check for any sensitivities to common ingredients like chicken, wheat (if using regular tortillas), and dairy (in the cheese and dressing). For pets, it’s best to avoid sharing the dressing due to ingredients like garlic and onion that can be harmful to them. Always opt for simple, plain chicken and veggies if you want to share a small bite with your furry friend.
How can I increase the nutritional value of my Chicken Caesar Salad Wrap?
Wonderful question! You can boost the nutritional profile by adding extra veggies like bell peppers, cucumbers, or even swapping out the tortillas for whole grain or lettuce wraps. This way, you not only enhance the flavor but also add a splash of color and fiber, making your Chicken Caesar Salad Wrap more wholesome and satisfying!
Savory Chicken Caesar Salad Wraps for Easy Lunch Bliss
Ingredients
Equipment
Method
- Prepare Chicken: Pound the chicken breasts gently with a meat mallet to ensure even thickness, about ½ inch.
- Season Chicken: Mix together olive oil, garlic powder, onion powder, paprika, black pepper, and salt. Rub this on the chicken breasts and let marinate for at least 15 minutes.
- Cook Chicken: Preheat your grill or skillet over medium heat. Grill or pan-fry the chicken for 5-7 minutes on each side until cooked through.
- Rest Chicken: Allow the chicken to rest for 5 minutes on a cutting board.
- Slice Chicken: Slice the chicken into thin strips, about ½ inch wide.
- Make Dressing: Whisk together mayonnaise, grated Parmesan, lemon juice, Dijon mustard, minced garlic, Worcestershire sauce, and pepper until smooth.
- Thin Dressing: Gradually add milk, whisking until desired consistency is achieved.
- Chill Dressing: Refrigerate the dressing for at least 30 minutes.
- Warm Tortillas (optional): Warm the tortillas slightly to make them pliable.
- Assemble Wraps: Layer chopped romaine, sliced chicken, creamy dressing, Parmesan cheese, and croutons on a tortilla.
- Wrap: Fold in the sides and roll from the bottom up to secure fillings.
- Serve: Slice the wrap in half diagonally and serve immediately.


Leave a Reply