
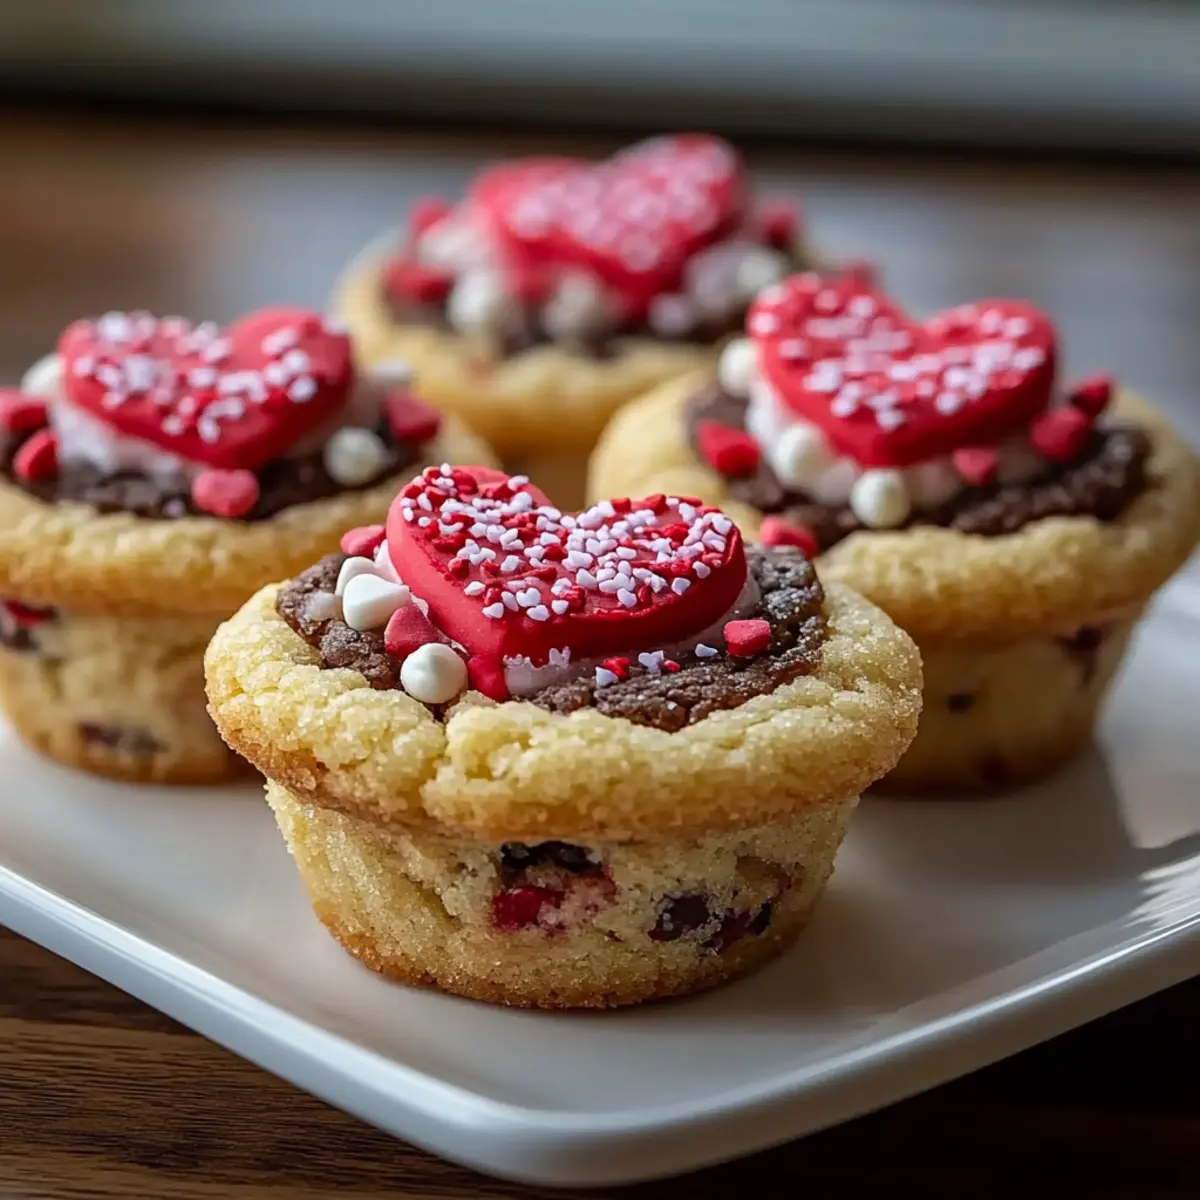
Before I even grab the ingredients, the aroma of freshly baked cookies fills my kitchen, casting a warm, inviting spell. There's something truly magical about baking, especially when it comes to creating delightful treats like these Valentine's Day Cookie Cups. Imagine sinking your teeth into a soft, chewy exterior only to discover a creamy Hershey's hug nestled inside; it’s the kind of surprise that melts hearts (and taste buds!). The best part? This recipe is as quick as it is delicious, making it a perfect choice for any busy home-chef eager to whip up something special without spending hours slaving away in the kitchen. Whether you're treating yourself or surprising a loved one, these cookie cups are bound to be a showstopper. Curious about how to bring this little piece of sweetness to life? Let’s dive in!

Why are these Cookie Cups Perfect?
Easy to Make: You’ll love how simple this recipe is—just a few ingredients combined in no time!
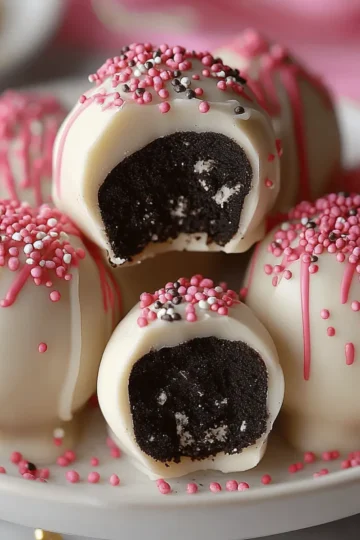
Delicious Surprise: Each cookie cup contains a creamy Hershey's hug that creates a delightful taste sensation.
Visually Stunning: With a pop of color from food coloring and sprinkles, these treats are sure to impress at any gathering.
Ideal for Sharing: Perfect for parties or romantic dinners, these cookie cups are great for sharing with family and friends, enhancing any celebration.
Make-Ahead Option: Prep the dough in advance for a quick baking session later—great for those busy days! Indulge in this dessert anytime, and you might also enjoy our Nutella Stuffed Cupcakes for another sweet twist.
Valentine's Day Cookie Cups Ingredients
• Get ready to create some sweet magic!
For the Cookie Cups
- Sugar Cookie Mix – Base for the cookie cups, providing sweetness and structure; can use homemade sugar cookie dough if preferred.
- Butter (melted) – Adds richness and moisture; some recipes may replace with coconut oil for a dairy-free option.
- All-Purpose Flour – Helps with dough structure; balances the sugar cookie mix—could use gluten-free flour blend for gluten-sensitive versions.
- Large Egg – Binds ingredients together, adding moisture; no substitutions recommended for binding purpose.
- Food Coloring (pink/red) – Enhances the festive appearance; opt for gel food coloring for more vibrant shades.
For the Filling
- Hershey's Hugs – Provides a creamy surprise filling; any chocolate candy that melts well can be used as a substitution.
Add a touch of sweetness to your baking with these cheerful Valentine's Day Cookie Cups!
Step‑by‑Step Instructions for Valentine's Day Cookie Cups
Step 1: Preheat the Oven
Start by preheating your oven to 350°F (177°C) to prepare for baking these delightful Valentine’s Day Cookie Cups. While your oven heats, grab a mini cupcake pan and spray it generously with cooking spray. This will ensure your cookie cups release easily after baking, so they maintain their perfect shape and texture.
Step 2: Mix the Dough
In a large mixing bowl, combine the sugar cookie mix, melted butter, all-purpose flour, large egg, and a few drops of food coloring. Stir the ingredients together using a spatula until just combined, being careful not to overmix. The dough should be moist and slightly sticky. This mixture creates the delicious base for your cookie cups, so ensure it’s evenly blended.
Step 3: Form the Dough Balls
Take approximately 1 tablespoon of the cookie dough and flatten it into a small disc in your palm. Place an unwrapped Hershey's hug in the center of the disc and gently wrap the dough around the chocolate to form a ball. It’s important the dough fully encases the candy to prevent leaks during baking. Repeat this process until you have used up all the dough.
Step 4: Fill the Muffin Pan
Carefully place each dough ball into the prepared mini cupcake pan cavity, making sure they are evenly spaced. The pan should be filled to about three-quarters full, allowing some room for the cookie cups to expand as they bake. This step is crucial for achieving the perfect shape and texture of your Valentine’s Day Cookie Cups.
Step 5: Bake the Cookie Cups
Once your muffin pan is full, slide it into the preheated oven and bake for 10-12 minutes. Keep an eye on them; the edges should be set while the centers remain soft and slightly puffy. This will create a chewy texture that contrasts beautifully with the creamy hug inside.
Step 6: Cool and Decorate
When the cookie cups are done, remove them from the oven and immediately sprinkle decorative sprinkles on top for a festive look. Allow them to cool in the pan for about 15 minutes; this helps them firm up while ensuring that the Hershey's hugs keep their gooey texture. Once cooled, gently remove them from the pan and they’re ready to serve.
Expert Tips for Valentine's Day Cookie Cups
-
Prep Ahead: Mix your dough up to 24 hours in advance and refrigerate it for an easy last-minute bake.
-
Avoid Leaks: Make sure the cookie dough fully envelops the Hershey's hugs to prevent leaking during baking.
-
Baking Time: If using a standard muffin tin instead of a mini one, be mindful to adjust the baking time accordingly to avoid overbaking.
-
Double the Batch: Plan to make a double batch of these Valentine's Day Cookie Cups, as they tend to vanish quickly at parties!
-
Storage Savvy: Keep cooled cookie cups in an airtight container for freshness, and freeze for up to two months if you want to enjoy them later.
Valentine's Day Cookie Cups Variations
Feel free to personalize these delightful cookie cups to your taste or dietary needs and make them uniquely yours!
-
Peanut Butter Cups: Swap Hershey's hugs for mini peanut butter cups for a nutty surprise that adds a delicious twist. Enjoy the rich flavor that pairs beautifully with cookie dough.
-
Coconut Bliss: Replace butter with coconut oil and add shredded coconut into the dough for a tropical flavor. The chewy texture makes it an enjoyable treat that beach lovers will adore.
-
Gluten-Free: For a gluten-sensitive option, sub in your favorite gluten-free flour blend in place of the all-purpose flour. These cookie cups will still be soft, sweet, and satisfying!
-
Spicy Kick: Mix in a pinch of cayenne or chili powder into the dough for a surprising hint of heat. This will bring out an unexpected depth of flavor for those who love a little adventure!
-
Chocolate Lovers: Use dark chocolate kisses or caramel-filled chocolates instead of Hershey's hugs. This richer filling is perfect for those who crave something more decadent.
-
Seasonal Sprinkles: Instead of standard festive sprinkles, get creative with seasonal themed sprinkles or edible glitter. Your cookie cups can easily transition from Valentine’s Day to any festive occasion!
-
Aquatic Flavor: Infuse the dough with a few drops of almond extract for a delightful twist. It adds a warm, nutty flavor that pairs wonderfully with the sweetness of chocolate.
-
Cookie Dough Center: For a fun twist, place a small ball of cookie dough in the center instead of chocolate. It’s a delicious surprise that cookie dough lovers won’t be able to resist, offering a creamy and indulgent experience.
Each variation opens up a world of possibilities for delightful cookie cups to share with loved ones. If you’re looking for more treat inspirations, try our Nutella Stuffed Cupcakes for another sweet option!
What to Serve with Valentine's Day Cookie Cups
Indulging in these delightful treats is just the beginning; let’s create a complete experience to warm your heart and satisfy your cravings.
- Vanilla Ice Cream: A scoop of creamy vanilla ice cream balances the sweetness of the cookie cups and adds a delightful contrast to the warm cookies.
- Chocolate Milkshake: Rich and indulgent, a chocolate milkshake complements the cookie cups perfectly, enhancing the chocolatey experience.
- Fresh Strawberries: Juicy strawberries offer a refreshing and tart contrast to the sweetness; their bright color adds a lovely touch to your dessert table.
- Whipped Cream Topping: Light and airy, a dollop of whipped cream elevates your cookie cups, making them even more irresistible.
- Espresso or Coffee: The bold flavors of coffee create a wonderful balance and add depth to the sweet cookie cups, perfect for any coffee lover.
- Sparkling Fruit Punch: A fruity, sparkling drink is a festive pair, adding a touch of celebration to your dessert experience.
- Mini Cheesecakes: These small, creamy delights provide a different texture and flavor profile, making for a delightful dessert trio with the cookie cups.
- Chocolate-Covered Pretzels: The salty-sweet flavor of chocolate-covered pretzels adds crunch and a touch of game to your sweet spread.
Each pairing enhances the joy of your Valentine's Day Cookie Cups, transforming a simple dessert into a memorable celebration!
Make Ahead Options
These Valentine's Day Cookie Cups are an excellent choice for meal prep, saving you precious time on that special day! You can prepare the cookie dough up to 24 hours in advance by mixing the ingredients and refrigerating the dough in an airtight container. This not only preserves the quality but also prevents the dough from drying out. When you're ready to bake, simply scoop the chilled dough, wrap around the Hershey's hugs, and follow the baking instructions as you normally would. For extra convenience, you can even bake the cookie cups ahead of time and store them in an airtight container for up to 3 days. Just reheat in the oven for a few minutes before serving to bring back that delightful warmth and gooey center!
Storage Tips for Valentine's Day Cookie Cups
- Room Temperature: Store your cooled cookie cups in an airtight container at room temperature for up to 3 days to maintain freshness and softness.
- Fridge: If you prefer your cookie cups slightly chilled, place them in the refrigerator in an airtight container, where they can stay fresh for up to a week.
- Freezer: For longer storage, freeze cooled Valentine's Day Cookie Cups in an airtight container for up to 2 months. Allow them to thaw at room temperature before serving for the best texture.
- Reheating: To reheat, place cookie cups in the microwave for about 10-15 seconds, ensuring the Hershey's hug inside remains gooey and delicious.

Valentine's Day Cookie Cups Recipe FAQs
What kind of sugar cookie mix should I use?
You can use any pre-packaged sugar cookie mix you prefer, as it provides a sweet and sturdy base for the cookie cups. If you’re up for it, I highly recommend making your own sugar cookie dough for a fresher, homemade taste!
How should I store the cookie cups?
Cooled cookie cups can be stored in an airtight container at room temperature for up to 3 days. If you’d like to keep them longer, it’s best to refrigerate them for up to a week or freeze them for up to 2 months.
Can I freeze these cookie cups?
Absolutely! To freeze, first allow the cookie cups to cool completely. Then, place them in an airtight container or freezer-safe bag, separating layers with parchment paper to prevent sticking. When you're ready to enjoy, simply thaw them at room temperature for the best texture.
What if the cookie dough is too sticky?
If you find your cookie dough is sticking excessively, try adding a little extra flour, about 1 tablespoon at a time, until you reach a workable consistency. Also, refrigerating the dough for about 30 minutes can help firm it up before shaping.
Are there any allergy considerations for this recipe?
Yes, this recipe does include common allergens like eggs and gluten from the flour. For a gluten-free version, you can substitute with a gluten-free flour blend. If someone has a dairy allergy, melted coconut oil is a great alternative to butter.
Can pets eat the cookie cups?
While the cookie cups are safe for humans, it's best to keep them away from pets, especially because chocolate can be toxic to dogs and cats. Always keep any baked goods intended for humans safely out of reach!

Indulgent Valentine's Day Cookie Cups for Sweethearts
Ingredients
Equipment
Method
- Preheat your oven to 350°F (177°C) and spray a mini cupcake pan with cooking spray.
- In a large mixing bowl, combine the sugar cookie mix, melted butter, all-purpose flour, large egg, and food coloring. Stir until just combined.
- Take about 1 tablespoon of dough, flatten it, place an unwrapped Hershey's hug in the center, and wrap the dough around it to form a ball.
- Place each dough ball into the prepared mini cupcake pan, filling them about three-quarters full.
- Bake for 10-12 minutes until the edges are set and centers are slightly puffy.
- Remove from the oven, sprinkle decorative sprinkles on top, and allow to cool in the pan for about 15 minutes.
Leave a Reply