
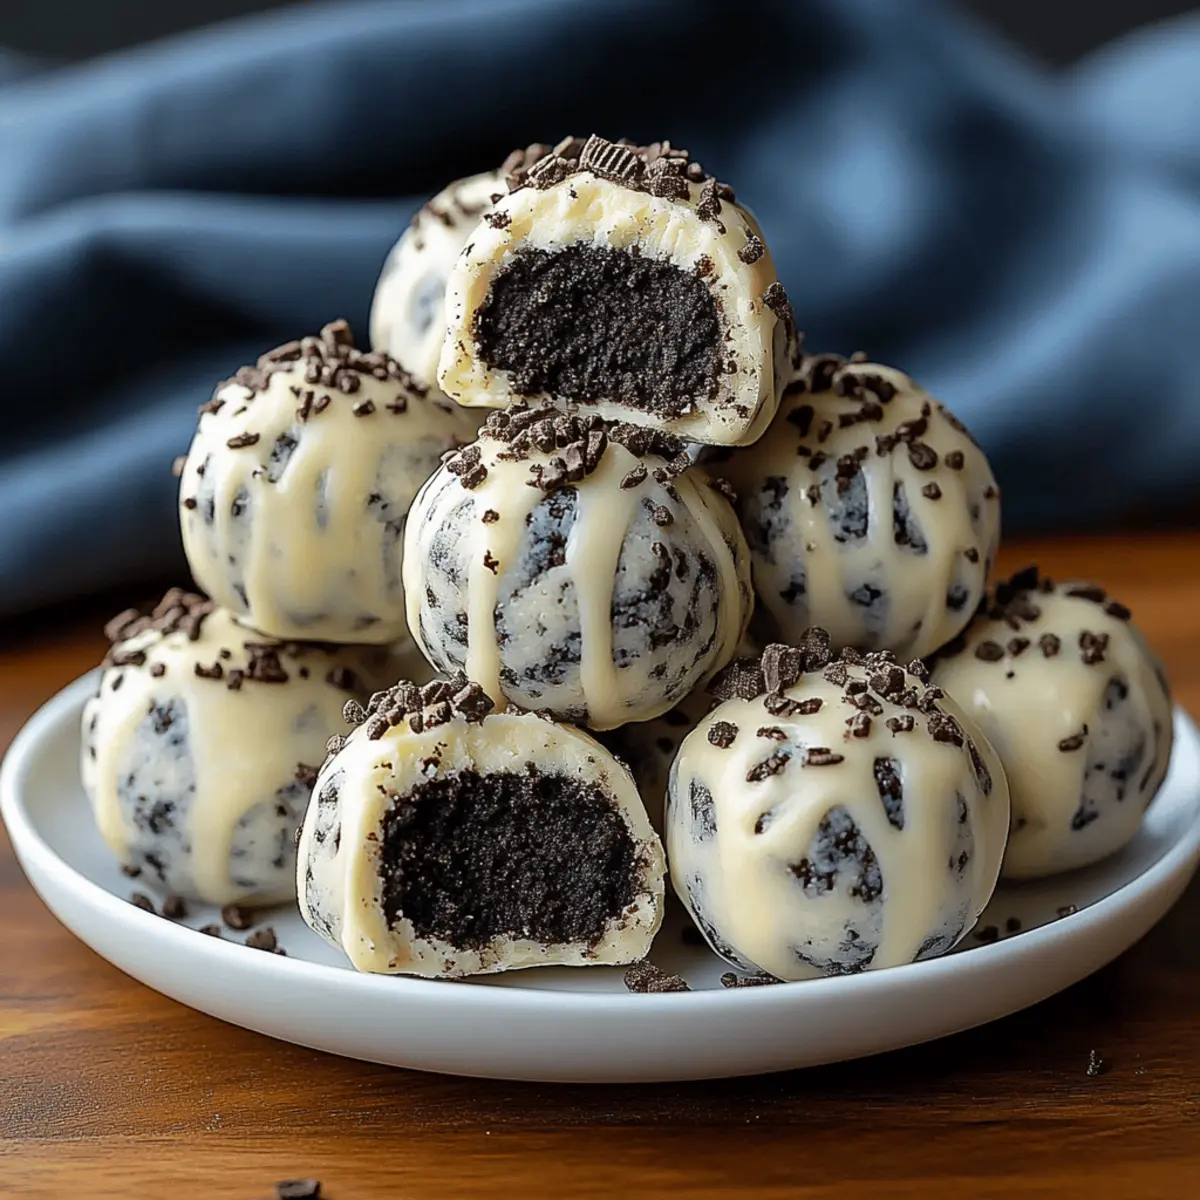
The aroma of freshly crushed Oreos fills the kitchen, whisking me back to carefree afternoons and sweet indulgences. These Cream Cheese Oreo Protein Balls are a delightful fusion of nostalgia and nutrition, perfect for satisfying cravings without the guilt. Packed with protein and boasting a creamy, dreamy texture, this no-bake treat becomes your go-to snack for busy days or post-workout boosts. Not only are they incredibly quick to prepare—taking just minutes to whip up—but they also invite customization, catering to dietary preferences with ease. Whether you’re a dedicated vegetarian or exploring vegan options, I promise these bites will keep your sweet tooth at bay while fueling your day. What flavors or toppings will you experiment with? Let's dive into the recipe!
Why make Cream Cheese Oreo Protein Balls?
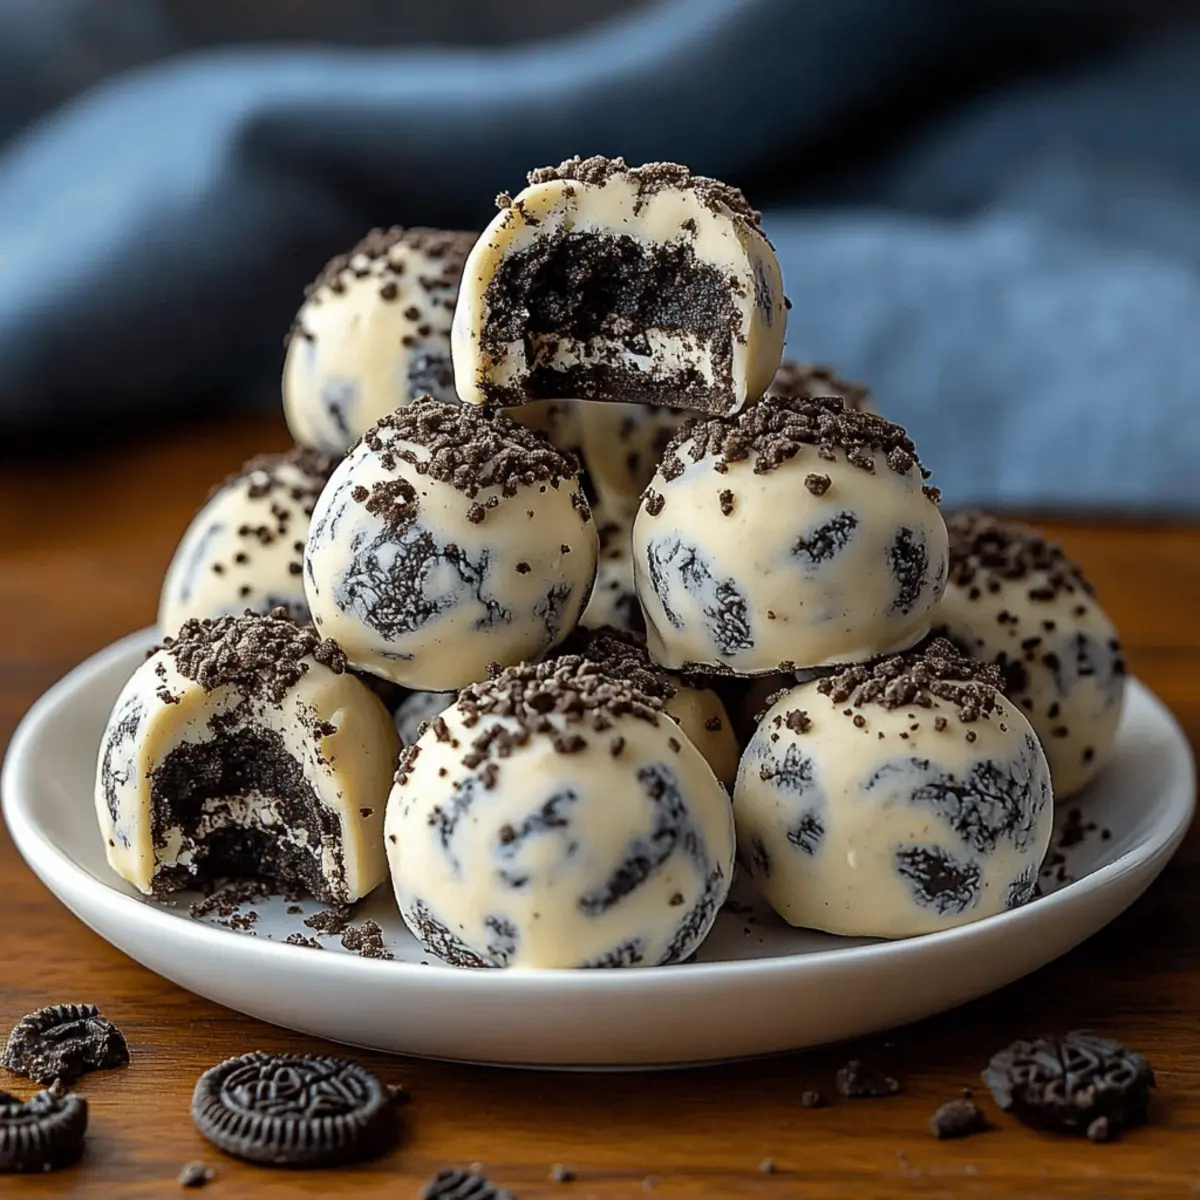
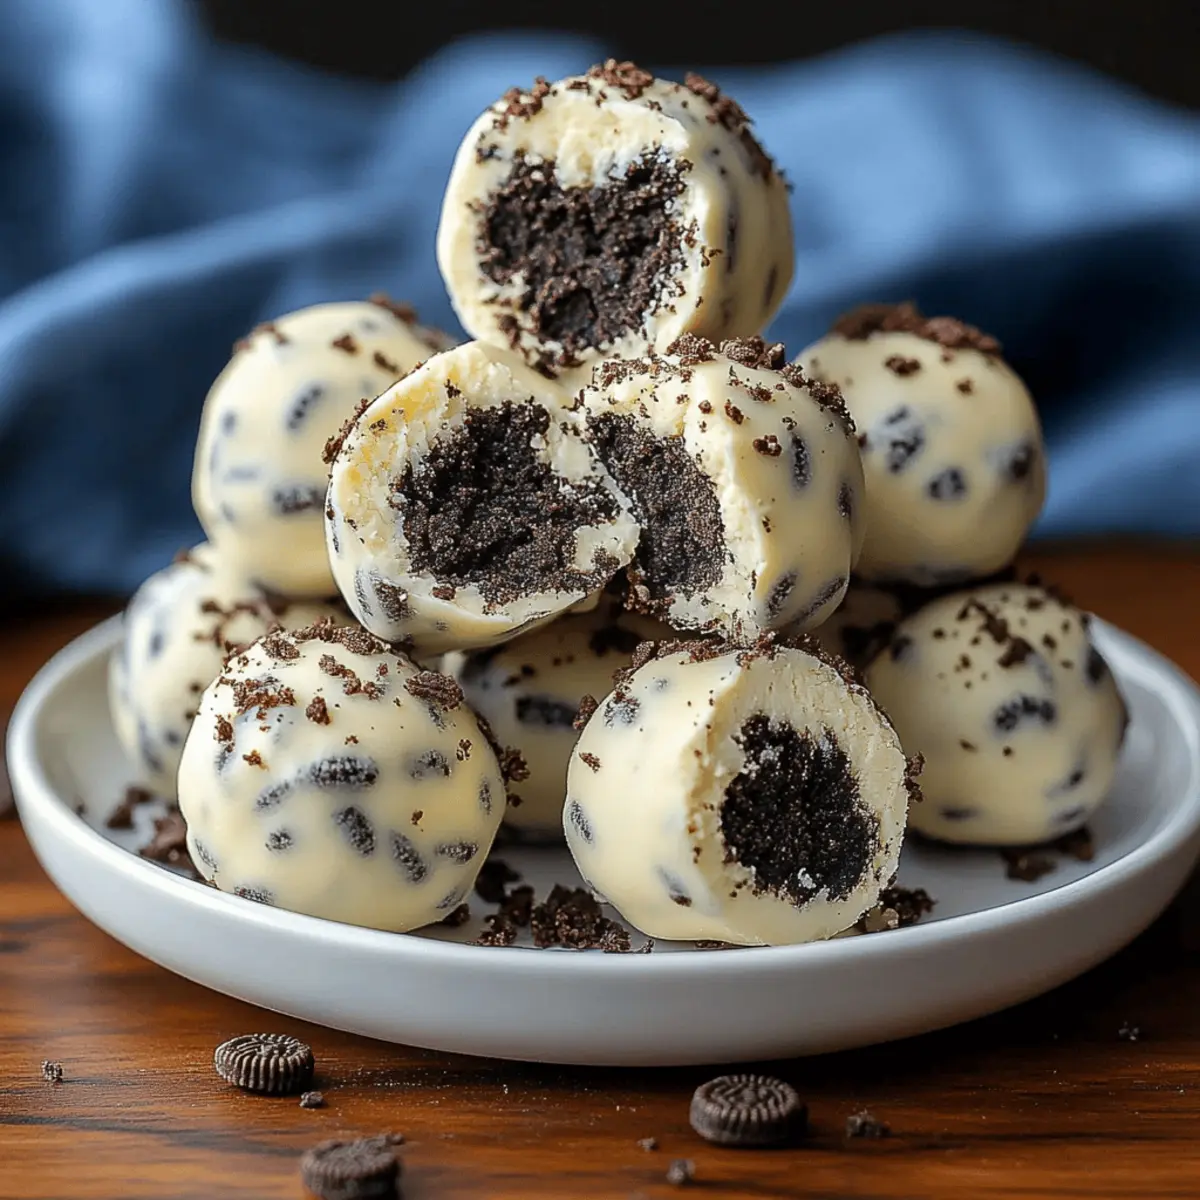
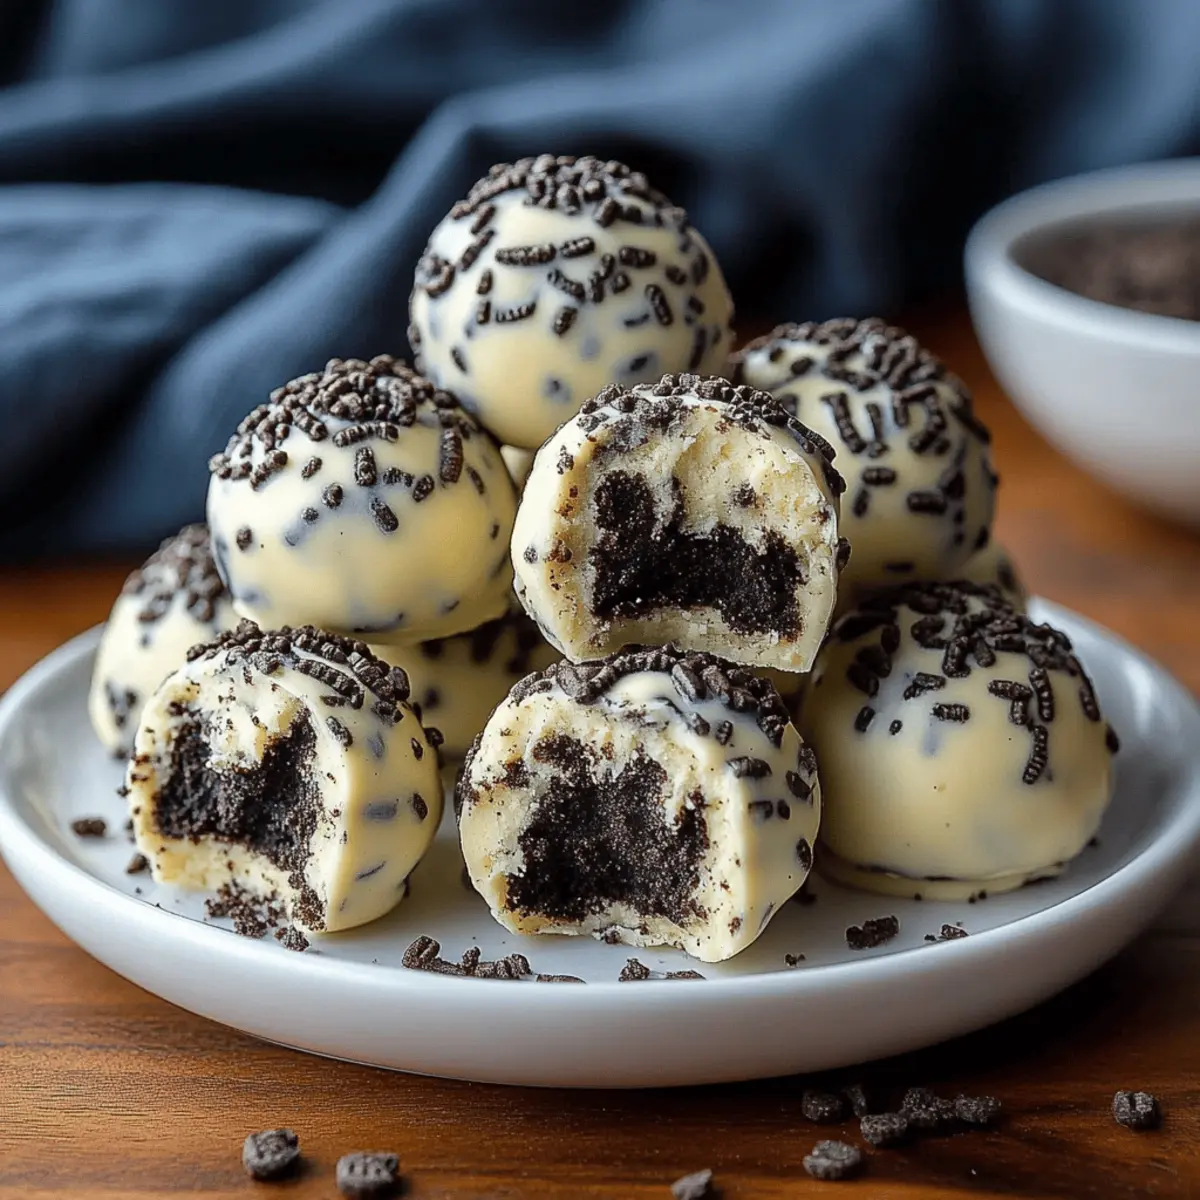
Bold, Indulgent Flavor: These protein balls capture the essence of cookies-and-cream nostalgia, delivering a creamy texture with every bite.
Quick and No-Bake: In just minutes, you can whip up these heavenly treats without turning on the oven.
Customizable Ingredients: Cater to your dietary needs with easy substitutions; go vegan with plant-based cream cheese and protein powder!
Perfect Snack: Whether you need a post-workout boost or a sweet snack with coffee, these bites satisfy cravings guilt-free.
Crowd-Pleasing Appeal: Friends and family will adore these delightful bites—they're perfect for gatherings or as a healthy treat for kids!
For more ideas, check out our guide on customizing healthy snacks.
Cream Cheese Oreo Protein Balls
• Elevate your snack game with this easy-to-follow ingredient list!
For the Protein Balls
- Cream Cheese – provides rich creaminess and texture; for a vegan option, consider plant-based cream cheese.
- Oreo Cookies – adds sweetness and that familiar cookies-and-cream flavor; try gluten-free Oreos for dietary needs.
- Vanilla Protein Powder – enhances protein content while blending seamlessly; use a plant-based protein powder for vegan-friendly options.
- Milk – adds moisture to help the mixture come together; choose dairy or non-dairy milk based on your preferences.
For Coating (Optional)
- Powdered Sugar – enhances sweetness; can be omitted for a lower-sugar option if desired.
- Melted Dark Chocolate (optional) – adds a luxurious touch; opt for vegan chocolate to keep it plant-based.
Whether you’re a busy bee looking for a quick snack or someone on a fitness journey, our Cream Cheese Oreo Protein Balls will keep you fueled and satisfied!
Step‑by‑Step Instructions for Cream Cheese Oreo Protein Balls
Step 1: Prepare Oreo Crumbs
Start by crushing the Oreo cookies into fine crumbs for your Cream Cheese Oreo Protein Balls. Use a food processor for a quick and even texture, or place the cookies in a zip-top bag and crush them with a rolling pin. Aim for fine crumbs in about 1-2 minutes, ensuring there are no large chunks. Set aside once done.
Step 2: Cream the Cream Cheese
In a mixing bowl, combine softened cream cheese and beat it with an electric mixer for about 2-3 minutes until it's smooth and creamy. This will create a luxurious base for your protein balls. Make sure the cream cheese is at room temperature for easy mixing; it should easily form a thick, velvety texture.
Step 3: Incorporate Oreo Crumbs
Once the cream cheese is perfectly smooth, add your prepared Oreo crumbs to the bowl. Gently fold the crumbs into the cream cheese mixture using a spatula or spoon until they are just combined, creating a delightful cookies-and-cream blend. The mixture should have a marbled look with Oreo bits distributed throughout.
Step 4: Add Protein Powder
Next, sprinkle in your vanilla protein powder and stir until fully integrated into the mixture. This step elevates the nutritional content of your Cream Cheese Oreo Protein Balls without compromising on flavor. The mixture should now have a thick consistency, making it easier to mold into balls in the next steps.
Step 5: Adjust Consistency
To achieve the perfect dough consistency, gradually mix in milk, one tablespoon at a time. Continue adding until the mixture is cohesive yet not overly sticky—this can take around 2-3 tablespoons. The dough should be pliable enough to roll into balls without falling apart, so adjust with milk carefully.
Step 6: Chill the Dough
Cover the bowl with plastic wrap and place it in the refrigerator for at least 30 minutes. This chilling time is crucial for the Cream Cheese Oreo Protein Balls to firm up, making them easier to roll. After chilling, the mixture should feel more solid and hold its shape when pressed.
Step 7: Roll the Protein Balls
Once chilled, take the dough out and use a tablespoon to scoop out portions. Roll each portion between your palms to form 1-inch balls. The process should yield a delightful batch of protein-packed bites, perfect for snacking. Place the rolled balls on a parchment-lined baking sheet as you go.
Step 8: Coat (Optional)
If desired, roll each protein ball in powdered sugar for a sweet touch. This optional step gives your Cream Cheese Oreo Protein Balls an elegant finish and enhances their sweetness. Use a shallow bowl for coating; simply roll each ball until well-coated, then shake off any excess sugar.
Step 9: Place on Baking Sheet
Arrange the coated protein balls neatly on the prepared baking sheet, ensuring they are spaced out. This will keep them from sticking together while they set in the fridge. Keep them in a single layer, as this makes for easier handling and storage later on.
Step 10: Melt Chocolate (Optional)
If you're opting for a chocolate drizzle, melt dark chocolate in a microwave-safe bowl. Heat in 30-second intervals, stirring in between until smooth and completely melted. This luxurious drizzle adds an extra layer of richness to your Cream Cheese Oreo Protein Balls.
Step 11: Drizzle with Chocolate (Optional)
Using a piping bag or a spoon, drizzle the melted dark chocolate over the protein balls. Let your creativity shine here; create decorative swirls or simply coat the tops. Allow the chocolate to set slightly before finishing the final step.
Step 12: Chill Again (Optional)
If you drizzled chocolate, place the baking sheet back in the refrigerator for another 15-20 minutes to allow the chocolate to harden. This quick chill will give your Cream Cheese Oreo Protein Balls a beautiful finish that’s perfect for serving.
Step 13: Storage
Once fully set, transfer the protein balls to an airtight container. They can be stored in the refrigerator for up to a week or frozen for longer storage. This way, you can indulge in these delicious Cream Cheese Oreo Protein Balls anytime you want a guilt-free treat!
How to Store and Freeze Cream Cheese Oreo Protein Balls
Fridge: Store your Cream Cheese Oreo Protein Balls in an airtight container in the refrigerator for up to 1 week. This keeps them fresh and ready to enjoy at a moment's notice.
Freezer: For longer storage, freeze the protein balls in a single layer on a baking sheet. Once frozen, transfer them to a freezer-safe bag or container for up to 3 months.
Thawing: When ready to enjoy, simply remove from the freezer and let them thaw in the refrigerator for a few hours. This keeps the texture perfect and ready to indulge.
Reheating: These protein balls are best enjoyed cold, but if you prefer a warmer treat, gently microwave them for 5-10 seconds—enjoy the melty goodness!
Expert Tips for Cream Cheese Oreo Protein Balls
- Soften First: Make sure your cream cheese is fully softened; this ensures a smoother mixing process and prevents lumps in your protein balls.
- Adjust Consistency: If your dough is too dry, add milk slowly until just right. Conversely, if it's too sticky, incorporate more crushed Oreos gradually.
- Chilling is Key: Don’t skip the chilling step! This allows the mixture to firm up properly, resulting in perfectly shaped balls that won’t fall apart.
- Experiment with Flavors: Feel free to add instant espresso powder or spices like cinnamon to enhance the taste. Just remember to maintain the balance with the sweetness of the Oreo cookies.
- Roll for Texture: For added texture, consider leaving some Oreo pieces chunkier instead of finely crushing them. This provides delightful bites of crunch in your Cream Cheese Oreo Protein Balls!
Cream Cheese Oreo Protein Balls Variations
Feel free to unleash your creativity and customize these delicious protein balls to suit your cravings and dietary needs!
-
Dairy-Free: Use a plant-based cream cheese alternative and a dairy-free protein powder for a vegan-friendly version.
Switch things up with cashew cream cheese; its nutty flavor adds a beautiful touch to these bites. -
Gluten-Free: Substitute regular Oreos with gluten-free Oreos to cater to dietary restrictions.
This way, everyone can enjoy the same taste without missing out—gluten-free doesn’t mean flavor-free! -
Nut Butter Delight: Add a spoonful of your favorite nut butter (like almond or peanut butter) for a rich, nutty flavor.
This adds depth and a satisfying creaminess, enhancing the protein boost without compromising taste. -
Chocolate Lovers' Dream: Enhance the recipe with chocolate-flavored protein powder for an extra chocolatey kick.
Because who wouldn’t want more chocolate in their life? It transforms these treats into pure indulgence! -
Tropical Twist: Roll the protein balls in shredded coconut for a refreshing, tropical flavor.
The toasted coconut pairs beautifully with the Oreo, creating a delightful contrast in textures and tastes. -
Spicy Kick: Add a hint of cayenne pepper or chili powder for an unexpected, exciting heat.
It may sound daring, but the spice melds surprisingly well with the sweet Oreo flavor! -
Chunky Texture: Instead of finely crushing the Oreos, leave some larger chunks for additional crunch.
This variation keeps the texture interesting and offers delightful bites of the classic cookie.
For even more wonderful ideas on customization, don't miss our guide on customizing healthy snacks!
Make Ahead Options
These Cream Cheese Oreo Protein Balls are perfect for meal prep enthusiasts! You can prepare the dough up to 24 hours in advance, storing it in the refrigerator to keep it fresh. Simply follow the first six steps of the recipe, then cover the bowl tightly with plastic wrap and refrigerate. This allows the flavors to meld beautifully while preventing browning. When you're ready to enjoy, scoop and roll the chilled mixture into balls, and if you wish, coat them in powdered sugar or drizzle with chocolate right before serving. Your homemade snacks will be just as delicious and ready to fuel your busy days!
What to Serve with Cream Cheese Oreo Protein Balls?
These delightful bites are the perfect complement to a variety of dishes, transforming any meal into a special occasion.
- Fresh Berries: Bright, juicy strawberries or raspberries offer a refreshing contrast, balancing the rich, creamy flavors of the protein balls.
- Greek Yogurt Parfait: Layer them with yogurt and granola for a decadent breakfast or snack that adds a creamy texture and crunchy elements.
- Nut Butter Spread: A dollop of almond or peanut butter adds a nutty taste, enhancing the protein-packed quality and providing a satisfying crunch.
- Smoothies: Blend up a refreshing green smoothie; it complements the cookies-and-cream flavor while providing an energizing boost for your day.
- Coffee or Espresso: The warmth and bold flavors of brewed coffee or an espresso pair perfectly, creating a luxurious coffee-and-treat experience.
- Coconut Macaroons: These sweet, chewy cookies echo the cookie theme and introduce a tropical twist, with wonderful texture to enjoy alongside.
- Sliced Apples or Pears: Fresh fruit slices add a crispness that contrasts beautifully with the softness of the protein balls, refreshing the palate with each bite.
- Chocolate-Covered Pretzels: Offering both sweet and salty flavors, these add a playful crunch that beautifully complements the creaminess of your protein balls.
- Chilled Almond Milk: For a light drink pairing, chilled almond milk enhances the flavors and adds a nutty hint, perfect for washing down these indulgent treats.
Cream Cheese Oreo Protein Balls Recipe FAQs
How do I choose the best cream cheese for my protein balls?
Absolutely! When selecting cream cheese, look for one that is fresh and full-fat to achieve that rich, creamy texture. If you're aiming for a vegan version, opt for a reputable plant-based cream cheese alternative, which will provide a similar consistency and flavor to your Cream Cheese Oreo Protein Balls.
What’s the best way to store these protein balls?
You’ll want to store your Cream Cheese Oreo Protein Balls in an airtight container in the refrigerator. They'll stay fresh for up to 1 week. If you have leftovers, consider freezing them! Just arrange them on a baking sheet in a single layer until they're firm, then transfer to a freezer-safe bag or container for up to 3 months.
Can I freeze Cream Cheese Oreo Protein Balls?
Yes, freezing is a great option! After preparing them, place the protein balls on a parchment-lined baking sheet and freeze for about 1-2 hours until solid. Once they are firm, transfer them to a freezer-safe container or bag. Remember to label them with the date, and they can be enjoyed for up to 3 months. To thaw, simply leave them in the refrigerator for a few hours before serving.
What if my protein ball mixture is too dry or too sticky?
Very common! If your mixture feels too dry, gradually mix in more milk, adding just a tablespoon at a time until it reaches a cohesive consistency. If it’s too sticky, slowly incorporate additional crushed Oreo crumbs until the dough holds together but isn’t overly tacky. This step will ensure your Cream Cheese Oreo Protein Balls roll into perfect shapes.
Are these protein balls suitable for people with allergies?
Definitely! When making your Cream Cheese Oreo Protein Balls, be sure to check for potential allergens in your ingredients. Use gluten-free Oreos to accommodate gluten sensitivities and select a plant-based protein powder and cream cheese to keep it vegan. Always read labels carefully if allergies are a concern.
Can pets eat these protein balls?
Not at all! While the ingredients are safe for human consumption, ingredients like cream cheese and Oreos can be harmful to dogs and other pets. It’s best to keep these delicious snacks away from your furry friends and stick to treats specifically made for them!
Indulgent Cream Cheese Oreo Protein Balls You'll Love
Ingredients
Equipment
Method
- Prepare Oreo Crumbs: Crush Oreo cookies into fine crumbs using a food processor or a zip-top bag and rolling pin.
- Cream the Cream Cheese: In a bowl, beat softened cream cheese with an electric mixer for 2-3 minutes until smooth.
- Incorporate Oreo Crumbs: Add Oreo crumbs to the cream cheese mixture and gently fold until combined.
- Add Protein Powder: Sprinkle vanilla protein powder and stir until fully integrated into the mixture.
- Adjust Consistency: Gradually mix in milk until dough is cohesive but not sticky, about 2-3 tablespoons.
- Chill the Dough: Cover the bowl with plastic wrap and refrigerate for at least 30 minutes.
- Roll the Protein Balls: Scoop portions of dough using a tablespoon and roll into 1-inch balls.
- Coat (Optional): Roll each protein ball in powdered sugar for extra sweetness if desired.
- Place on Baking Sheet: Arrange rolled balls on a parchment-lined baking sheet.
- Melt Chocolate (Optional): Melt dark chocolate in a microwave-safe bowl for drizzling.
- Drizzle with Chocolate (Optional): Drizzle melted chocolate over the protein balls.
- Chill Again (Optional): Refrigerate for an additional 15-20 minutes if drizzled with chocolate.
- Storage: Transfer protein balls to an airtight container and store in the refrigerator or freeze for longer.


Leave a Reply