
Amid the chaos of Halloween preparations, a glimmer of delight can come from your own kitchen. Picture this: while the kids are scavenging for sugary sweets, here you are, whipping up a batch of Easy Spooky Baked Halloween Chips—an imaginative and healthier snack that’s sure to steal the show. These festive, crunchy chips not only make a fantastic alternative to traditional Halloween treats but also offer a fun opportunity for creativity in the kitchen. With customizable shapes and an optional creamy spinach dip to accompany them, they transform snacking into an interactive experience for the whole family. Ready to impress your friends and family with something that’s both playful and guilt-free? Let’s dive into the recipe and conjure up some spooky deliciousness together!

Why Make These Halloween Chips?
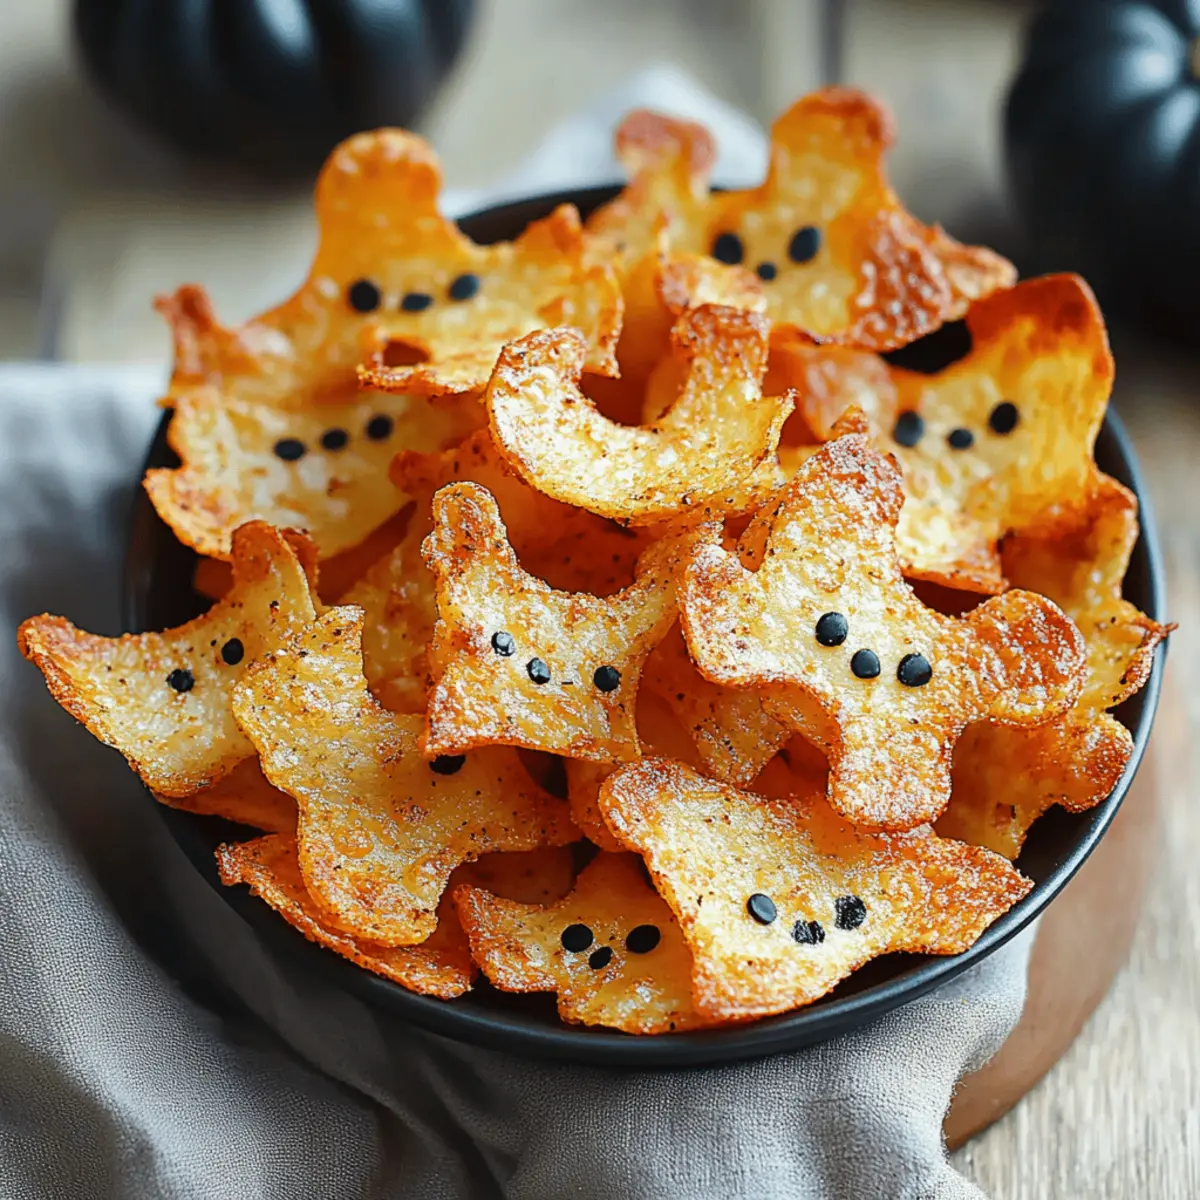
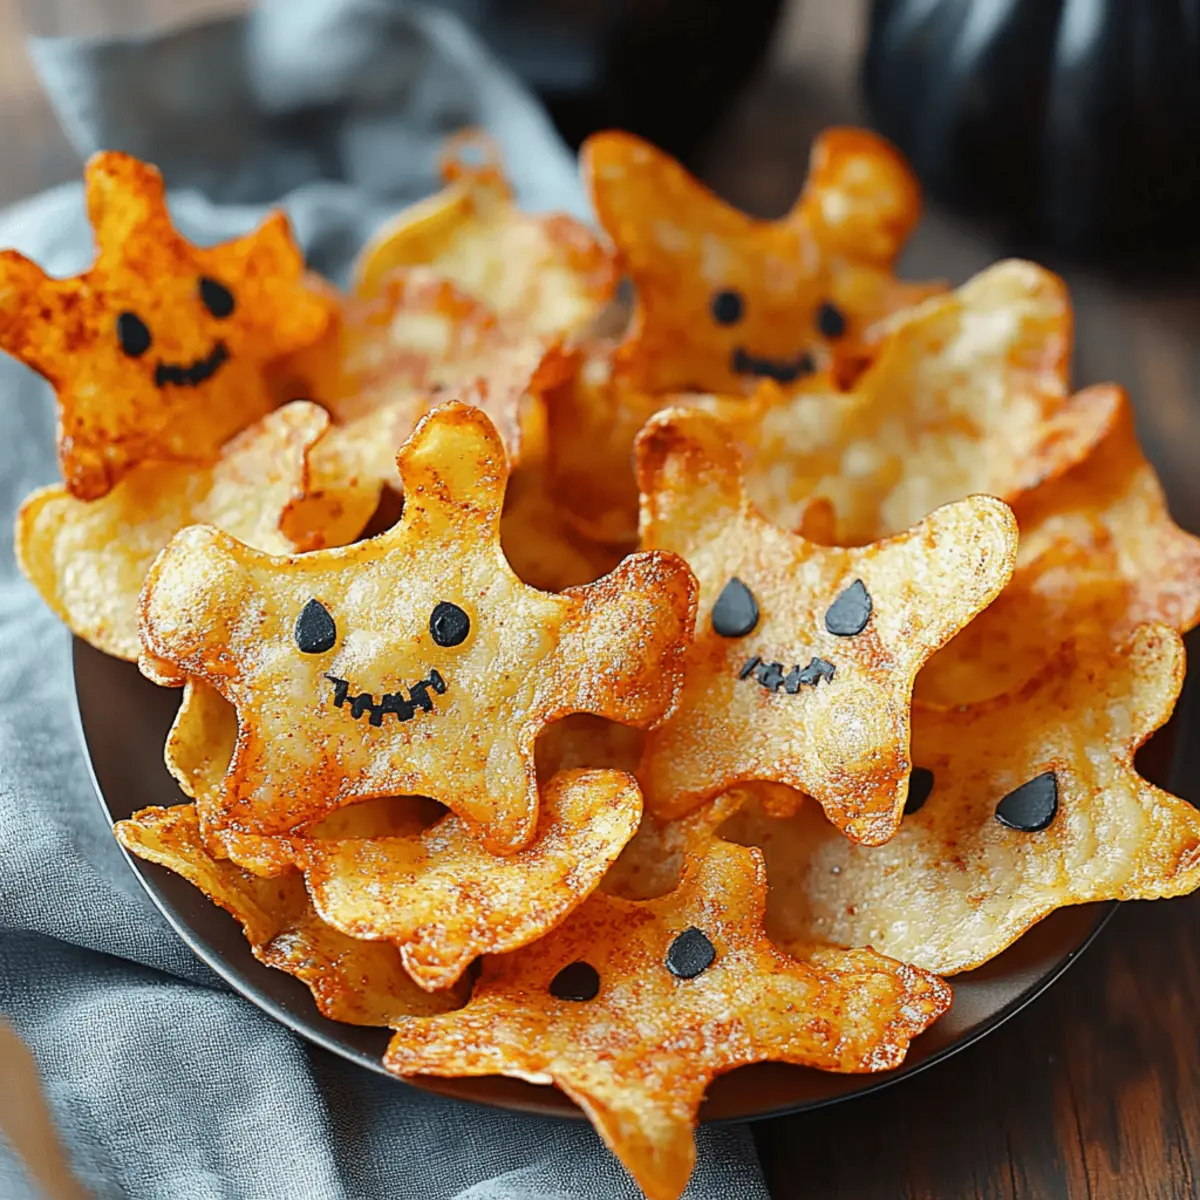
Uniquely Spooky: These spooky-shaped chips aren’t just delicious; they add a festive flair to your Halloween festivities!
Healthier Choice: Crafted with oven-baked russet potatoes, they serve as a guilt-free alternative to greasy snacks.
Customize to Your Taste: You can easily experiment with seasonings—from zesty ranch to smoky paprika—tailoring the flavor to your liking.
Interactive Fun: Kids will love helping create the shapes with cookie cutters, turning snacking into a fun family activity.
Pair with a Dip: Don't forget the optional spinach dip for an extra creamy touch; it’s a delightful way to balance the crunch! Discover how to prepare the dip with my other healthy dip recipe.
These Easy Spooky Baked Halloween Chips are the perfect blend of fun, flavor, and festivity!
Spooky Baked Halloween Chips Ingredients
For the Chips
• Russet Potatoes – The foundation of crispy chips; for more color, mix with Yukon Gold.
• Olive Oil – Enhances crunch and flavor; use a spray bottle for a light coat.
• Sea Salt – Elevates the potato flavor; adjust to taste for your preference.
• Black Pepper – Adds a mild warmth; a little goes a long way.
• Smoked Paprika – Infuses a rich, smoky flavor; essential for that savory kick.
• Garlic Powder – Lends a wonderful aroma and depth to each chip.
• Onion Powder – Complements the spices beautifully, enhancing overall taste.
• Cayenne Pepper (optional) – Introduces a spicy twist, great for Halloween!
• Halloween-themed Cookie Cutters – Perfect for crafting your festive chip shapes.
For the Optional Dip
• Frozen Chopped Spinach – A healthy base for the dip; ensure it’s well-dried after thawing.
• Sour Cream & Mayonnaise – These create a creamy texture; opt for full-fat for richness.
• Cream Cheese – Boosts the richness of the dip; make sure it's softened for easy mixing.
• Chives & Garlic – Fresh flavors that add a delightful zing; essential for flavor balance.
• Lemon Juice – Brightens up the dip's taste, adding a zesty finish.
• Food Coloring (optional) – For a spooky effect in your dip, unleash your creativity!
With these Easy Spooky Baked Halloween Chips ingredients, you're all set to create a fun, healthy snack that's perfect for celebrating the holiday!
Step‑by‑Step Instructions for Spooky Baked Halloween Chips
Step 1: Preheat the Oven
Begin your spooky chip adventure by preheating your oven to 400°F (200°C). While the oven warms, line your baking sheets with parchment paper to ensure the chips won't stick. This step sets the stage for crispy, golden Halloween chips that'll delight everyone at your spooky gathering!
Step 2: Prepare the Potatoes
Take those lovely russet potatoes and give them a good wash to remove any dirt. Slice them into 1/16 to ⅛ inch thick rounds using a sharp knife or mandoline for evenness. For best results, soak the potato slices in ice water for 30 minutes to 2 hours; this helps reduce starch and enhances crispiness.
Step 3: Dry Thoroughly
After soaking, drain the potato slices and thoroughly pat them dry with kitchen towels. This crucial step ensures your Spooky Baked Halloween Chips will be crisp, not soggy. Removing moisture before baking is key to achieving that delightful crunch we all crave in a chip.
Step 4: Season the Potatoes
Place the dried potato slices in a large bowl and drizzle them with olive oil, tossing them gently to coat. Next, sprinkle on the sea salt, black pepper, smoked paprika, garlic powder, onion powder, and optional cayenne pepper. Mix well until all the slices are evenly seasoned, ready for their festive transformation.
Step 5: Cut Fun Shapes
Using your Halloween-themed cookie cutters, cut fun spooky shapes from the seasoned potato slices. Arrange the shapes on your lined baking sheets in a single layer, ensuring they don’t overlap for even baking. This will ensure each chip gets the maximum exposure to heat and becomes perfectly crispy.
Step 6: Bake the Chips
Slide the baking sheets into your preheated oven and bake the potato slices for 15-20 minutes. Keep an eye on them as they bake; they should turn golden brown and crispy. After the initial baking time, carefully flip each chip and return them to the oven for an additional 10-15 minutes for that extra crunch.
Step 7: Cool the Chips
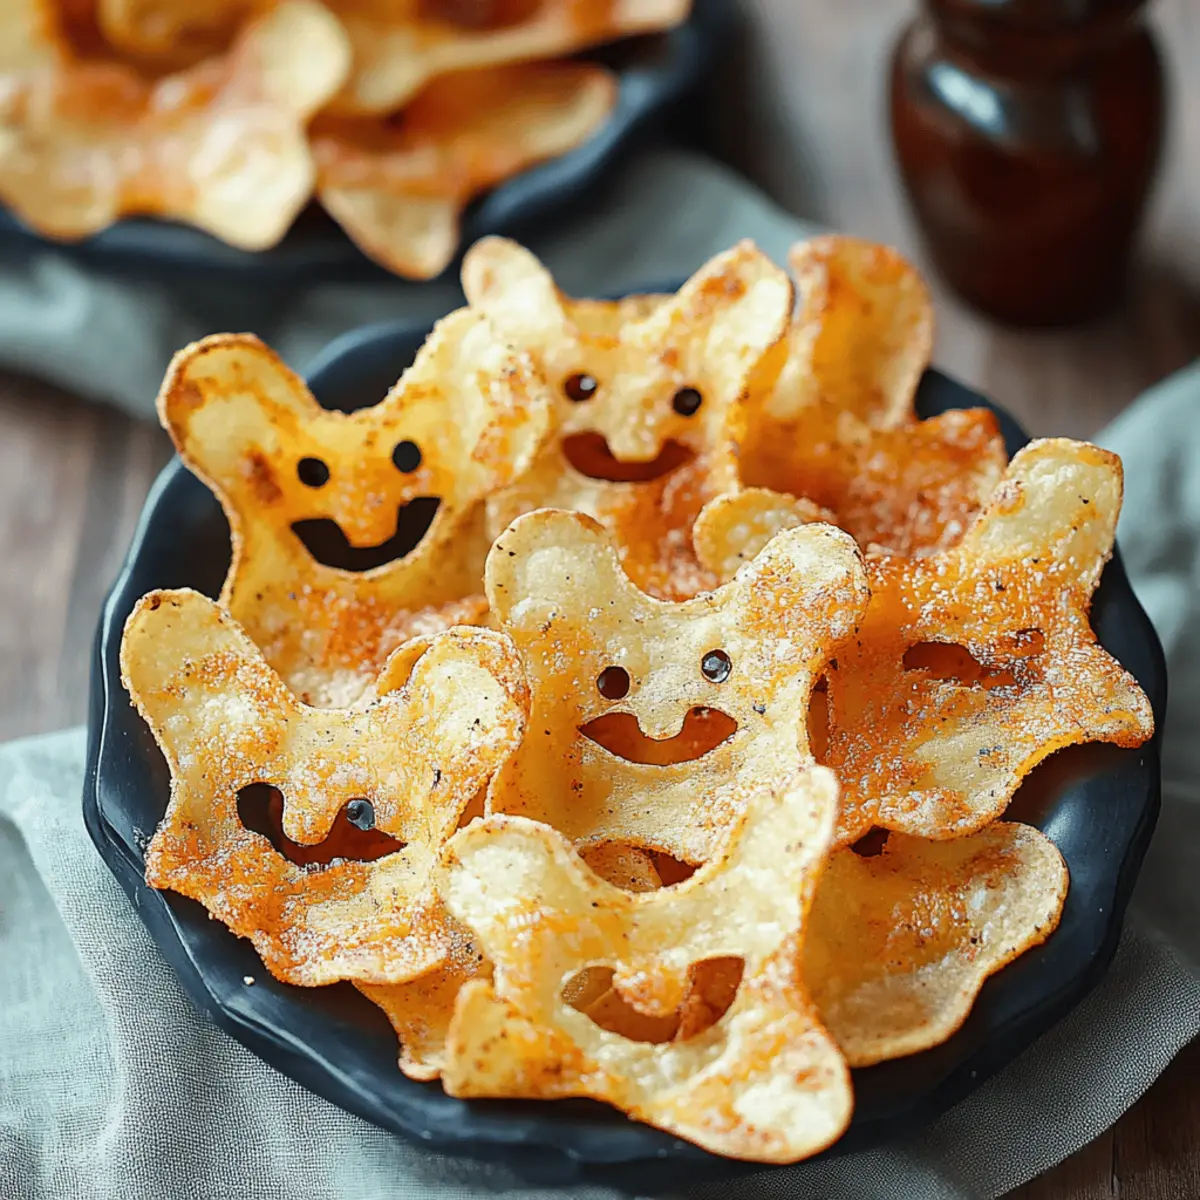
Once baked to perfection, remove the sheets from the oven and transfer the chips to a cooling rack immediately. Allow them to cool for a few minutes; this ensures they stay crispy. You’ll love the vibrant shapes and satisfying crunch that these Easy Spooky Baked Halloween Chips offer!
Step 8: Prepare the Dip (Optional)
While your chips are cooling, you can whip up the optional spinach dip. In a mixing bowl, combine the thawed and well-dried frozen spinach with sour cream, mayonnaise, and softened cream cheese. Add in chives, garlic, and lemon juice, mixing until smooth and creamy. An hour in the refrigerator allows the flavors to meld beautifully.
Step 9: Serve the Festive Snack
To serve, arrange your spooky baked Halloween chips on a festive platter, surrounding them with the creamy spinach dip. Let the creativity shine as you present this fun snack at your Halloween gathering. Your guests will love both the flavors and the playful shapes of your delightful creation!
Make Ahead Options
These Easy Spooky Baked Halloween Chips are perfect for busy home cooks looking to save time during the Halloween rush! You can prep the potato slices up to 24 hours in advance by soaking and drying them, then storing them in an airtight container in the refrigerator to prevent browning. You can also season the slices and cut them into shapes ahead of time; just keep them covered to maintain their freshness. When you're ready to bake, simply toss the prepared shapes in olive oil and spices, then follow the baking instructions. This way, you’ll have a delightful, fresh snack ready with minimal effort on the day of your Halloween celebration!
How to Store and Freeze Spooky Baked Halloween Chips
Airtight Container: Store leftover spooky baked Halloween chips in an airtight container at room temperature for up to 2-3 days to maintain their crunchy texture.
Reheating: To refresh your chips, place them in the oven at 350°F (175°C) for about 5-7 minutes until they regain their crispiness.
Freezer Tip: For longer storage, freeze the baked chips in a single layer on a baking sheet. Once frozen, transfer them to a freezer-safe bag or container for up to 1 month.
Thawing: When ready to enjoy, simply bake directly from frozen for about 10-15 minutes to restore their delightful crunch before serving!
Spooky Baked Halloween Chips Variations
Embrace your culinary creativity with these delightful twists for your spooky chips, ensuring every batch is uniquely your own!
-
Sweet Potato Swap: Use sweet potatoes instead of russets for a naturally sweeter flavor that pairs perfectly with spices. The vibrant orange hue adds a festive touch!
-
Herbs Galore: Sprinkle fresh herbs like rosemary or thyme on your chips before baking for a fragrant and savory explosion. Herb-infused chips aren’t just tasty—they elevate your snacks to a whole new level.
-
Spicy Kick: Add a dash of chili powder or slices of jalapeño for a fiery twist that will thrill your taste buds. This adds an exciting kick, making your chips the star of any Halloween gathering!
-
Cheesy Goodness: Top your chips with grated Parmesan or cheddar before baking for a cheesy delight. The melted cheese adds a rich flavor that enhances the chip experience.
-
Vegan Delight: Use avocado oil and leave out the cheese in your optional dip, transforming it into a delicious vegan treat that everyone can enjoy. This variation provides a creamy texture while keeping it plant-based!
-
Flavored Dips: Pair with different dips—try a tangy salsa or a creamy avocado dip for a surprising flavor combination. Dips can elevate the snack experience and provide variety that keeps your guests coming back for more.
-
Crispy Cornmeal Coating: For an extra crunchy texture, coat potato slices lightly in cornmeal before seasoning. This adds delightful crunchiness while maintaining that comforting potato taste.
-
Garlic Lovers' Dream: Increase the garlic powder or add roasted garlic into your dip for a robust garlic flavor. It’s a perfect choice for those who crave an aromatic kick in their snacks.
These variations are not just fun; they're a chance to make your spooky chips truly yours! And if you're looking for a way to elevate the experience further, consider serving the chips alongside my creamy healthy dip recipe. Enjoy customizing and sharing the Halloween fun!
Expert Tips for Spooky Baked Halloween Chips
• Perfect Slicing: Use a mandoline for evenly sliced potato rounds. This tool ensures optimal crispiness and prevents uneven cooking.
• Dry Thoroughly: Pat the potato slices completely dry after soaking. This step is crucial to avoid soggy chips and achieve that delightful crunch in your spooky baked Halloween chips.
• Watch the Bake: Keep a close eye on the chips while baking. They can quickly go from golden to burnt, especially towards the end of the baking time.
• Layering Matters: Arrange the cut shapes on baking sheets in a single layer to ensure each chip bakes evenly and gets the crispiness you desire.
• Flavor Boosting: Feel free to experiment with different seasonings like ranch powder or cheese blends, customizing your spooky baked Halloween chips to suit your taste!
• Cooling Strategy: Transfer chips immediately to a cooling rack after baking. This helps maintain maximum crispness, enhancing the overall snacking experience.
What to Serve with Easy Spooky Baked Halloween Chips
These delightful Halloween chips deserve a feast of flavors to elevate your festive gathering and delight every guest.
-
Creamy Spinach Dip: The ultimate partner! This luscious dip contrasts perfectly with the crisp chips, adding a velvety texture that makes each bite irresistible.
-
Roasted Veggies: Colorful roasted carrots, bell peppers, and zucchini bring sweetness and a hearty bite, making for a crunchy, healthful contrast to the baked chips.
-
Guacamole: Earthy and creamy, the fresh avocado dip pairs beautifully with the smoky flavor of the chips, lending a refreshing twist to your snack table.
-
Cheesy Nacho Dip: For those who crave a richer taste, this melted cheese dip offers decadence and warmth, creating an indulgent experience that's perfect for Halloween revelry.
-
Stuffed Mini Peppers: These sweet mini peppers filled with cream cheese and herbs provide a pop of color and flavor, ensuring a visually stunning and delightful platter.
-
Festive Fruit Skewers: Brighten up your table with skewers of seasonal fruits like grapes, melon, and strawberries for a sweet touch that balances the savory snacks beautifully.
-
Spooky Beer Cocktails: Embrace the Halloween spirit with fun, themed cocktails featuring orange or black hues that echo the season! Pair with the chips for a festive toast.
-
Pumpkin Spice Hot Chocolate: A fun, seasonal warm drink option, this cozy beverage complements the savory chips while satisfying sweet cravings, capturing the essence of Halloween.
Easy Spooky Baked Halloween Chips Recipe FAQs
How do I choose the best potatoes for my chips?
Absolutely! For these spooky chips, I recommend using russet potatoes for their high starch content, which yields the crispiest results. You can also mix in some Yukon Gold potatoes for added color and a slightly sweeter flavor. Ensure the potatoes are firm, with no dark spots or soft areas, as these may indicate overripeness.
What is the best way to store leftover chips?
Very! To keep your spooky baked Halloween chips fresh, store any leftovers in an airtight container at room temperature for up to 2-3 days. This will help maintain their crunchiness. If you find they have lost some crispness, pop them back in the oven at 350°F (175°C) for about 5-7 minutes to refresh!
Can I freeze these Halloween chips for later enjoyment?
You sure can! To freeze your spooky baked Halloween chips, place them in a single layer on a baking sheet until completely frozen. Once frozen, transfer the chips to a freezer-safe bag or container, where they can be stored for up to 1 month. When you're ready to enjoy them, bake them straight from the freezer at 350°F (175°C) for 10-15 minutes until crispy again.
What should I do if my chips come out soggy?
Great question! If your chips end up soggy, it might be due to excess moisture before baking. Be sure to dry the potato slices thoroughly after soaking and before seasoning. Additionally, don’t forget to arrange them in a single layer on the baking sheet—overlapping slices can trap steam, making them soggy instead of crispy.
Are these Halloween chips suitable for all diets?
Definitely! These spooky baked chips can cater to different dietary preferences. They are gluten-free and can be vegan if you skip the dip or make a plant-based version. If you have guests with specific allergies, like dairy or specific spices, consider customizing the seasoning and dip ingredients to suit their needs!
Easy Spooky Baked Halloween Chips for a Crunchy Festive Treat
Ingredients
Equipment
Method
- Preheat your oven to 400°F (200°C) and line baking sheets with parchment paper.
- Wash russet potatoes and slice them into 1/16 to ⅛ inch thick rounds.
- Soak the potato slices in ice water for 30 minutes to 2 hours.
- Drain the potato slices and pat them dry with kitchen towels.
- In a bowl, drizzle the slices with olive oil and season with salt, pepper, paprika, garlic powder, onion powder, and optional cayenne.
- Cut spooky shapes using Halloween-themed cookie cutters and arrange on the baking sheets.
- Bake the chips for 15-20 minutes, then flip and bake for an additional 10-15 minutes.
- Remove chips and let them cool on a cooling rack.
- Prepare the optional spinach dip by mixing spinach, sour cream, mayonnaise, cream cheese, chives, garlic, and lemon juice.
- Serve the chips with the dip on a festive platter.

Leave a Reply