
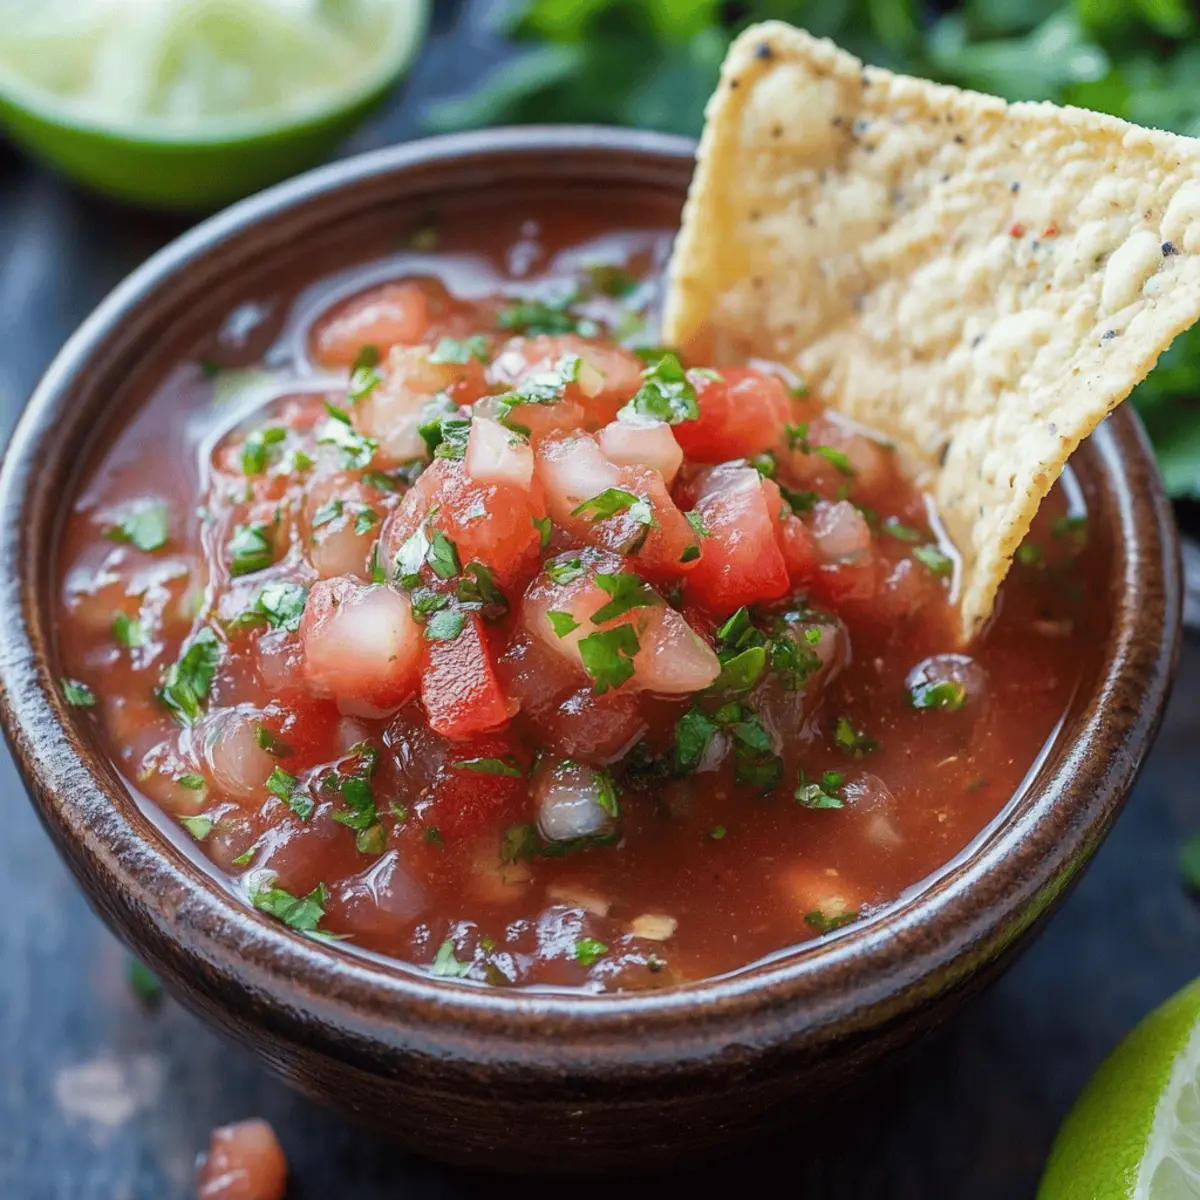
As I stood in my kitchen, the intoxicating aroma of roasted tomatoes and peppers wafted through the air, instantly transporting me to a bustling Mexican market. This Homemade Salsa is the perfect companion for tacos, nachos, or even a bold breakfast twist—its vibrant flavors are leagues ahead of anything you’d find at the store. Featuring a delightful mix of fresh Roma tomatoes, zesty onions, and fragrant cilantro, this recipe is not just quick to prepare (under 40 minutes!) but also incredibly versatile, allowing you to customize it just the way you like. Whether you prefer it mild or with an extra kick, it’s a guaranteed crowd-pleaser that will elevate any meal. Ready to dive into a world of flavor? Let’s get started!
Why Is Homemade Salsa a Must-Try?
Freshness: Nothing beats the taste of hand-picked ingredients! This salsa bursts with the vibrant flavors of ripe Roma tomatoes, adding a refreshing touch to your meals.
Customization: Enjoy limitless variations! Swap jalapeños for milder peppers or add diced mango for a sweet twist—this salsa can be tailored to your cravings.
Simplicity: The process is quick and easy, taking less than 40 minutes to prepare. Perfect for anyone, from budding chefs to busy parents who want a homemade touch.
Health Benefits: Packed with nutrients from fresh veggies, this salsa is low in calories yet high in flavor—ideal for guilt-free snacking!
Versatility: Serve it with tortilla chips, tacos, or grilled meats—this salsa fits effortlessly into any meal! Want more ideas? Check out our Serving Suggestions for inspiration.
Salsa Ingredients
For the Salsa
- Ripe Roma Tomatoes – The base of the salsa, providing juiciness and freshness; substitute with vine-ripened tomatoes if necessary.
- Large White Onion – Adds sharpness and sweetness; can replace with red onion for a milder taste.
- Garlic – Enhances flavor depth; fresh minced garlic is preferred, but powder can work in a pinch.
- Jalapeño Peppers – Introduces heat; adjust quantity based on your spice preference; use milder peppers like poblano for less kick.
- Cilantro – Adds a fresh herby flavor; omit if you dislike it, or substitute with parsley for a different herbaceous touch.
- Limes – Provides acidity and brightness; fresh juice is ideal, though bottled juice can substitute in a pinch.
- Ground Cumin – Adds earthy, warm tones; substitute with coriander for a different flavor note.
- Chili Powder – Introduces a complex flavor; use smoked paprika as a flavorful alternative.
- Cayenne Pepper – Optional for extra heat; simply omit for a milder version.
- Olive Oil – Helps soften vegetables and adds richness; can be substituted with avocado oil.
- Salt and Black Pepper – Essential for seasoning; add to taste for the best flavor.
Don't forget, these ingredients come together to create a homemade salsa that is truly fresh and flavorful!
Step‑by‑Step Instructions for Salsa
Step 1: Preheat the Oven
Begin by preheating your oven to 400°F (200°C). This will create the perfect environment for roasting the tomatoes and peppers. While the oven heats up, line a baking sheet with parchment paper to prevent sticking and ensure easy cleanup later.
Step 2: Prepare the Tomatoes
Wash the ripe Roma tomatoes thoroughly, removing any stems. Cut them in half, exposing their vibrant flesh, and arrange them cut-side up on the prepared baking sheet. You’ll want to see those beautiful bright colors, as they signal freshness that will enhance your homemade salsa.
Step 3: Add Onions and Jalapeños
Chop the large white onion and jalapeño peppers, adjusting the quantity of jalapeños according to your preferred heat level. Scatter the chopped onions and jalapeños around the tomatoes on the baking sheet, creating a colorful medley that will roast beautifully together.
Step 4: Drizzle with Olive Oil
Generously drizzle olive oil over the tomatoes, onions, and jalapeños, ensuring even coverage to enhance their flavors as they roast. The olive oil will help soften the vegetables and add richness, making your homemade salsa irresistible.
Step 5: Roast the Vegetables
Place the baking sheet in the preheated oven and roast the vegetables for 20-25 minutes. Look for a slight charring on the edges and a soft, tender texture, as this is crucial in developing deeper flavors that set your salsa apart from store-bought options.
Step 6: Cool the Roasted Vegetables
Once the vegetables are beautifully roasted, remove the baking sheet from the oven and let them cool for a few minutes. This cooling time is important for safe handling and will make blending easier, ensuring a smooth consistency for your homemade salsa.
Step 7: Transfer to Blender
Carefully transfer the roasted vegetables into a blender or food processor, making sure to include all the delicious juices that have accumulated on the baking sheet. This liquid will help create a luscious salsa with the perfect blend of flavors.
Step 8: Add Additional Ingredients
Now, add in minced garlic, fresh cilantro, ground cumin, chili powder, and cayenne pepper to the blender. This mix of ingredients will elevate your salsa, adding depth and a vibrant flavor profile that is sure to please any palate.
Step 9: Squeeze in Lime Juice
Pour fresh lime juice over the mixture in the blender. The acidity from the lime will brighten up the flavors, balancing the heat and sweetness in your salsa. Fresh juice is ideal, but bottled can be used if necessary.
Step 10: Blend to Desired Consistency
Blend everything together until you reach your desired consistency. Whether you prefer a chunky or smoother salsa, this method allows you to customize it just right for your taste buds and the needs of your meal.
Step 11: Season with Salt and Pepper
Once blended, taste your homemade salsa and season it with salt and black pepper. Adjust according to your preferences, ensuring a perfectly seasoned salsa that enhances every dish it's paired with.
Step 12: Chill and Meld Flavors
Transfer your salsa to an airtight container and let it chill in the refrigerator for at least 30 minutes. This chilling time is essential, as it allows the flavors to meld beautifully, creating a luscious salsa that everyone will enjoy.
Step 13: Serve and Enjoy
Finally, your homemade salsa is ready to be served! Pair it with tortilla chips, tacos, or grilled meats for a burst of freshness. Enjoy the vibrant flavors and know that you’ve created a delicious and versatile dish from scratch.
What to Serve with Homemade Salsa?
Elevate your meal with these delicious pairings that perfectly complement your vibrant homemade salsa!
-
Crispy Tortilla Chips: The classic pairing for salsa, these crunchy chips provide the perfect texture and a neutral canvas for the fresh flavors.
-
Grilled Chicken: Juicy, marinated grilled chicken is enhanced by salsa, giving a zingy contrast that brings each bite to life.
-
Zesty Tacos: Whether filled with beef, chicken, or veggies, tacos topped with your homemade salsa add a delightful burst of flavor that makes every bite unforgettable.
-
Avocado Toast: Spread creamy avocado on whole-grain bread, then add a generous spoonful of salsa for a fresh and exciting twist on a breakfast favorite!
-
Fish Tacos: Light and flaky fish, such as tilapia or cod, pairs beautifully with salsa, complementing the delicate fish with a spicy zing.
-
Refreshing Salad: Toss together greens, black beans, corn, and a handful of salsa for a refreshing and vibrant salad that speaks to the summer spirit.
-
Crisp Nachos: Layer tortilla chips with cheese and bake until melted, then top with your colorful salsa for an ultimate game-day snack that everyone loves.
-
Savory Egg Dishes: Serve salsa over scrambled eggs or omelets for a fun and zesty breakfast that transforms your morning routine.
-
Chilled White Wine: A glass of chilled Sauvignon Blanc or Pinot Grigio brings a refreshing balance to the heat and acidity of your homemade salsa.
Expert Tips for the Best Salsa
• Roasting Matters: Don't skip roasting the vegetables! This step is crucial for deepening the flavor of your salsa and enhancing its richness.
• Chill Time: Allow your salsa to chill for at least 30 minutes after blending. This helps the flavors meld together, creating an irresistible salsa.
• Taste as You Go: Always adjust the seasoning. Taste your salsa before serving, and feel free to add salt, pepper, or extra lime to get it just right.
• Experiment Freely: Salsa is highly customizable! Try different peppers, add fruits like mango or peach, or even incorporate black beans for a hearty twist.
• Storage Tips: To keep your salsa fresh, store it in an airtight container in the refrigerator for up to 5 days. For longer storage, freeze it in portions.
Enjoy creating your homemade salsa and savor the fresh flavors that will make any meal unforgettable!
Salsa Variations & Substitutions
Feel free to experiment and make this salsa truly your own by incorporating these exciting twists!
-
Spicy Upgrade: Substitute jalapeños with serrano peppers for an extra kick that heat lovers will adore. The smokiness complements the salsa beautifully.
-
Tropical Twist: Add diced pineapple or mango for a refreshing, sweet touch that balances the heat, making each bite a delightful surprise.
-
Heartier Mix: Incorporate black beans or corn for added protein and texture, transforming your salsa into a filling side dish that pairs wonderfully with tacos.
-
Garlic Lover's Dream: Instead of raw garlic, roast whole cloves with the other veggies for a mellow, sweet flavor that elevates your salsa.
-
Herb Varieties: If you’re not a fan of cilantro, swap it out for fresh parsley or even dill for a unique herbal twist that keeps the freshness alive.
-
Flavor Boost: Use smoked paprika instead of chili powder for a deeper, smokier flavor profile that adds complexity to your salsa.
-
Zesty Citrus: Mix in zest from an orange or lemon along with lime juice for an unexpected citrusy brightness that contrasts beautifully with the savory elements.
-
Creamy Addition: For a richer salsa, blend in some ripe avocado for creaminess that’s perfect for spreading on tacos or scooping with chips.
These variations not only cater to diverse palates, but they also let your creativity shine. Enjoy experimenting!
Make Ahead Options
These Homemade Salsa preparations are perfect for saving time on busy weeknights! You can roast the tomatoes, onions, and jalapeños up to 24 hours in advance. Simply follow the roasting steps and allow the vegetables to cool, then transfer them to an airtight container and refrigerate until ready to blend. When you're ready to finish the salsa, simply blend the chilled roasted vegetables with the remaining ingredients, season to taste, and allow it to chill for another 30 minutes to meld the flavors. This method keeps your salsa fresh and just as delicious, making meal prep a breeze!
How to Store and Freeze Salsa
Fridge: Store your homemade salsa in an airtight container in the refrigerator for up to 5 days. This keeps it fresh and ready for your next meal!
Freezer: For longer storage, freeze your salsa in portioned airtight containers or freezer bags. It can last up to 3 months; just thaw in the fridge before using.
Reheating: If you prefer your salsa warmed, gently heat it in a saucepan over low heat until warmed through, stirring occasionally to maintain texture.
Containers: Use glass or BPA-free plastic containers to prevent flavor absorption and ensure your salsa retains its vibrant taste and freshness.

Homemade Salsa Recipe FAQs
How do I choose ripe Roma tomatoes for salsa?
Absolutely! Look for Roma tomatoes that are firm but slightly soft to the touch, with a rich red color. Avoid any that have dark spots all over or feel overly mushy, as these may be past their prime. Freshness really makes a difference in flavor!
What is the best way to store homemade salsa?
To keep your homemade salsa fresh, store it in an airtight container in the refrigerator. It will stay good for up to 5 days. Just make sure to seal it well to prevent air from breaking down those delicious flavors!
Can I freeze homemade salsa?
Yes, you can! For freezing, use portioned airtight containers or freezer bags, ensuring there's minimal air inside. Your salsa can last up to 3 months in the freezer. For best results, thaw it overnight in the fridge before using, and stir well to recombine any separated liquid.
What should I do if my salsa is too runny?
If your salsa comes out runny, don’t worry! You can thicken it by simmering it over low heat on the stove for 10-15 minutes, stirring occasionally. This will evaporate some of the excess liquid. Alternatively, you can toss in some finely diced fresh tomatoes or a tablespoon of tomato paste to absorb some moisture, then blend again!
Is homemade salsa safe for my pets?
Make sure to keep homemade salsa away from your pets. Onions, garlic, and certain spices can be harmful to dogs and cats. Stick to more pet-friendly treats for your furry companions, and enjoy your salsa yourself!
Can I use different kinds of peppers in my salsa?
Certainly! You can experiment with various pepper types like serrano for extra heat or even sweet bell peppers for a milder version. The more variations, the merrier! Just adjust the quantity based on your heat tolerance.
Fresh Salsa Perfection: A Simple Indulgence for Any Meal
Ingredients
Equipment
Method
- Preheat your oven to 400°F (200°C) and line a baking sheet with parchment paper.
- Wash the Roma tomatoes, cut them in half and arrange cut-side up on the baking sheet.
- Chop the onion and jalapeños, adjusting for heat level, then scatter them over the tomatoes.
- Drizzle olive oil over the vegetables for even coverage.
- Roast the vegetables in the oven for 20-25 minutes until slightly charred and tender.
- Remove the vegetables from the oven and let them cool for a few minutes.
- Transfer roasted vegetables to a blender, including their juices.
- Add minced garlic, cilantro, cumin, chili powder, and cayenne pepper to the blender.
- Squeeze fresh lime juice over the mixture in the blender.
- Blend until you reach the desired consistency.
- Taste and season with salt and black pepper to your preference.
- Transfer salsa to an airtight container and chill in the refrigerator for at least 30 minutes.
- Serve with tortilla chips, tacos, or grilled meats.


Leave a Reply