
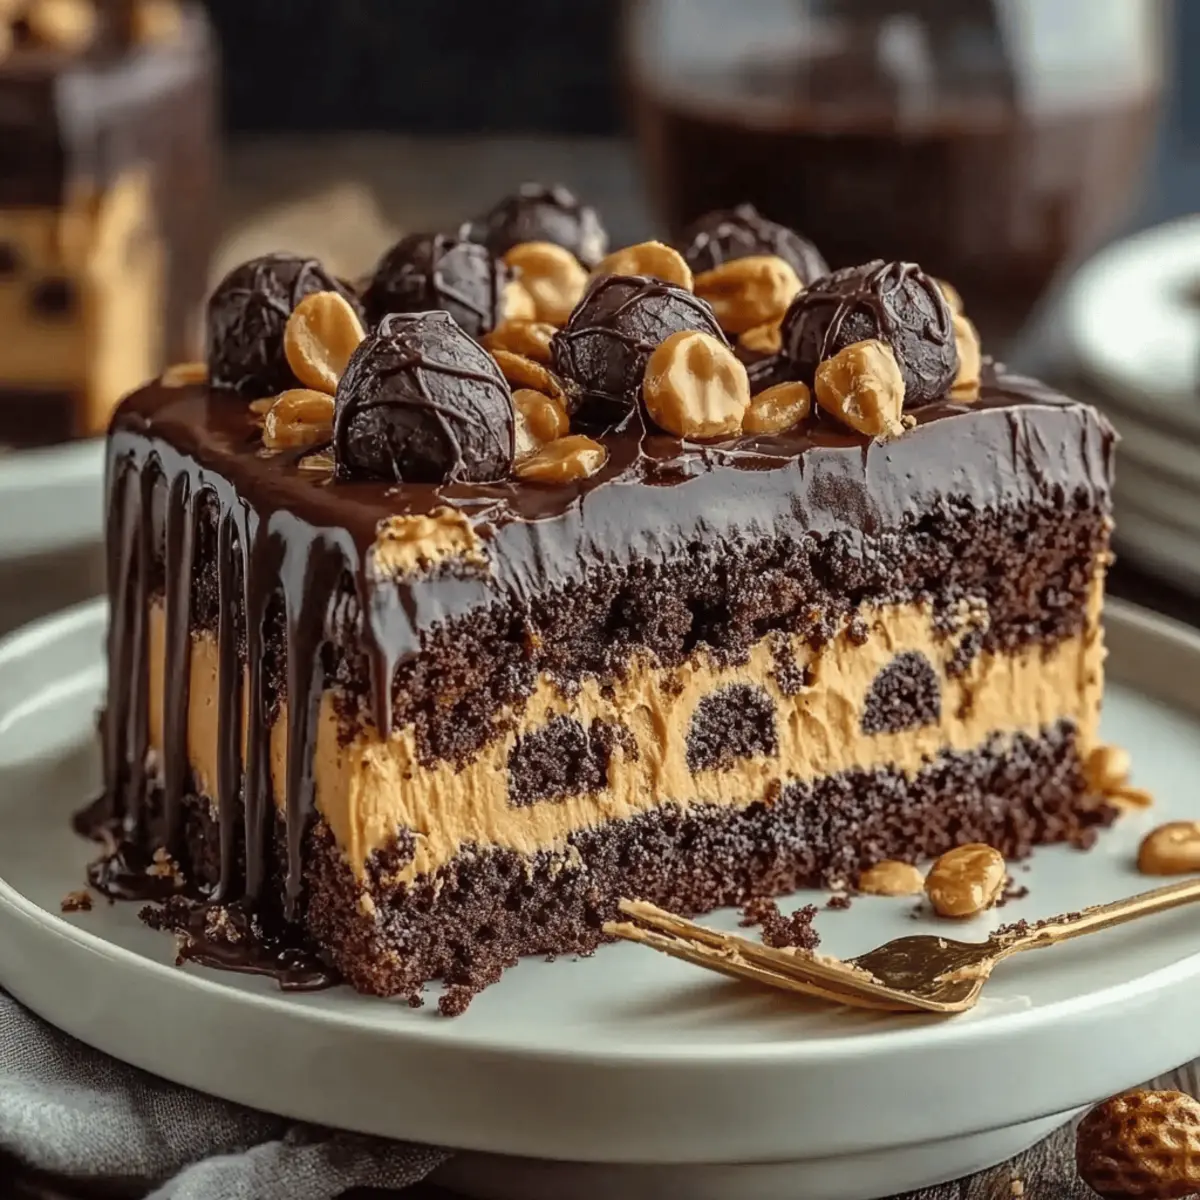
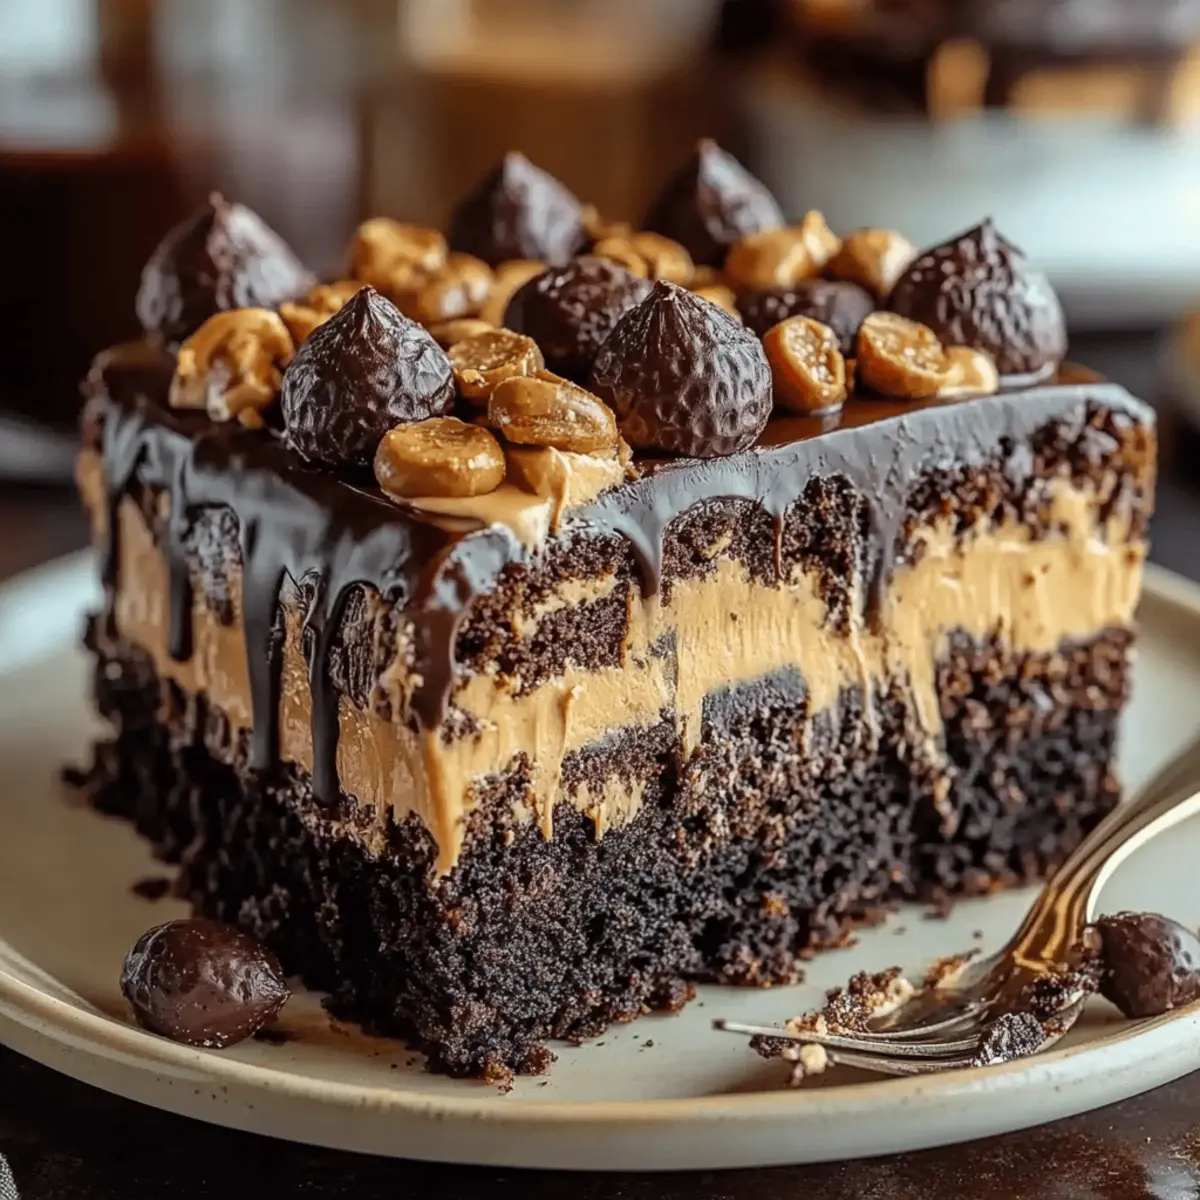
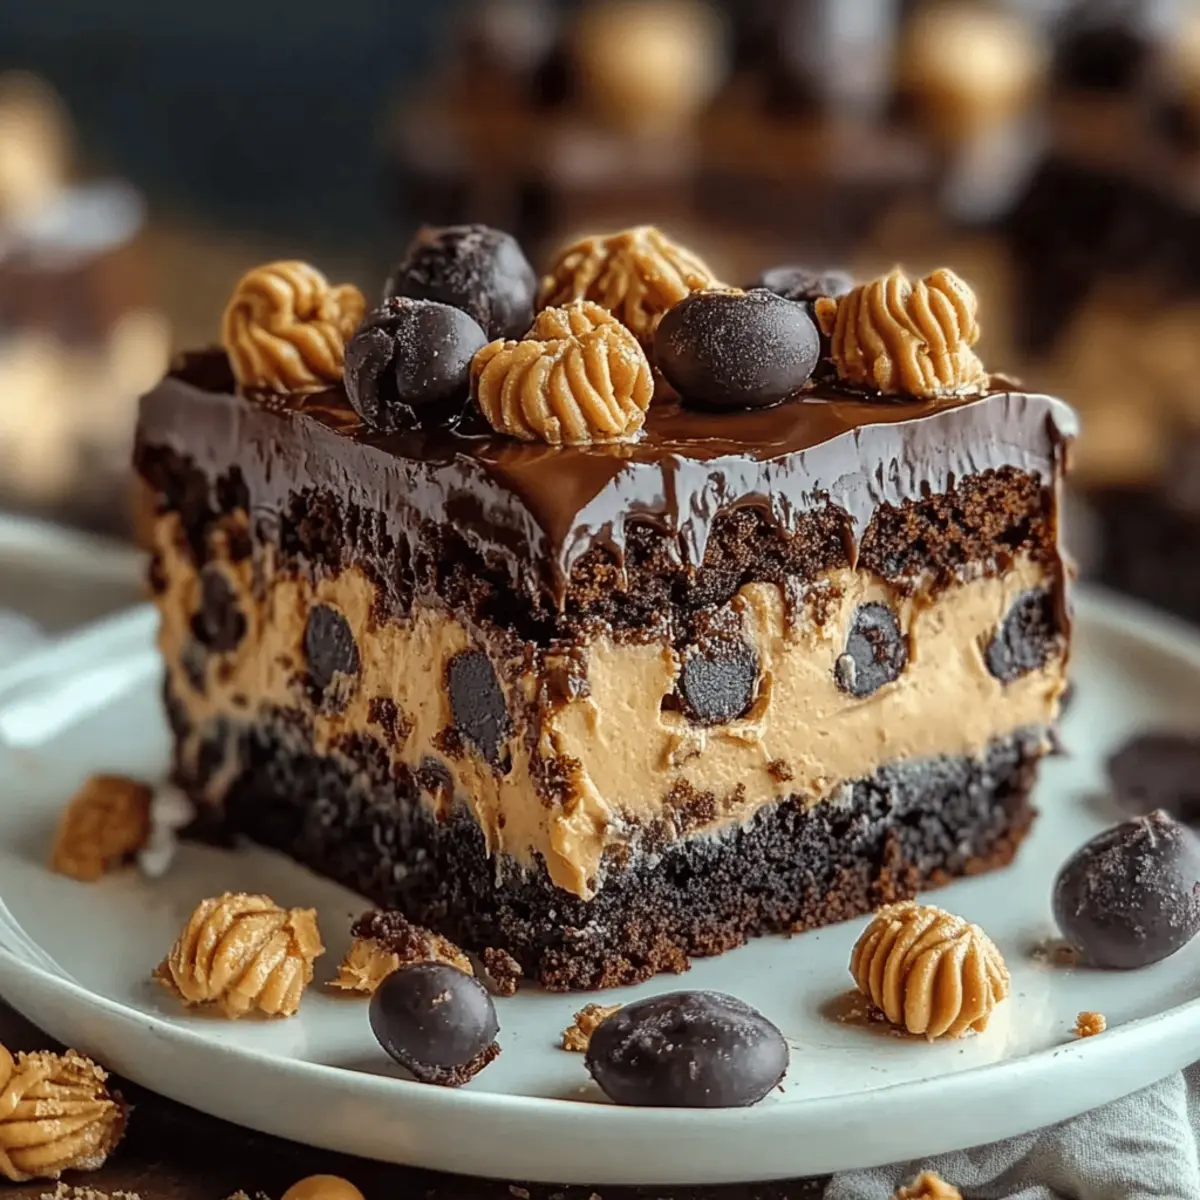
As I sifted through my dessert recipes, a bright idea struck me: why not whip up a Reese's Peanut Butter Earthquake Cake? This delightful treat is an absolute marvel, combining rich chocolate with swirls of creamy peanut butter that create a mouthwatering molten center. Not only is this dessert a showstopper for celebrations, but it’s also surprisingly easy to make, ensuring that even novice bakers can impress their friends and family. Plus, the joy of cutting into this cake, revealing its gooey heart, will surely bring smiles all around. Are you ready to make your next baking adventure one for the books? Let's dive into this deliciously decadent recipe!
Why is Earthquake Cake so special?
Decadent, this Reese's Peanut Butter Earthquake Cake brings together the best of both worlds with its rich chocolate and creamy peanut butter fusion. Easy to bake, even novice bakers can achieve delicious results that look impressive. Crowd-pleaser, it’s perfect for birthdays or casual gatherings, leaving everyone longing for seconds. Mouthwatering texture varies from moist cake to gooey center, ensuring every bite is a delightful surprise. Customizable, feel free to play with different candies or peanut butter types, personalizing each experience. This cake is truly a heavenly indulgence that everyone will adore!
Reese's Peanut Butter Earthquake Cake Ingredients
For the Cake
• Chocolate Cake Mix – This is the foundation of your decadent dessert; any brand will do for convenience.
• Water – Hydrates the cake mix; substituting with milk will create an even richer cake.
• Vegetable Oil – Provides moisture and tenderness; you can use melted coconut oil or butter as alternatives.
• Large Eggs – Essential for binding and moisture; don't skip this ingredient for the best structure.
For the Peanut Butter Filling
• Creamy Peanut Butter – Adds the signature rich flavor and creates that irresistible swirl; go for natural for a healthier twist.
• Powdered Sugar – Sweetens the filling; consider using less sugar or an alternative if you want a lower-sugar option.
• Cream Cheese – Gives a creamy texture to the filling; feel free to use Neufchâtel cheese for a lighter choice.
• Butter – Enhances flavor and richness; margarine can be swapped in if preferred.
• Vanilla Extract – Elevates the taste of your cake; pure vanilla extract is always best.
For the Toppings
• Hot Fudge Topping – Lends a luxurious finish to the cake; store-bought makes things easy, but homemade is a delightful touch.
• Reese's Peanut Butter Cups – Infuses the cake with chocolate and peanut butter goodness; experiment with other candies to switch up flavors.
Get ready to indulge in this deliciously delightful Reese's Peanut Butter Earthquake Cake!
Step‑by‑Step Instructions for Reese's Peanut Butter Earthquake Cake
Step 1: Preheat and Prepare
Start by preheating your oven to 350°F (175°C). While the oven heats up, grease a 9x13 inch baking pan with cooking spray or butter, ensuring it's well-coated to prevent sticking. Set it aside so you can pour the batter in later. The aroma of the warming oven will get your excitement brewing for this delicious Reese's Peanut Butter Earthquake Cake!
Step 2: Mix the Cake Batter
In a large mixing bowl, combine the chocolate cake mix, water, vegetable oil, and large eggs. Using a hand or stand mixer, beat the mixture on medium speed for about 2 minutes. The batter should be smooth and slightly thick, with no lumps remaining. This rich base will set the stage for your earthquake cake’s delightful texture and flavor.
Step 3: Pour the Batter
Once your batter is mixed to perfection, pour it into the prepared baking pan. Use a spatula to spread the batter evenly across the bottom, ensuring all corners are filled. This creates a solid foundation for the creamy peanut butter swirl that's to come. The anticipation will build as you prepare to add the next delicious layer!
Step 4: Prepare the Peanut Butter Filling
In a separate bowl, blend together the creamy peanut butter, powdered sugar, cream cheese, softened butter, and vanilla extract. Using an electric mixer or a whisk, mix until the filling is creamy and smooth. This luscious mixture will bring a delightful swirl to the Reese's Peanut Butter Earthquake Cake, enhancing its richness and flavor.
Step 5: Swirl the Peanut Butter Mixture
Drop spoonfuls of the peanut butter mixture over the chocolate batter, allowing it to dollop across the surface. Take a knife and gently swirl the two mixtures together to create a marbled effect. Be careful not to overmix; you want to maintain distinct swirls of rich chocolate and creamy peanut butter throughout the cake.
Step 6: Bake the Cake
Place the baking pan in the preheated oven and bake for 35-40 minutes. Keep an eye on your cake, checking for doneness by inserting a toothpick in the center. If it comes out with moist crumbs rather than batter, your Reese's Peanut Butter Earthquake Cake is ready to come out and cool, creating that perfect gooey center.
Step 7: Cool the Cake
Once baked, remove the cake from the oven and let it cool completely in the pan. This essential step allows the cake to firm up slightly and makes it easier to cut. The moment you cut into it, you’ll reveal the signature molten peanut butter swirl nestled within the decadent chocolate.
Step 8: Add the Hot Fudge
After the cake has cooled, warm the hot fudge topping according to the jar instructions. Once heated, pour it generously over the top of your cooled cake, allowing it to drizzle and spread across the surface. The rich fudge will complement the flavors of the Reese's Peanut Butter Earthquake Cake, enhancing your dessert experience.
Step 9: Top with Reese's Cups
Sprinkle the chopped Reese's Peanut Butter Cups over the melted fudge. This adds a delightful crunch and bursts of flavor with each bite. This beautiful topping transforms your dessert, both visually and in taste, making it irresistible for everyone who lays eyes on it.
Step 10: Slice and Serve
Allow the fudge to set slightly before cutting the cake into squares. Use a sharp knife to create clean cuts, revealing the rich layers inside. Serve each slice on a plate, perhaps accompanied by a scoop of vanilla ice cream for an extra-indulgent treat. Your friends and family will be thrilled to dig into this sensational Reese's Peanut Butter Earthquake Cake!

Helpful Tricks for Reese's Peanut Butter Earthquake Cake
-
Room Temperature Ingredients: Ensure all ingredients are at room temperature for a smoother batter and better mixing to create an even, delicious Reese's Peanut Butter Earthquake Cake.
-
Monitor Baking Time: Check for doneness at the 35-minute mark to prevent over-baking. A toothpick should come out with moist crumbs, ensuring a gooey center.
-
Perfect Swirling Technique: When swirling the peanut butter mixture, don’t overmix! Aim for beautifully marbled patterns for an appetizing look and satisfying texture.
-
Serving Tips: For an indulgent experience, serve the cake warm with a scoop of vanilla ice cream or whipped cream. This pairs excellently with the peanut butter and chocolate flavors.
-
Storing Leftovers: Keep leftovers in an airtight container in the refrigerator for up to 3 days. Rewarm slices in the microwave for a melty treat that tastes just as good as fresh!
Storage Tips for Reese's Peanut Butter Earthquake Cake
Room Temperature: Enjoy your cake at room temperature for up to 2 days, ensuring it's covered to keep it moist and delicious.
Fridge: Store slices in an airtight container in the refrigerator for up to 3 days. This keeps the cake fresh while maintaining its gooey center.
Freezer: For longer storage, freeze individual slices wrapped in plastic wrap and then in aluminum foil for up to 2 months. Thaw overnight in the fridge before enjoying!
Reheating: To enjoy that melted, delicious texture, rewarm slices in the microwave for about 10-15 seconds. You can also pair it with a scoop of ice cream for an indulgent dessert treat!
Reeses Peanut Butter Earthquake Cake Variations
Feel free to play around with flavors and textures in this delightful dessert to suit your preferences!
-
Nut-Free: Swap out peanut butter for sunbutter or almond butter for a nut-free cake that still brings that creamy richness.
-
Gluten-Free: Use a gluten-free chocolate cake mix to surprise friends with a gluten-free version that doesn’t skimp on flavor!
-
Chocolate Lovers: For an extra chocolatey twist, mix in chocolate chips into the batter or sprinkle them on top along with the Reese's Cups.
-
Spicy Kick: Add a pinch of cayenne pepper or a dash of cinnamon to the chocolate batter for an exciting hint of spice that complements the sweetness.
-
Fruit Fusion: Incorporate applesauce into the peanut butter filling for a fruity twist or try adding some crushed bananas to the batter for an added depth of flavor.
-
Vegan Delight: Replace eggs with flax eggs and use almond milk and coconut oil to create a vegan-friendly version that everyone will love!
-
Cheesecake Surprise: Introduce a layer of cheesecake by mixing cream cheese with sugar and vanilla to add a delicious tang to your cake.
-
Toppings Galore: Level up your creation by topping with whipped cream, crushed nuts, or even a drizzle of caramel for an extravagant finish!
Make Ahead Options
These Reese's Peanut Butter Earthquake Cake can easily be prepped in advance, making it perfect for busy weeknights or special occasions! You can prepare the chocolate cake batter and pour it into the baking pan, then refrigerate it for up to 24 hours before baking; just cover well to maintain moisture. Additionally, the peanut butter filling can be made ahead and stored in the refrigerator for up to 3 days. When you're ready to bake, simply take the cake batter out, swirl in the chilled peanut butter mixture, and bake as directed. This way, you'll enjoy a show-stopping dessert with minimal last-minute effort, delivering just as delicious results!
What to Serve with Reese's Peanut Butter Earthquake Cake?
Indulge in a full dessert experience that captivates your taste buds and leaves everyone reaching for the last slice.
- Vanilla Ice Cream: The creamy chill of vanilla ice cream contrasts beautifully with the warm, gooey cake, making each bite heavenly. It's a classic pairing that never gets old.
- Caramel Sauce: A drizzle of rich caramel sauce adds an irresistible depth of sweetness, enhancing the cake's luscious flavors. Its sticky texture perfectly complements the soft sponge.
- Whipped Cream: Light and airy, a dollop of fresh whipped cream provides a delightful contrast to the dense cake, balancing the richness with a fluffy finish.
- Fresh Berries: Strawberries or raspberries add a refreshing burst of acidity, cutting through the chocolate and peanut butter, easing the indulgence just enough.
- Chocolate Milkshake: For a delightful touch, serve a chocolate milkshake on the side for those who crave extra chocolatey goodness. It’s a nostalgic treat that everyone loves!
- Coffee: A warm cup of coffee can enhance the cake’s flavors, bringing out the richness and making each bite more enjoyable. The slight bitterness is a perfect counterpoint to the sweet cake.
- Chocolate Ganache: If you crave more chocolate, pour a silky layer of ganache over the cake for an even more decadent experience; each additional layer intensifies the delight.
Reese's Peanut Butter Earthquake Cake Recipe FAQs
How should I select the best chocolate cake mix for this recipe?
Absolutely! When choosing a chocolate cake mix, look for one that is rich in cocoa and has a moist texture. I recommend opting for a brand you’ve enjoyed in the past. Checking the "best before" date ensures freshness, which translates to better flavor in your Reese's Peanut Butter Earthquake Cake.
What’s the best way to store any leftover cake?
For the best flavor and texture, store your leftover Reese's Peanut Butter Earthquake Cake in an airtight container. It will keep well at room temperature for 2 days, or you can refrigerate it for up to 3 days. Just remember to cover it tightly, so it stays moist!
Can I freeze this cake? If so, how?
Yes, you can absolutely freeze it! To freeze your Reese's Peanut Butter Earthquake Cake, first, let it cool completely. Then, wrap individual slices tightly in plastic wrap and then in aluminum foil. This prevents freezer burn. You can store it like this for up to 3 months! When you're ready to indulge again, just thaw it overnight in the refrigerator.
What should I do if my cake turns out dry?
If you find that your cake is dry, it could be due to over-baking. I recommend checking for doneness at around the 35-minute mark with a toothpick; it should have moist crumbs, not batter. If your cake is already baked and dry, you can try serving it warm with a drizzle of hot fudge or a scoop of ice cream, that will add back some moisture!
Can I make this cake gluten-free?
Certainly! To make a gluten-free version of the Reese's Peanut Butter Earthquake Cake, simply replace the chocolate cake mix with a gluten-free cake mix. Also, check that your other ingredients, like the baking soda or powder, are certified gluten-free. It’ll be just as delicious, trust me!
Is this cake safe for pets or those with nut allergies?
While the Reese's Peanut Butter Earthquake Cake is a delightful treat for humans, be cautious about sharing it with pets as chocolate and nuts can be harmful to them. Additionally, its heavy peanut butter content makes it unsuitable for those with nut allergies. Always double-check for any dietary restrictions before sharing the cake!
Indulge in Reeses Peanut Butter Earthquake Cake Bliss
Ingredients
Equipment
Method
- Preheat your oven to 350°F (175°C) and grease a 9x13 inch baking pan.
- In a large mixing bowl, combine chocolate cake mix, water, vegetable oil, and eggs. Mix on medium speed for about 2 minutes.
- Pour the batter into the prepared baking pan and spread evenly.
- In a separate bowl, blend together creamy peanut butter, powdered sugar, cream cheese, butter, and vanilla extract until smooth.
- Drop spoonfuls of the peanut butter mixture over the chocolate batter and swirl gently to create a marbled effect.
- Bake for 35-40 minutes, checking for doneness with a toothpick.
- Once baked, let the cake cool completely in the pan.
- Warm the hot fudge topping and pour it over the cooled cake.
- Sprinkle chopped Reese's Peanut Butter Cups over the melted fudge.
- Allow the fudge to set before slicing and serving with ice cream, if desired.


Leave a Reply