
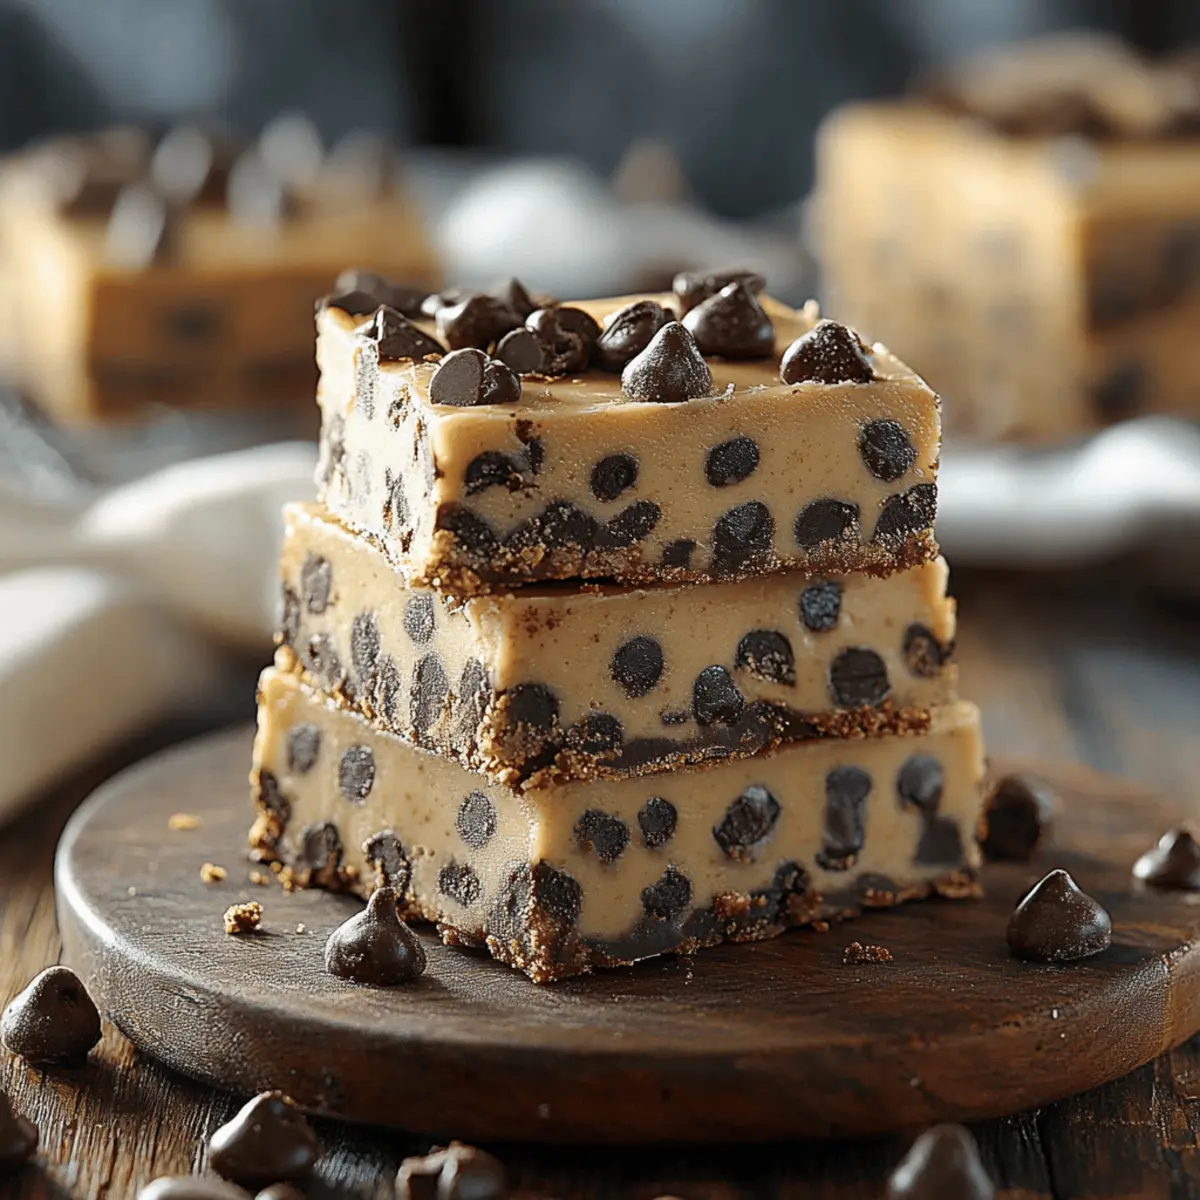
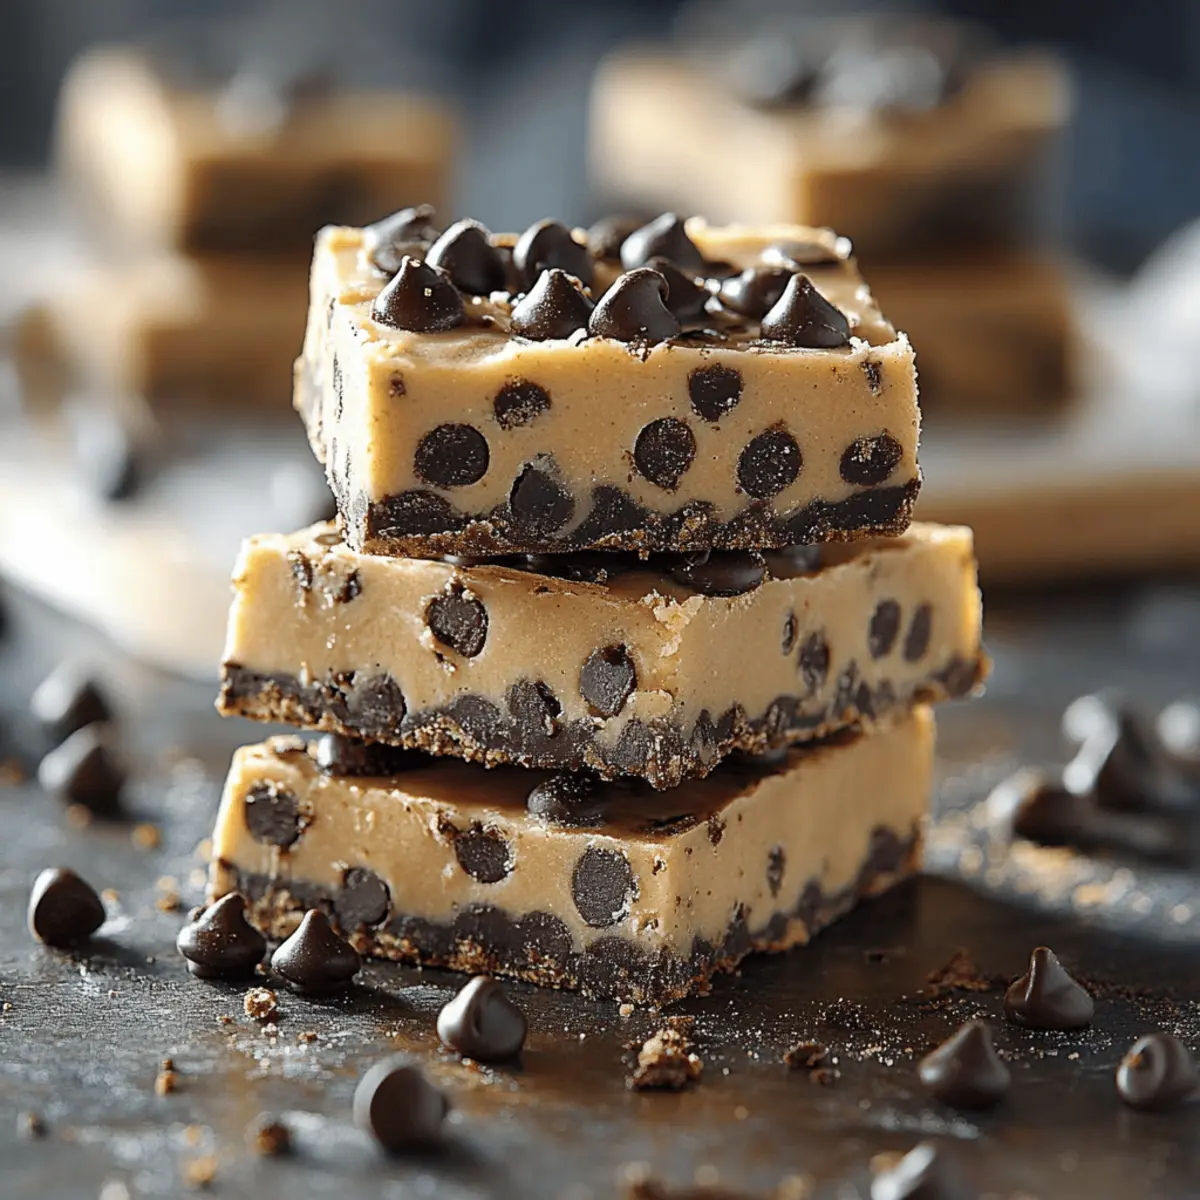
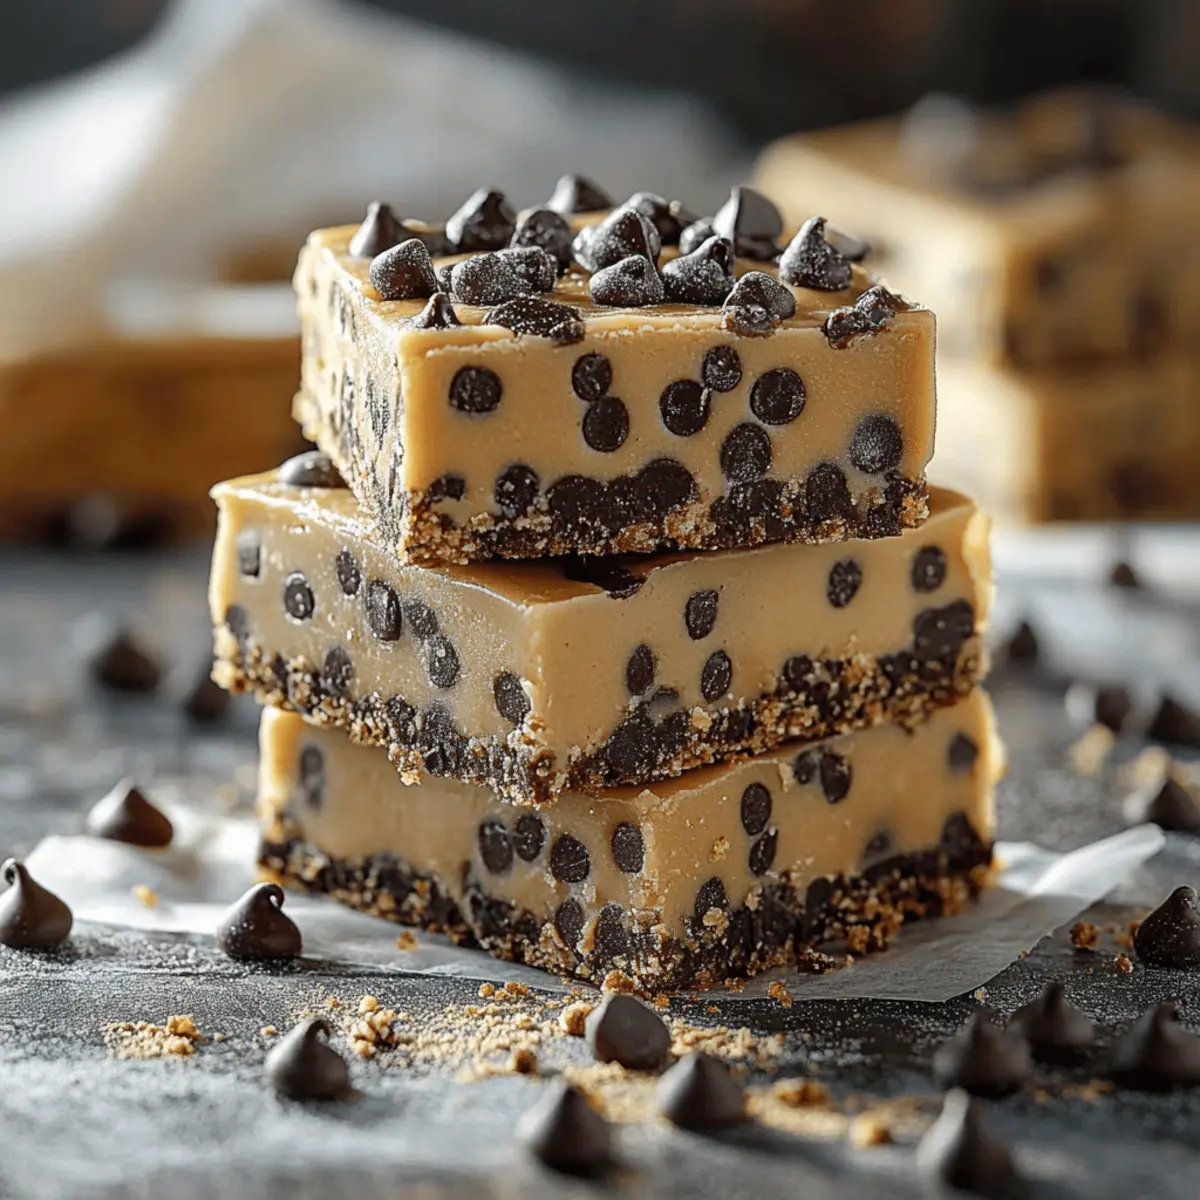
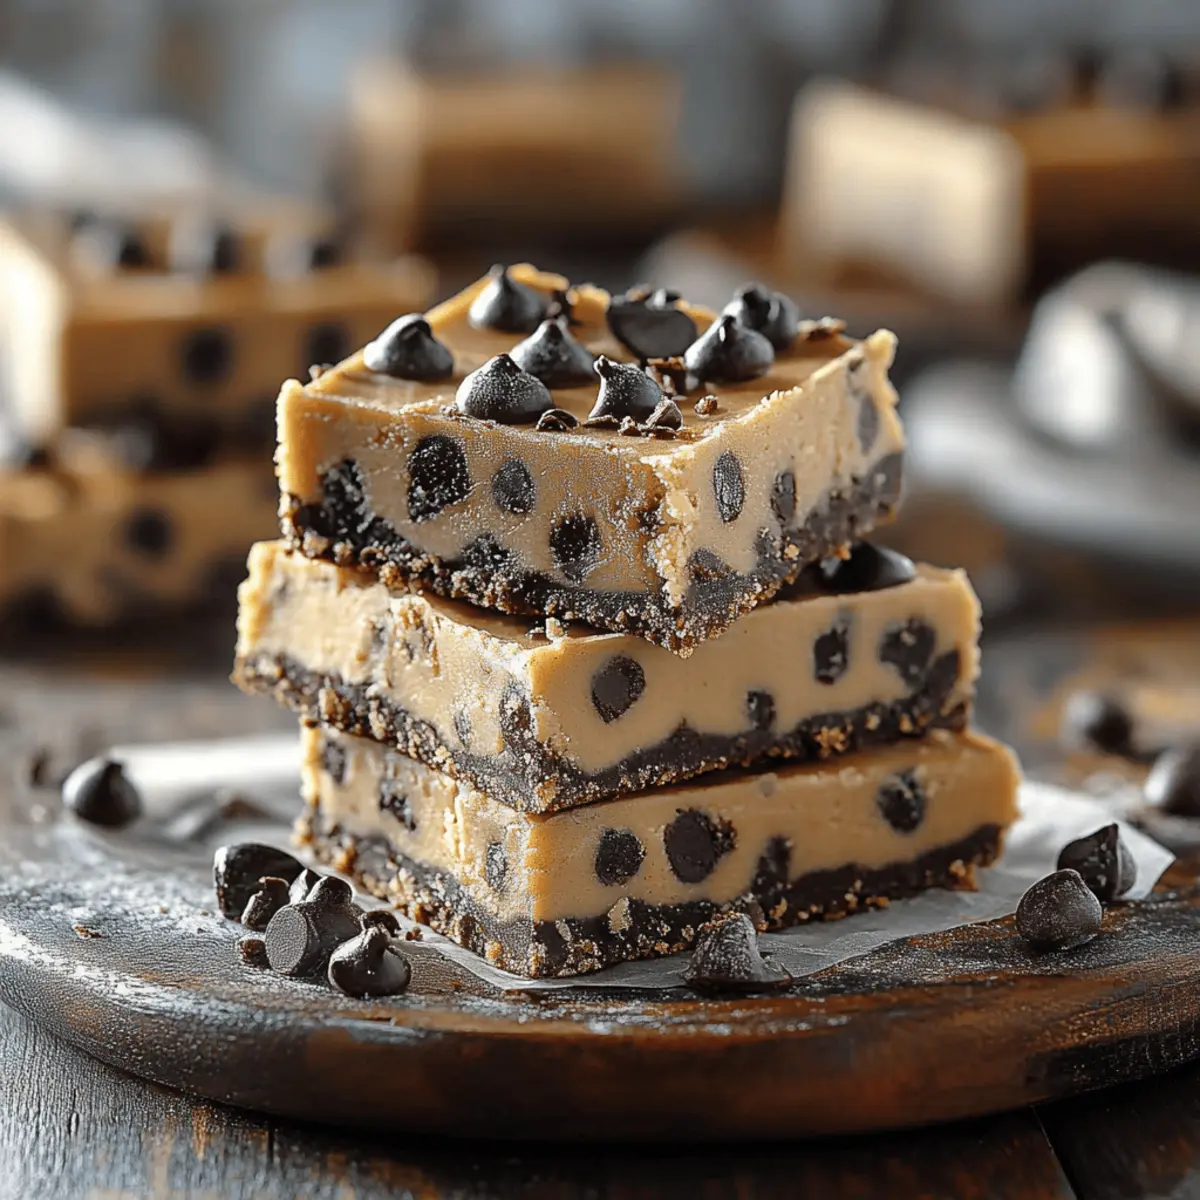
As I rummaged through my pantry, a delightful thought struck me: what if I could enjoy the nostalgic taste of raw cookie dough without firing up the oven? That’s how I stumbled upon the magic of No Bake Cookie Dough Bars! These decadent bars are a dreamy fusion of creamy dough and rich chocolate, perfect for any occasion where you crave a sweet treat but lack time. Not only are they incredibly easy to make, but they can also be tailored to fit vegan and gluten-free diets, making them a versatile crowd-pleaser. So, whether you’re planning a potluck or just indulging a late-night sweet tooth, these bars are sure to satisfy. What’s your favorite way to personalize a classic dessert?
Why Make No Bake Cookie Dough Bars?
Simplicity: This recipe is all about ease, so you can whip them up in no time without any baking skills required.
Decadent Flavor: The combination of rich cookie dough and luscious chocolate creates a dessert experience that’s truly indulgent.
Customizable: Whether you prefer nuts, pretzels, or a gluten-free twist, these bars can be adapted to suit any dietary need or personal taste. Explore more options with our variation ideas.
Crowd-Pleaser: These bars are always a hit at gatherings, ensuring that everyone—from kids to adults—will be reaching for seconds!
Make-Ahead Magic: Perfect for prepping in advance, storing well in the fridge or freezer, and perfect for when you need a sweet treat in a hurry!
No Bake Cookie Dough Bars Ingredients
For the Base
- Unsalted Butter – Provides a rich, creamy texture; substitute with plant-based butter for a vegan-friendly option.
- Granulated Sugar – Adds sweetness and texture; opt for coconut sugar for a lower glycemic choice.
- Light Brown Sugar – Enhances depth and moisture; regular granulated sugar works if brown sugar is unavailable.
- Salt – Balances sweetness; adjust to taste for a lower sodium intake.
For the Filling
- All-Purpose Flour – Provides structure; remember to heat-treat it for safety, or substitute with heat-treated almond flour for a gluten-free version.
- Sweetened Condensed Milk – Adds creaminess and binds the mixture together; use dairy-free for a vegan adaptation.
- Semi-Sweet Chocolate Chips – Essential for that rich chocolate flavor; dark or vegan chocolate can be used as a twist.
- Mini Chocolate Chips (Optional) – Sprinkle on top for added chocolate goodness; skip if you prefer a simpler treat.
For the Ganache
- Vegetable Oil – Ensures smooth melting for the chocolate; any neutral oil will work perfectly.
- Additional Chocolate Chips – Melt further chocolate for a luscious glossy top on your bars.
These No Bake Cookie Dough Bars can be easily transformed to fit various dietary preferences, making them the perfect treat for everyone!
Step‑by‑Step Instructions for No Bake Cookie Dough Bars
Step 1: Heat-Treat Flour
Preheat your oven to 350°F (175°C). Spread the all-purpose flour evenly on a baking sheet and bake it for 5–7 minutes until it’s slightly warm. This crucial step ensures the flour is safe to eat by killing any potential bacteria. After baking, allow the flour to cool completely before moving on to the next step.
Step 2: Cream Butter & Sugars
In a large mixing bowl, use a hand mixer or stand mixer to cream together 1 cup of softened unsalted butter with ¾ cup of granulated sugar and ½ cup of light brown sugar. Beat the mixture on medium speed for about 3–5 minutes until it becomes light, fluffy, and well combined. The sweetness is essential for the No Bake Cookie Dough Bars, so ensure thorough mixing.
Step 3: Add Flavorings
Once your butter and sugars are well combined, add in 2 teaspoons of pure vanilla extract and a pinch of salt. Mix on low speed until the flavors are fully incorporated, about 30 seconds. The aroma of vanilla will fill your kitchen, making this an irresistible base for your creamy filling.
Step 4: Combine Mixtures
Gradually add the cooled, heat-treated flour and 1 can of sweetened condensed milk to the butter mixture. Use a spatula or wooden spoon to fold the ingredients together, mixing until the dough becomes thick and sticky, about 2–3 minutes. This combination is where the magic of your No Bake Cookie Dough Bars takes shape.
Step 5: Fold in Chocolate Chips
Gently fold in 1 cup of semi-sweet chocolate chips into your thick cookie dough mixture. Use slow, sweeping motions to ensure that the chocolate chips are evenly distributed throughout the dough. This adds delightful pockets of chocolate that will melt in your mouth and elevate the flavor of your No Bake Cookie Dough Bars.
Step 6: Prepare Ganache
In a microwave-safe bowl, combine an additional ½ cup of semi-sweet chocolate chips with 1 tablespoon of vegetable oil. Microwave in 20-second intervals, stirring in between, until the chocolate is melted and smooth, about 1 minute total. This ganache will create a glossy topping for your No Bake Cookie Dough Bars that adds indulgence.
Step 7: Assemble Bars
Line a 9x9-inch baking pan with parchment paper for easy removal. Press the cookie dough mixture evenly into the bottom of the prepared pan, creating a smooth layer. Pour the melted ganache over the dough and spread it evenly using a spatula, ensuring a luscious coating on top of your bars.
Step 8: Chill
Cover the baking pan with plastic wrap or aluminum foil and refrigerate for at least 2 hours or overnight. Chilling not only helps the No Bake Cookie Dough Bars set but also intensifies their flavors, ensuring a satisfying sweet treat when you’re ready to enjoy them.
Step 9: Cut & Serve
Once chilled and firm, lift the bars from the pan using the parchment paper. Place on a cutting board and use a sharp knife to cut them into squares or rectangles. These No Bake Cookie Dough Bars can be served chilled straight from the fridge or enjoyed at room temperature, making them versatile for any occasion.
Storage Tips for No Bake Cookie Dough Bars
Fridge: Store your No Bake Cookie Dough Bars in an airtight container in the refrigerator for up to one week. This ensures they stay fresh and ready for snacking!
Freezer: For longer storage, freeze individual bars wrapped in plastic wrap and sealed in a freezer bag for up to 2 months. Thaw them in the fridge overnight before enjoying!
Serving Temperature: These bars can be enjoyed straight from the fridge or at room temperature. Allowing them to sit for about 10 minutes after taking them out enhances their creamy texture.
Make-Ahead Magic: Prepping these bars in advance is fantastic for gatherings; they hold their flavor and integrity well, making them a perfect last-minute dessert option!
What to Serve with No Bake Cookie Dough Bars?
Indulge in a sweet symphony of flavors and textures with delightful side dishes that elevate your dessert experience.
- Cold Glass of Milk: A classic pairing that complements the rich sweetness of the bars, enhancing every bite with its creamy flavor.
- Fresh Fruit Medley: Chilled strawberries, blueberries, or banana slices add a refreshing burst of natural sweetness that beautifully contrasts the dessert’s rich texture.
- Vanilla Ice Cream: A scoop of cold, creamy goodness paired with the bars makes for a decadent treat that feels like a celebration.
- Nutty Granola: Sprinkle over the bars for a satisfying crunch and a healthy twist, balancing the sweetness while adding fiber.
- Rich Coffee: A warm cup of coffee enhances the chocolatey richness, making it a perfect companion for those late-night cravings.
- Chocolate Sauce Drizzle: Elevate each bite with melted chocolate poured over the top for an extra touch of indulgence; irresistible for chocolate lovers!
- Creamy Whipped Topping: Light and airy, this topping adds a fluffy texture that perfectly balances the richness of the bars; a delightful finish!
- Crushed Nuts: Serve with crushed walnuts or pecans for a nutty crunch that adds an earthy flavor punch to each creamy bite.
- Coconut Flakes: Toasted coconut flakes bring a tropical twist, adding subtle sweetness and chewiness that pairs well with the rich chocolate.
- Hot Fudge Sundae: For ultimate indulgence, serve the bars as part of a dessert sundae topped with hot fudge, emphasizing decadence for special occasions.
No Bake Cookie Dough Bars Variations
Explore the endless possibilities and make this recipe your own with delightful twists and customizations!
- Nutty Bliss: Add chopped walnuts or pecans for added crunch and flavor contrast.
- Fruity Surprise: Toss in dried cranberries or cherries for a sweet and tangy burst.
- Salted Caramel: Drizzle homemade or store-bought caramel sauce over the ganache before chilling for a luxurious touch.
- Spicy Kick: Sprinkle a hint of cinnamon or cayenne pepper into the dough for a surprising flavor twist.
- Chewy Texture: Swap out some chocolate chips for mini marshmallows for a gooey treat.
- Creamy Coconut: Mix shredded coconut into your dough for a tropical flair; top with a coconut chocolate drizzle for extra richness.
- Peanut Butter Swirl: For peanut lovers, incorporate creamy peanut butter into the filling, or swirl it through the ganache for divine layers of flavor.
- Low-Sugar Option: Use a combination of ripe banana purée and stevia instead of sugar for a healthier take without sacrificing taste.
Feel free to unleash your creativity and make these bars uniquely yours! Don’t forget to check out our tips on storage and serving for a truly unforgettable experience!
Expert Tips for No Bake Cookie Dough Bars
-
Heat-Treat Flour Safely: Always ensure to heat-treat your flour at 350°F for 5–7 minutes to eliminate harmful bacteria; skipping this step can lead to food safety issues.
-
Ingredient Quality Matters: Use high-quality unsalted butter and semi-sweet chocolate for richer flavor in your No Bake Cookie Dough Bars. Subpar ingredients can lead to a less satisfying treat.
-
Perfect Chilling Time: Allow at least 2 hours or preferably overnight for chilling. This not only helps the bars firm up but also deepens the flavors, making every bite a delight.
-
Avoid Overmixing: Combine the dough just until ingredients are incorporated to maintain the soft, indulgent texture. Overmixing can lead to a tougher bar.
-
Customization is Key: Feel free to get creative with your mix-ins or toppings! Adding nuts or using vegan alternatives allows you to tailor your No Bake Cookie Dough Bars to your personal taste.
Make Ahead Options
These No Bake Cookie Dough Bars are a fantastic option for busy home cooks looking to save time! You can prepare the cookie dough filling and assemble the bars up to 24 hours in advance. Simply follow the instructions to mix the dough, press it into your lined baking pan, and cover it tightly with plastic wrap or foil. When you’re ready to enjoy, melt the ganache and pour it over the set dough. Allow the bars to chill for an additional 1-2 hours if they’ve been in the fridge overnight. This method not only saves you time but also enhances the flavors, ensuring your bars are just as delicious as when freshly made!
No Bake Cookie Dough Bars Recipe FAQs
How do I know if my ingredients are ripe and ready to use?
For this recipe, the most important ingredient to focus on is the unsalted butter. It should be at room temperature, which means soft enough to easily cream with sugars but not melted. As for the sugars, make sure they aren’t clumpy or hard. If you're using nuts or chocolate chips as additional mix-ins, I recommend checking that they’re fresh—look for any unusual smells or changes in texture.
What’s the best way to store No Bake Cookie Dough Bars?
Absolutely! Store your No Bake Cookie Dough Bars in an airtight container in the refrigerator for up to 1 week. If you want to keep them longer, I often freeze individual bars wrapped in plastic wrap and then place them in a freezer bag. They can last up to 2 months in the freezer! Just remember to thaw them in the fridge overnight before enjoying for the best texture.
Can I freeze No Bake Cookie Dough Bars, and how?
Yes, you can definitely freeze these bars! After cutting them into squares, wrap each bar in plastic wrap and place them in an airtight freezer-safe container or bag. They will stay fresh for up to 2 months. When you're ready to enjoy, simply remove them from the freezer and let them thaw in the fridge for several hours or overnight. This method helps maintain their delicious texture while preserving all that chocolaty goodness!
What should I do if my bars are too sticky or crumbly?
If your No Bake Cookie Dough Bars are too sticky, this commonly happens when not enough flour is added or the sweetened condensed milk is a bit too much. Try adding a couple of tablespoons of heat-treated flour until you reach the desired consistency. Conversely, if they are crumbly, you may need to use a touch more sweetened condensed milk. It’s all about finding the right balance!
Are there any dietary considerations for making these bars?
Absolutely! This recipe is quite versatile. For a vegan version, substitute the unsalted butter for vegan butter and use dairy-free sweetened condensed milk. Additionally, if you want to make this gluten-free, ensure to use heat-treated gluten-free flour in place of all-purpose flour. When offering these bars to friends or family, make sure to note any potential allergies, specifically related to nuts or chocolate, and feel free to customize mix-ins based on their preferences!
Indulgent No Bake Cookie Dough Bars You’ll Crave Daily
Ingredients
Equipment
Method
- Preheat your oven to 350°F. Spread the flour on a baking sheet and bake for 5-7 minutes. Allow to cool completely.
- Cream the softened butter, granulated sugar, and brown sugar in a bowl until light and fluffy for 3-5 minutes.
- Add vanilla extract and a pinch of salt to the butter mixture and mix on low speed for 30 seconds.
- Fold in the cooled flour and sweetened condensed milk until thick and sticky, about 2-3 minutes.
- Gently fold in the semi-sweet chocolate chips into the dough mixture.
- Combine additional chocolate chips and vegetable oil in a microwave-safe bowl. Microwave until melted and smooth.
- Line a baking pan with parchment paper. Press the cookie dough into the pan, then pour the ganache over it.
- Cover and refrigerate for at least 2 hours. Cut into bars once set.


Leave a Reply