
As the first chill of autumn sweeps in, memories of cozy evenings gather around the table, and that sweet, cinnamon-spiced aroma fills the air—the kind that instantly warms your heart. This is how I feel every time I whip up my Simple Apple Crisp. It’s an easy dessert that serves as a warm hug in a bowl, featuring tender, spiced apples cocooned beneath a crisp, golden topping. Not only can you whip this up with minimal effort, but it’s also customizable to fit your taste or dietary needs, including gluten-free options. Whether you're hosting a family gathering or enjoying a quiet night in, this comfort food classic is sure to impress. Have you ever tasted the simple joy of homemade apple crisp just out of the oven?
What makes this apple crisp a must-try?
Simplicity at its finest: This recipe requires only a few familiar ingredients and minimal prep time, making it perfect for bakers of all skill levels. Customizable to your liking: Feel free to swap in your favorite fruits or spices for a unique twist each time. Warm and comforting, the combination of spiced, tender apples with a crispy topping creates a delightful experience. Family-friendly and guaranteed to please even picky eaters, it's the ideal dessert for gatherings. Want to get creative? Check out my tips for gluten-free options to accommodate everyone at your table!
Apple Crisp Ingredients
• Gather these basics for delicious results:
For the Filling
- Apples – Use tart varieties like Granny Smith for a balanced flavor that brings the apple crisp to life.
- White Sugar – Enhances the natural sweetness of apples; you can substitute with coconut sugar for a healthier option.
- Brown Sugar – Adds a rich, caramel flavor that contrasts beautifully with the tart apples.
- Cinnamon – Provides warm spice notes that make this apple crisp comforting; try pumpkin spice for a seasonal twist.
- Nutmeg – Complements cinnamon with deeper flavor; this is optional and can be adjusted per your taste.
- All-purpose Flour (for filling) – Helps bind the apples together; gluten-free flour or cornstarch works great as a substitute.
- Lemon Juice – Brightens the apple flavor while preventing browning and enhancing freshness.
For the Topping
- Porridge Oats – The main component of the topping for that satisfying crunch; feel free to use gluten-free oats as an alternative.
- All-purpose Flour (for topping) – Provides structure to the topping; almond flour can be used for a gluten-free version.
- Brown Sugar (for topping) – Contributes sweetness and those delightful caramel notes that keep you coming back for more.
- Salt – A pinch helps balance the sweetness of the sugars perfectly.
- Butter – Adds richness and aids in achieving that crispy texture; for a dairy-free option, swap in vegan butter.
Step‑by‑Step Instructions for Easy Simple Apple Crisp
Step 1: Prepare the Apples
Begin by peeling, coring, and slicing about six tart apples, such as Granny Smith, and place them in a large mixing bowl. Toss the apple slices with white sugar, brown sugar, cinnamon, nutmeg, all-purpose flour, and a splash of lemon juice until everything is evenly coated. This mixture should appear glossy and fragrant, as the sugars and spices work their magic on the apples.
Step 2: Make the Topping
In a separate bowl, combine the porridge oats, all-purpose flour, brown sugar, and a pinch of salt. Using a pastry cutter or your fingers, cut in cold butter until the mixture resembles coarse crumbs—about the size of peas. When ready, the topping should feel slightly crumbly yet hold together when pressed. This delicious topping will create a crunchy contrast to the tender apple filling.
Step 3: Preheat the Oven
Now, preheat your oven to 375°F (190°C). While it warms up, butter a 9x13-inch baking dish to prevent sticking and ensure a golden finish. Feel free to use softened vegan butter if preparing a dairy-free option. This step sets the stage for baking your delicious apple crisp to perfection!
Step 4: Assemble & Bake
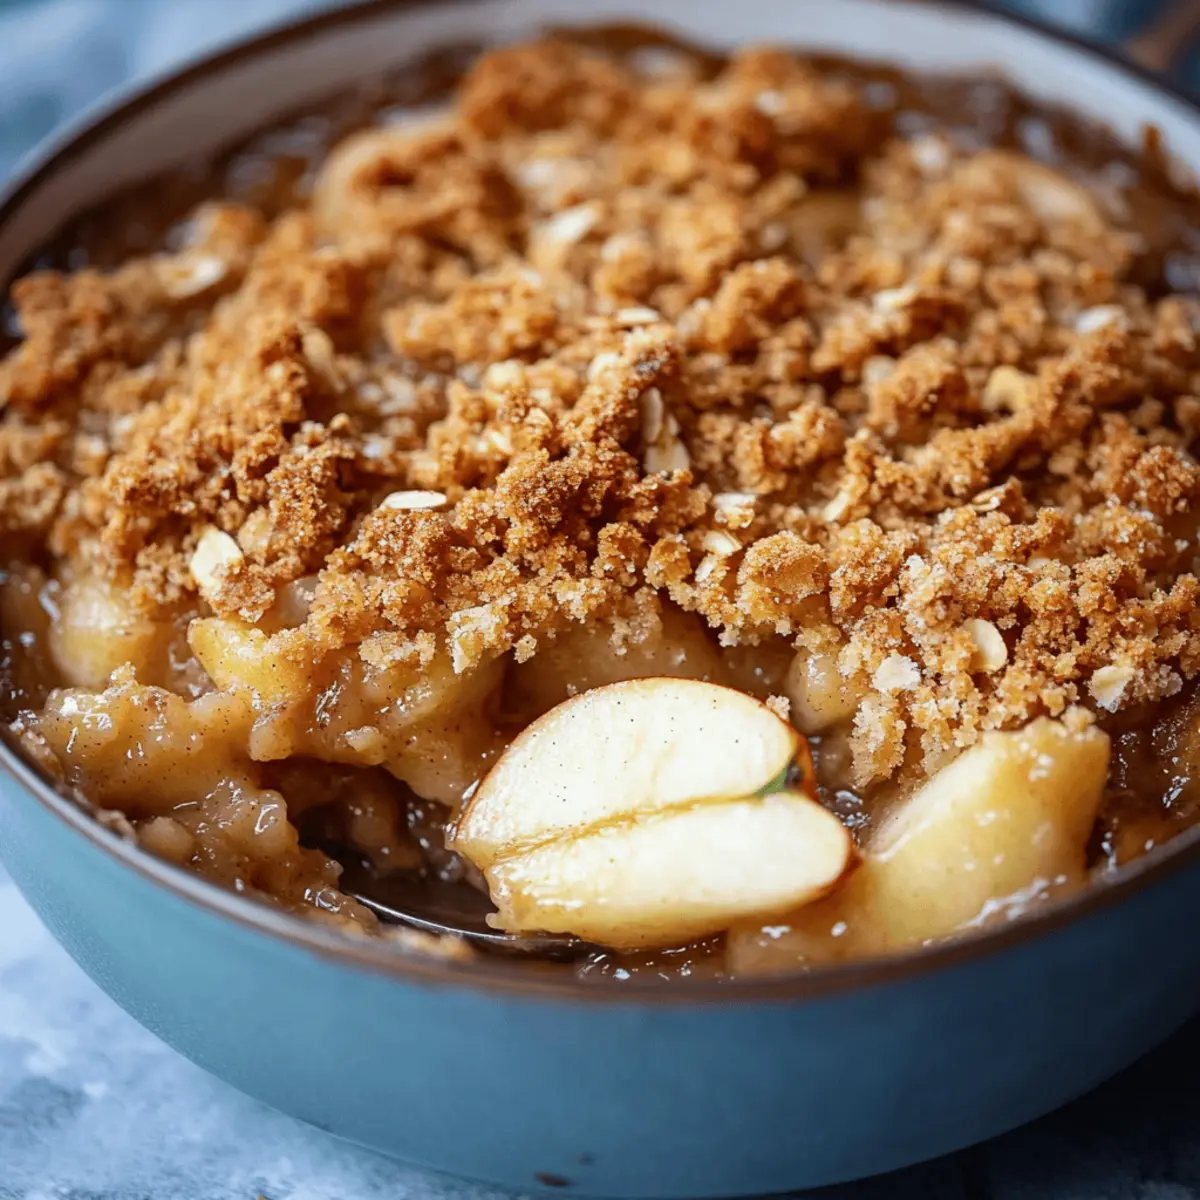
Spread the well-mixed apple filling evenly across the buttered baking dish, ensuring no apples are overlapping too much. Next, sprinkle the oat topping generously over the apples, covering them completely. Bake in the preheated oven for 45-60 minutes, or until the topping turns a lovely golden brown and the apple filling is bubbling and softened—this is when the comforting aroma fills your kitchen!
Step 5: Cool & Serve
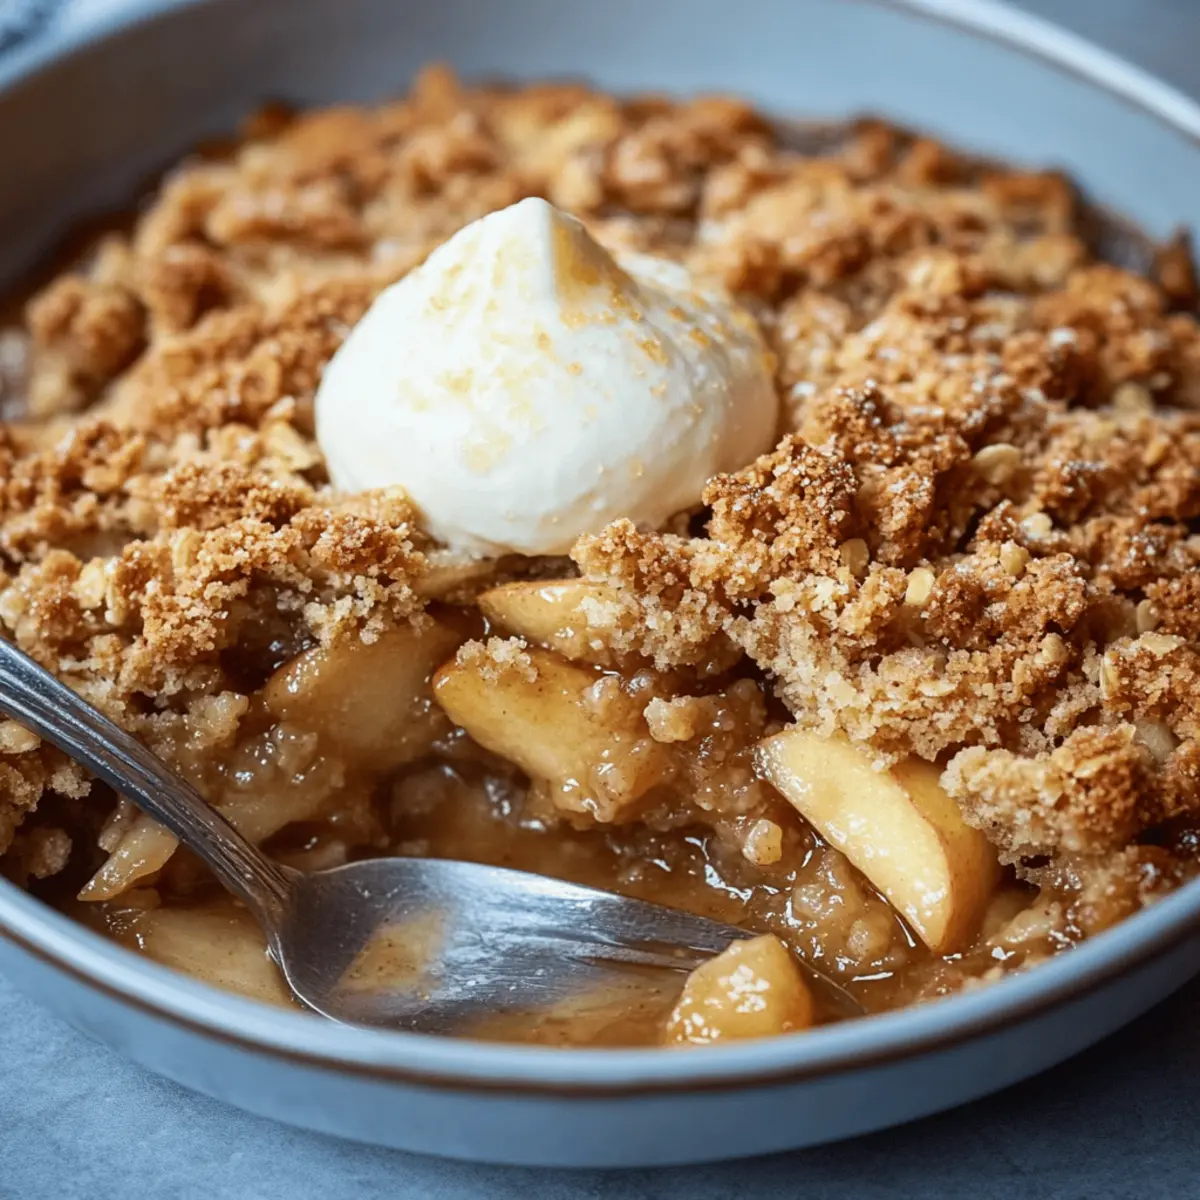
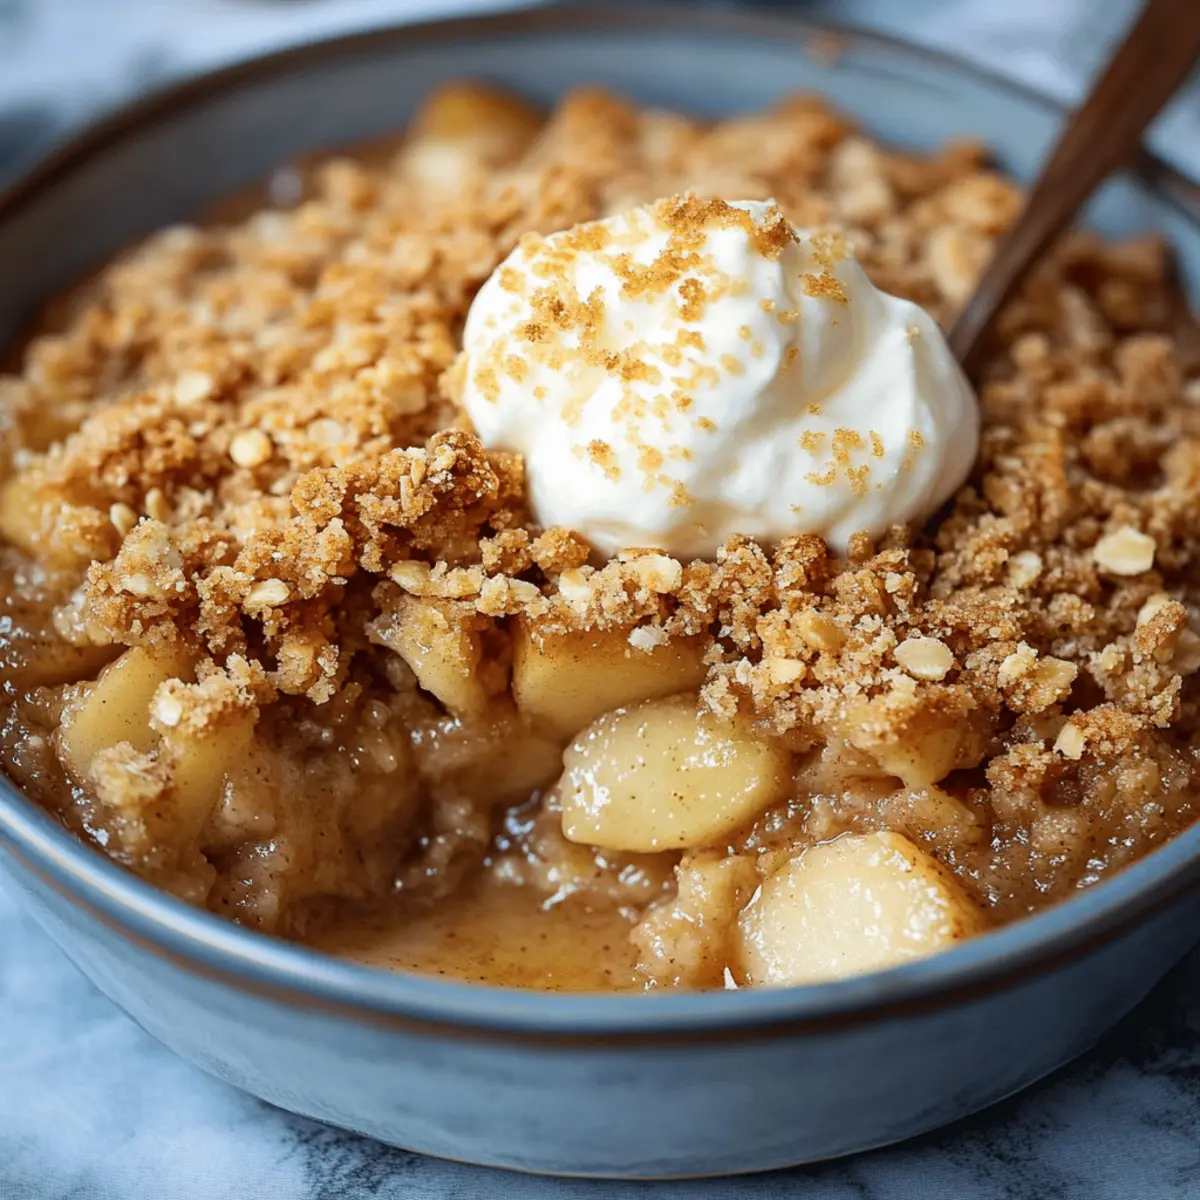
Once baked to perfection, remove your Easy Simple Apple Crisp from the oven and allow it to cool for about 15-20 minutes. This resting period helps the filling set, making it easier to serve. The topping will remain crisp while the apples are warm and inviting—ready to be enjoyed with a scoop of vanilla ice cream or a dollop of whipped cream for an indulgent treat.

What to Serve With Simple Apple Crisp
There's nothing quite like the joy of enjoying a warm dessert that feels like a cozy hug; let's build a delightful meal around this easy apple crisp.
- Vanilla Ice Cream: A classic pairing, the creaminess of ice cream melts beautifully over warm apple crisp for a heavenly contrast.
- Whipped Cream: Light and airy, whipped cream adds a fluffy touch that enhances the rich, spiced apple flavor.
- Caramel Sauce: Drizzle warm caramel over each serving for an indulgent twist that enhances the dish's sweet notes.
- French Vanilla Coffee: A warm mug of fragrant coffee ties together the sweet and spiced flavors, enriching the dessert experience.
- Baked Cinnamon Croissants: Flaky, buttery croissants sprinkled with cinnamon bring a lovely texture and flavor contrast to the dessert.
- Fresh Berries Salad: The tartness of mixed berries adds a refreshing element, cutting through the sweetness of the apple crisp beautifully.
- Cheddar Biscuits: Savory, cheesy biscuits provide a delightful textural contrast and bring a touch of comfort to your meal.
- Chai Tea: The spicy warmth of chai tea complements the cinnamon and nutmeg in the apple crisp, creating a cozy atmosphere.
- Molasses Cookies: Chewy molasses cookies complements the warm spices of the crisp, making for an enticing duo.
- Chocolate Stout Brownies: For the chocolate lovers, these fudgy brownies pair delightfully for those who crave a rich ending.
Make Ahead Options
These Easy Simple Apple Crisp creations are perfect for busy home cooks seeking to save time! You can prepare the apple filling up to 24 hours in advance by peeling, coring, and slicing the apples, then mixing them with sugars, spices, and lemon juice. Just cover the mixture tightly and refrigerate it to maintain freshness and prevent browning. Additionally, you can make the oat topping ahead of time—combine the dry ingredients and cut in the butter, then store it in the refrigerator for up to 3 days. When you’re ready to bake, simply layer the chilled apple filling in a buttered dish, sprinkle on the topping, and bake as directed. This way, you’ll enjoy all the comforting flavors of apple crisp with minimal effort at mealtime!
Apple Crisp Variations & Substitutions
Feel free to unleash your culinary creativity with these fun twists on the classic flavors of apple crisp!
-
Fruity Fusion: Swap half of the apples for pears, berries, or even peaches to create a deliciously different fruit medley. Each fruit brings its own sweetness, adding layers of complexity to your crisp.
-
Spice Adventure: Experiment with spices like ginger, allspice, or cardamom for a unique flavor kick. A pinch of these can elevate your dish and bring a delightful warmth to each bite.
-
Nutty Crunch: Add chopped pecans or walnuts to the topping for extra texture and crunch. This not only enhances the flavor but also introduces a satisfying nutty profile that pairs beautifully with the apples.
-
Sweet Swap: Replace white sugar with maple syrup or honey for a natural sweetness that infuses a deeper flavor. This swap can make your apple crisp feel even more wholesome and comforting.
-
Gluten-Free Goodness: Use gluten-free oats and almond flour to make this dish friendly for those avoiding gluten. Your apple crisp will still have all the crispy, buttery goodness without compromising on taste.
-
Dairy-Free Delight: Substitute traditional butter with coconut oil or a vegan butter alternative. This simple change keeps the dish rich while catering to vegan diets.
-
Zesty Boost: Add a hint of orange zest or limoncello to the apple filling for a refreshing citrus twist. This brightens the overall flavor profile, making every bite more dynamic and delightful.
-
Colorful Layers: Layer in different colored fruits or add dried fruits like cranberries or raisins. A splash of color can make your apple crisp visually stunning and even more appealing to your family and guests.
With all these variations, you can recreate this comforting dish again and again, making every experience uniquely delicious!
How to Store and Freeze Apple Crisp
Room Temperature: Store leftovers covered at room temperature for up to 1 day to enjoy the warm, comforting flavors right away.
Fridge: Keep your apple crisp covered in the refrigerator for up to 3-4 days. This helps maintain its freshness while ensuring the flavors remain delightful.
Freezer: For longer storage, freeze portions of the apple crisp in an airtight container for up to 3 months. Thaw overnight in the fridge before reheating.
Reheating: To reheat, warm the apple crisp in the oven at 350°F (175°C) for about 15-20 minutes until heated through, restoring its crispy topping and making it perfectly delicious again.
Expert Tips for Perfect Apple Crisp
• Texture Matters: Ensure the topping has varied crumb sizes for the best crunch; this creates a delightful contrast with the tender apple filling.
• Chill for Crispiness: Chill the topping mixture for about 30 minutes before baking. This helps achieve a crispier finish, making your apple crisp even more delightful.
• Cover if Needed: If you find that the topping is browning too quickly while the apples are still firm, tent with aluminum foil to protect it from over-baking.
• Cooling Time: Resist the urge to serve immediately! Allow the apple crisp to cool for 15-20 minutes post-baking, as this helps the filling set properly, avoiding a runny texture.
• Flavor Substitutions: Feel free to swap spices like nutmeg or ginger for a unique twist. Just remember to keep the balance, so the apple crisp remains a comforting favorite.
Easy Simple Apple Crisp Recipe FAQs
What type of apples should I use for the best flavor?
Absolutely! For a balanced flavor in your Easy Simple Apple Crisp, I recommend using tart varieties like Granny Smith. Their natural acidity complements the sweetness of the sugars beautifully, resulting in a delectably tender and spiced filling. You could also experiment with Honeycrisp or Fuji apples for a different taste, or mix in some pears for a delightful twist.
How should I store my apple crisp leftovers?
Very! Any leftovers should be covered and stored at room temperature for up to 1 day, or you can refrigerate them for 3-4 days. Keeping it covered helps maintain the flavors and texture. I often place leftover portions in an airtight container to stay fresh longer; if it ever dries out, a little scoop of ice cream on top works wonders!
Can I freeze apple crisp, and if so, how?
Definitely! To freeze your Easy Simple Apple Crisp, allow it to cool completely first. Then, cut it into portions and place them in airtight containers or freezer bags. It can be stored in the freezer for up to 3 months. When you're ready to enjoy it again, simply thaw it in the fridge overnight and reheat in the oven at 350°F (175°C) for about 15-20 minutes, so it regains its crispy topping.
What should I do if my topping is too soft?
Oh no! If you find your topping is too soft after baking, it may be due to too much butter or not enough chilling time before baking. To remedy this, allow your apple crisp to cool for a short while before serving; this helps the topping firm up a bit. If the topping doesn’t brown, try adding it back into the oven for a little longer, keeping an eye on it so it doesn’t over-bake.
Is there a dairy-free alternative for butter in this recipe?
You bet! If you're looking for a dairy-free option for your Easy Simple Apple Crisp, simply substitute the butter with a vegan butter alternative. Brands like Earth Balance work wonderfully and will still give you that rich flavor and crisp texture. Just be sure to use the same amount as specified in the recipe for optimal results.
Can I make this apple crisp gluten-free?
Absolutely! To make your Easy Simple Apple Crisp gluten-free, substitute all-purpose flour with gluten-free flour or cornstarch for the filling and topping. Also, ensure you use gluten-free oats in the topping. I often do this for my friends who have dietary preferences, and they love it just as much!
Irresistibly Easy Apple Crisp: Your New Favorite Dessert!
Ingredients
Equipment
Method
- Peel, core, and slice apples; mix with sugars, spices, flour, and lemon juice.
- Combine oats, flour, sugar, and salt; cut in butter until crumbly.
- Preheat oven to 375°F (190°C). Butter a 9x13-inch baking dish.
- Spread apple filling in the dish, top with oat mixture, and bake for 45-60 minutes.
- Cool for 15-20 minutes before serving.


Leave a Reply