
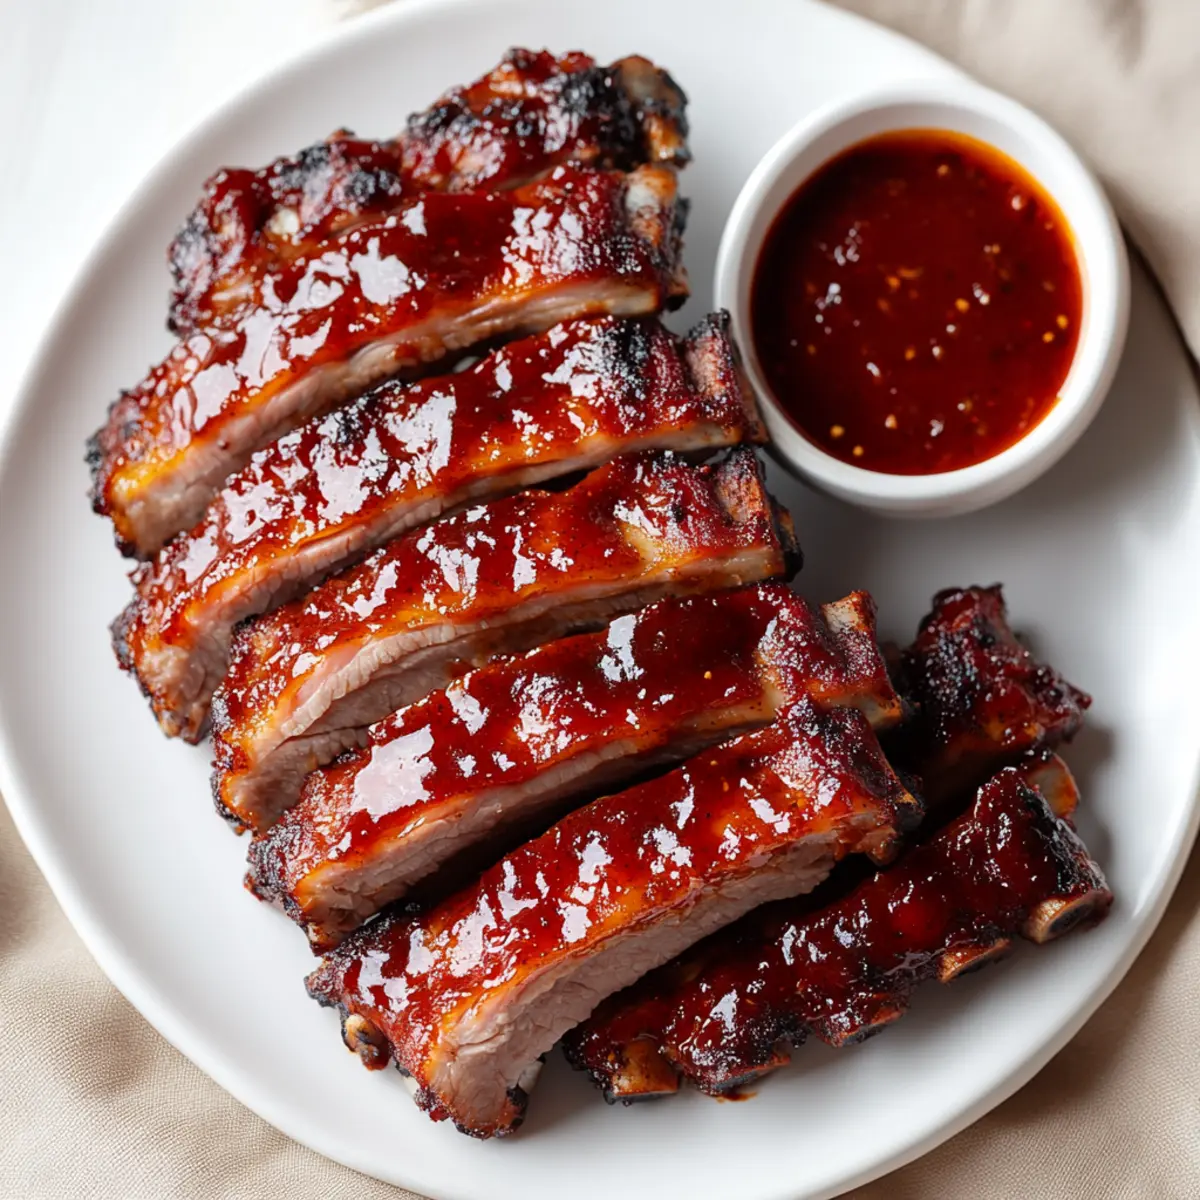
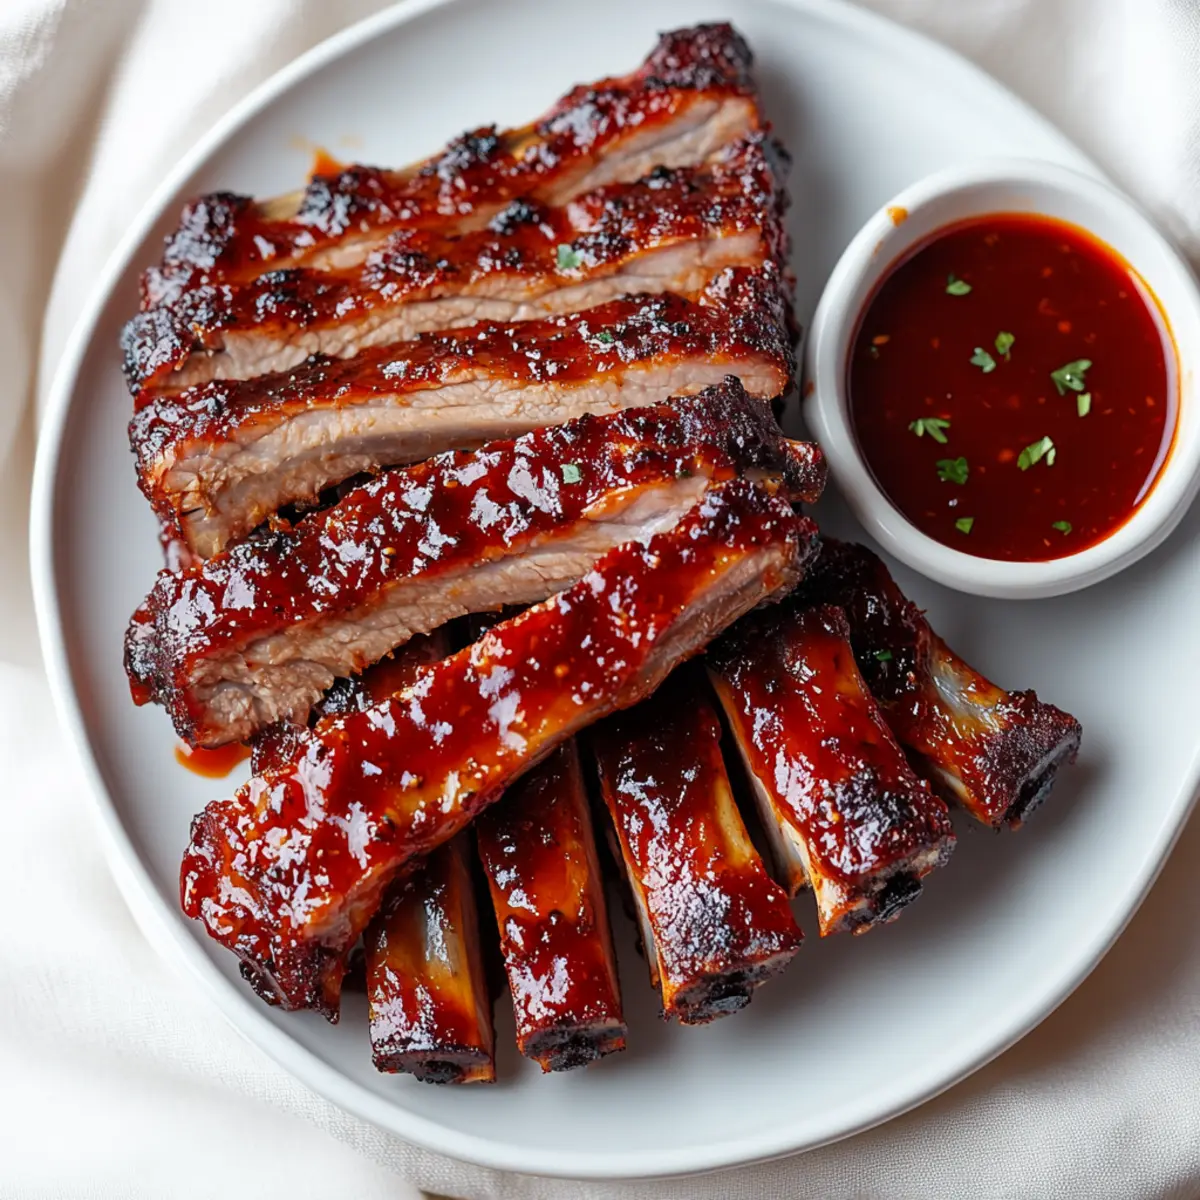
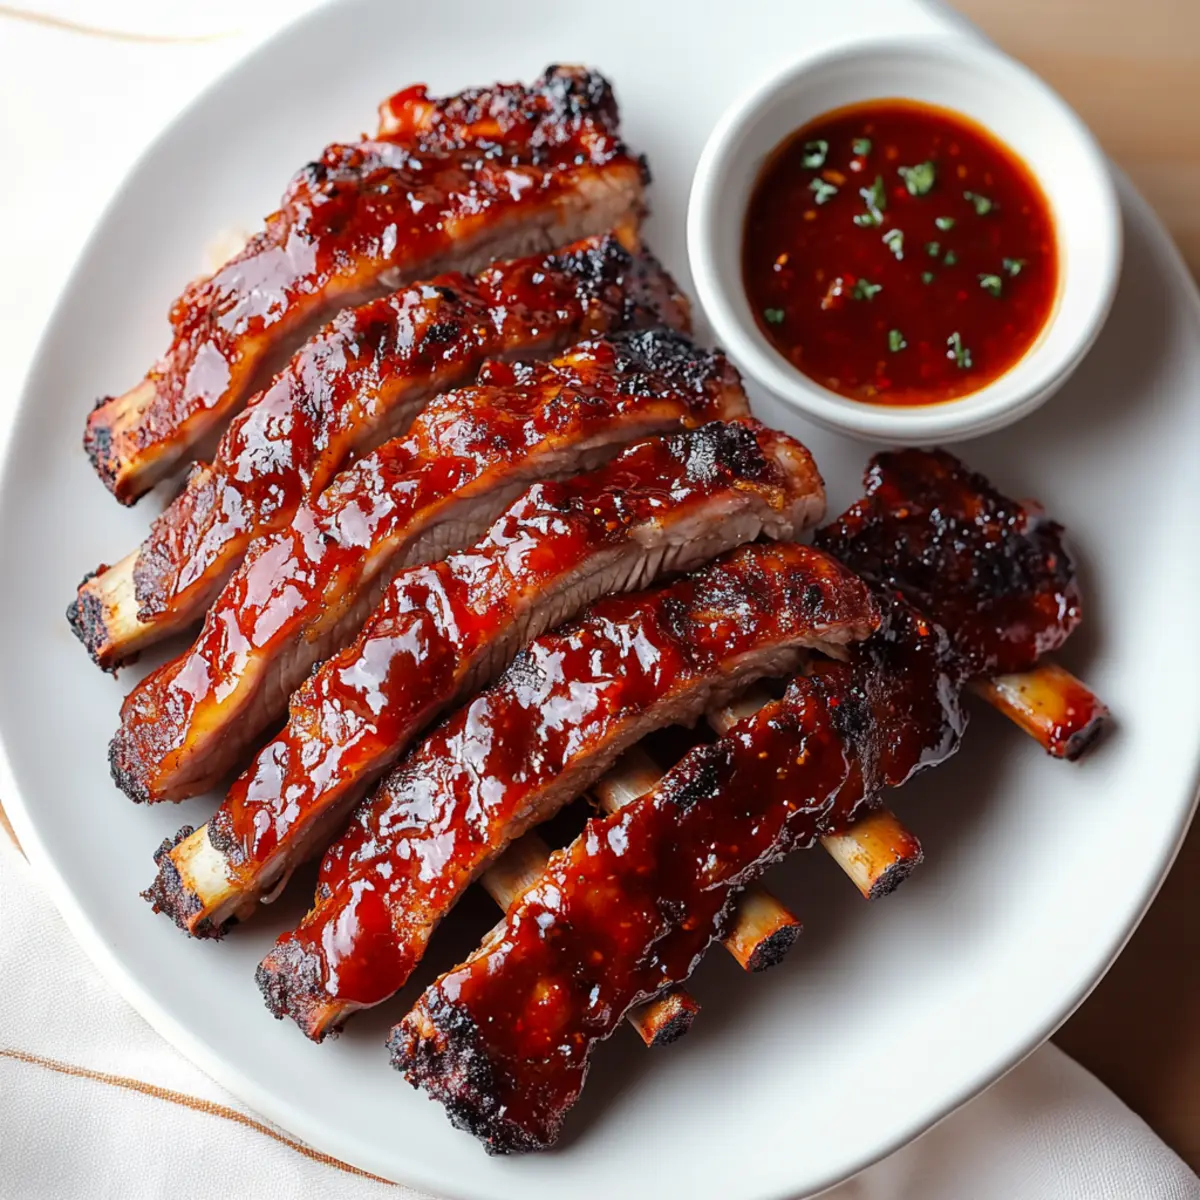
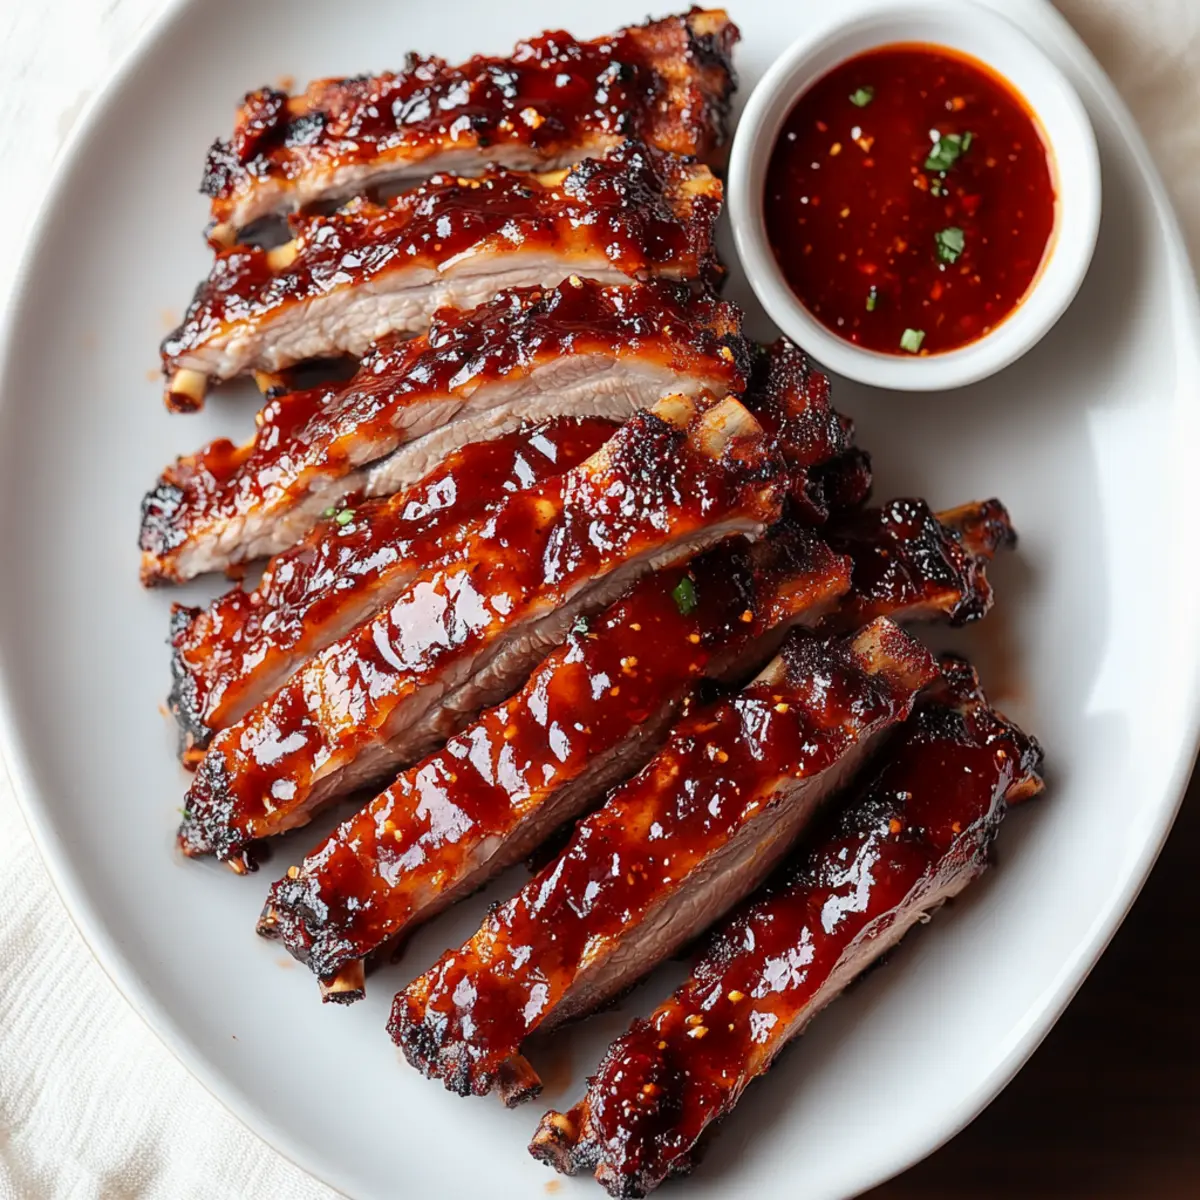
As the sun sets and the enticing aroma of barbecue wafts through the air, I can't help but smile at the thought of gathering friends and family around for a feast. Tender Sticky Baby Back Ribs are my go-to dish, effortlessly combining succulent meat with a decadently sticky BBQ sauce. This recipe is not just about food; it's a cozy invitation to slow down and savor those joyful moments. With minimal effort and time, you can produce fall-off-the-bone goodness that delights palates and warms hearts. Whether you're hosting a backyard barbecue or enjoying a quiet family dinner, these ribs will surely become a cherished staple in your kitchen. Are you ready to transform your next meal into a mouthwatering barbecue tradition?
Why Are Baby Back Ribs So Special?
Tenderness at its finest: The secret to these ribs lies in their melt-in-your-mouth texture, perfect for any barbecue lover.
Simple Preparation: With just a few ingredients and minimal prep, you can create a feast that impresses without fuss.
Versatile Sauce: Customize your BBQ sauce to suit your taste—whether sweet, tangy, or spicy, the possibilities are endless!
Crowd-Pleasing: Perfect for gatherings or cozy family dinners, these ribs are bound to make everyone smile.
Satisfying Satisfaction: This recipe delivers delicious fall-apart meat that will have your guests coming back for seconds. Dive into these Tender Sticky Baby Back Ribs and elevate your barbecuing game!
Baby Back Ribs Ingredients
For the Ribs
• Baby Back Ribs – The star of the show, known for their tenderness and quick cook time.
• Kosher Salt – Essential for enhancing the natural flavors of the meat.
• Water – Adds moisture during cooking, keeping the ribs succulent and juicy.
For the Sauce
• BBQ Sauce – Offers that signature sweetness and tang, customizable to match your taste preferences; try experimenting with your own homemade version for unique flavors!
These ingredients come together to create mouthwatering Baby Back Ribs that will surely become a hit at your next gathering. Enjoy the process and the delicious results!
Step‑by‑Step Instructions for Tender Sticky Baby Back Ribs
Step 1: Preparation
Preheat your oven to 300°F (150°C) or set your pressure cooker to the steaming function. Begin by removing the thin membrane from the back of the baby back ribs using a sharp knife; this helps improve tenderness. Rinse the ribs under cold water and pat them dry with paper towels to prepare for seasoning.
Step 2: Seasoning
Generously sprinkle kosher salt over both sides of the ribs, effectively enhancing their flavor. Make sure to coat every nook and cranny, as this will help develop a savory crust during cooking. Allow the seasoned ribs to rest for about 15 minutes to absorb the salt before moving on to the cooking process.
Step 3: Cooking Process
Arrange the seasoned baby back ribs in a large baking dish, bone side down, and pour in enough water to cover the bottom of the dish. This moisture is vital to keep the ribs juicy. Cover tightly with aluminum foil for the oven or seal the pressure cooker lid to trap the steam during cooking.
Step 4: Slow Cook
Place the covered baking dish in the preheated oven and bake for 2.5 hours. Alternatively, if using a pressure cooker, cook the ribs on high pressure for approximately 30-35 minutes. Both methods will yield tender, fall-off-the-bone baby back ribs, so choose whichever suits your kitchen best!
Step 5: BBQ Sauce Application
Once the cooking time is complete, carefully remove the foil (or open the pressure cooker) to reveal the succulent ribs. Brush a generous layer of your favorite BBQ sauce all over the ribs, ensuring an even coating. This will create a sticky, flavorful glaze during the final baking phase.
Step 6: Finish and Serve
Return the ribs to the oven and bake uncovered for an additional 30 minutes at the same temperature. This caramelizes the sauce, creating sticky goodness. After this time, remove the ribs from the oven, allow them to cool slightly, then slice between the bones. Serve with extra BBQ sauce on the side for dipping and enjoy your delicious baby back ribs!
Baby Back Ribs Variations & Substitutions
Feel free to get creative with your ribs and tailor them to suit your taste buds or dietary needs!
-
Spare Ribs: Substitute baby back ribs for spare ribs for a meatier bite, but anticipate a longer cooking time.
-
Dairy-Free Sauce: Use a homemade sauce that skips dairy ingredients—this keeps it pure and just as tasty!
-
Low-Sodium Option: Swap regular kosher salt for a low-sodium alternative to create a healthier dish without sacrificing flavor.
-
Sweet & Spicy: Mix in some chili powder or cayenne pepper with your BBQ sauce to turn up the heat and add a delightful kick.
-
Fruit Infusion: Add pineapple or mango juice to your BBQ sauce for a sweet, tropical twist that pairs beautifully with the smoky meat.
-
Smoky Flavor Boost: If you crave a deeper flavor, sprinkle smoked paprika over the ribs before baking for an irresistible smoky essence.
-
Herb-Infused: Add fresh herbs like rosemary or thyme to your cooking water to infuse another layer of aromatic deliciousness into the meat.
-
Vinegar Tang: Use apple cider vinegar in place of water to add a tangy note to your cooking process, enhancing the overall depth of flavor.
Experimenting with these variations will keep your BBQ game fresh and exciting! For more recipe ideas that celebrate family favorites, check out our tips for creating delectable BBQ sides and savories that complete your gatherings. Wouldn’t some homemade BBQ sauce pair perfectly with those tender ribs you're making? Enjoy making every meal memorable!
Expert Tips for Tender Sticky Baby Back Ribs
- Remove the Membrane: Taking off the thin membrane on the back of the ribs is vital. This step enhances tenderness and allows seasonings to penetrate better.
- Don’t Rush the Cooking: Slow cooking is key for achieving fall-off-the-bone tenderness. Be patient and let the Baby Back Ribs cook long enough to develop flavor.
- Use Enough Water: Make sure there’s enough water in the baking dish. Moisture prevents the ribs from drying out during cooking, keeping them succulent.
- Sauce Application: For the best flavor, brush on BBQ sauce during the last 30 minutes of cooking. This allows it to caramelize while adding that signature sticky finish.
- Resting Period: Allowing the ribs to cool slightly before slicing helps retain juices, ensuring a moist and flavorful bite every time.
Make Ahead Options
These Tender Sticky Baby Back Ribs are perfect for meal prep, allowing you to savor barbecue bliss even on your busiest days! You can season the ribs and wrap them in plastic wrap or foil, refrigerating them for up to 24 hours before cooking. This allows the flavors to meld beautifully. Additionally, you can cook the ribs completely and then refrigerate them for up to 3 days. When ready to enjoy, simply reheat in a low oven at 300°F (150°C), basting with extra BBQ sauce for moisture. This way, you’ll have delightful, fall-off-the-bone ribs that are just as delicious, easily ready to serve with minimal effort!
What to Serve with Tender Sticky Baby Back Ribs
Pair your mouthwatering meal with delightful sides that enhance every bite!
- Classic Coleslaw: The crunch and tang of coleslaw provide a refreshing contrast to the sticky richness of the ribs. It's a must-have for any backyard BBQ!
- Corn on the Cob: Sweet and buttery corn on the cob perfectly complements the savory flavors of baby back ribs, adding a delightful pop of sweetness. The juicy kernels are perfect for enjoying with a finger-licking meal will keep everyone smiling around the table!
- Baked Beans: Rich, hearty baked beans bring a smoky flavor that beautifully ties together the barbecue experience, enhancing the meal with their comforting warmth.
- Garlic Bread: Warm, gooey garlic bread soaks up the extra BBQ sauce and rounds out your plate with a crisp, buttery texture that everyone loves.
- Grilled Vegetables: Charred, seasonal vegetables like zucchini, bell peppers, and asparagus not only add color but also a satisfying crunch that balances the dish.
- Potato Salad: Creamy potato salad complements the ribs with its coolness, making it a classic choice that pleases the crowd and enhances the overall flavor experience!
- Lemonade or Iced Tea: For drinks, serve refreshing lemonade or iced tea to cleanse the palate and perk up your barbecue gathering with a hint of sweetness.
- Brownie Sundaes: End on a sweet note with brownie sundaes topped with ice cream and chocolate syrup, creating a deliciously indulgent dessert that brings smiles to everyone’s faces.
- Watermelon Slices: Fresh, juicy watermelon adds a light and refreshing touch while serving as a fun snack to balance the meal's heartiness.
Enjoy crafting the perfect feast that showcases those gloriously tender baby back ribs and creates lasting memories around the dinner table!
How to Store and Freeze Baby Back Ribs
Fridge: Store leftover baby back ribs in an airtight container for up to 3 days. Reheat in the oven at 300°F with a splash of BBQ sauce for moisture.
Freezer: Freeze baby back ribs for up to 2 months. Wrap tightly in plastic wrap and place in a freezer bag to prevent freezer burn.
Reheating: Thaw in the fridge overnight before reheating. Warm in the oven at 300°F, brushing with extra BBQ sauce to restore the delicious sticky texture.
Make-Ahead: For convenience, prepare ribs a day ahead, chill, and simply reheat before serving for hassle-free entertaining!
Baby Back Ribs Recipe FAQs
How do I select the best baby back ribs?
Absolutely! When choosing baby back ribs, look for a piece with a good amount of meat on top and minimal fat. The meat should be a pale pink color without dark spots or excessive bruising. A fresh slab will also have a slight sheen. For optimal tenderness, I recommend selecting ribs that feel firm to the touch, as these will cook beautifully.
How should I store leftover baby back ribs?
Very simple! Place the leftover ribs in an airtight container and refrigerate them for up to 3 days. When reheating, try warming them in the oven at 300°F (150°C) with a splash of your favorite BBQ sauce to keep them moist and flavorful. If you want to enjoy them later, freezing is an option too!
Can I freeze cooked baby back ribs?
Absolutely! To freeze your tasty baby back ribs, wrap them tightly in plastic wrap and then place them in a freezer bag. This method prevents freezer burn. They can be frozen for up to 2 months. When you’re ready to enjoy them, thaw in the fridge overnight, and reheat in the oven at 300°F, brushing with extra sauce for that sticky goodness!
What should I do if my baby back ribs aren’t tender after cooking?
Don't worry! If your ribs aren’t tender, it's likely they need more cooking time. If you used the oven, cover them tightly again and return them to bake for an additional 30 minutes. Alternatively, if they were done in a pressure cooker, they may need a few more minutes under high pressure. Ensuring enough moisture at the start (with water or broth) also helps achieve that delightful tenderness!
Are baby back ribs safe for pets?
While cooking rib bones may appear appealing for pets, I recommend keeping them away from your furry friends. Cooked bones can splinter and pose a choking hazard or cause internal injuries. If you want to share some love with your pets, consider uncooked, raw bones that are safe and healthy for them!
What are some good side dishes to serve with baby back ribs?
The more, the merrier! Classic sides like coleslaw, cornbread, or grilled corn on the cob perfectly complement the rich flavors of baby back ribs. A simple green salad can balance the richness, while baked beans add a hearty touch. Don’t hesitate to mix and match your favorites to make your barbecue truly irresistible!
Irresistibly Tender Baby Back Ribs for BBQ Lovers
Ingredients
Equipment
Method
- Preheat your oven to 300°F (150°C) or set your pressure cooker to steaming. Remove the thin membrane from the ribs.
- Generously sprinkle kosher salt over both sides of the ribs and let them rest for 15 minutes.
- Arrange the seasoned ribs in a large baking dish, bone side down, and add water to cover the bottom.
- Cover the dish tightly with aluminum foil or seal the pressure cooker lid.
- Bake the covered ribs for 2.5 hours or cook on high pressure for 30-35 minutes.
- After cooking, brush BBQ sauce all over the ribs for flavor and a sticky glaze.
- Bake the ribs uncovered for an additional 30 minutes to caramelize the sauce. Cool slightly before slicing.
Leave a Reply