
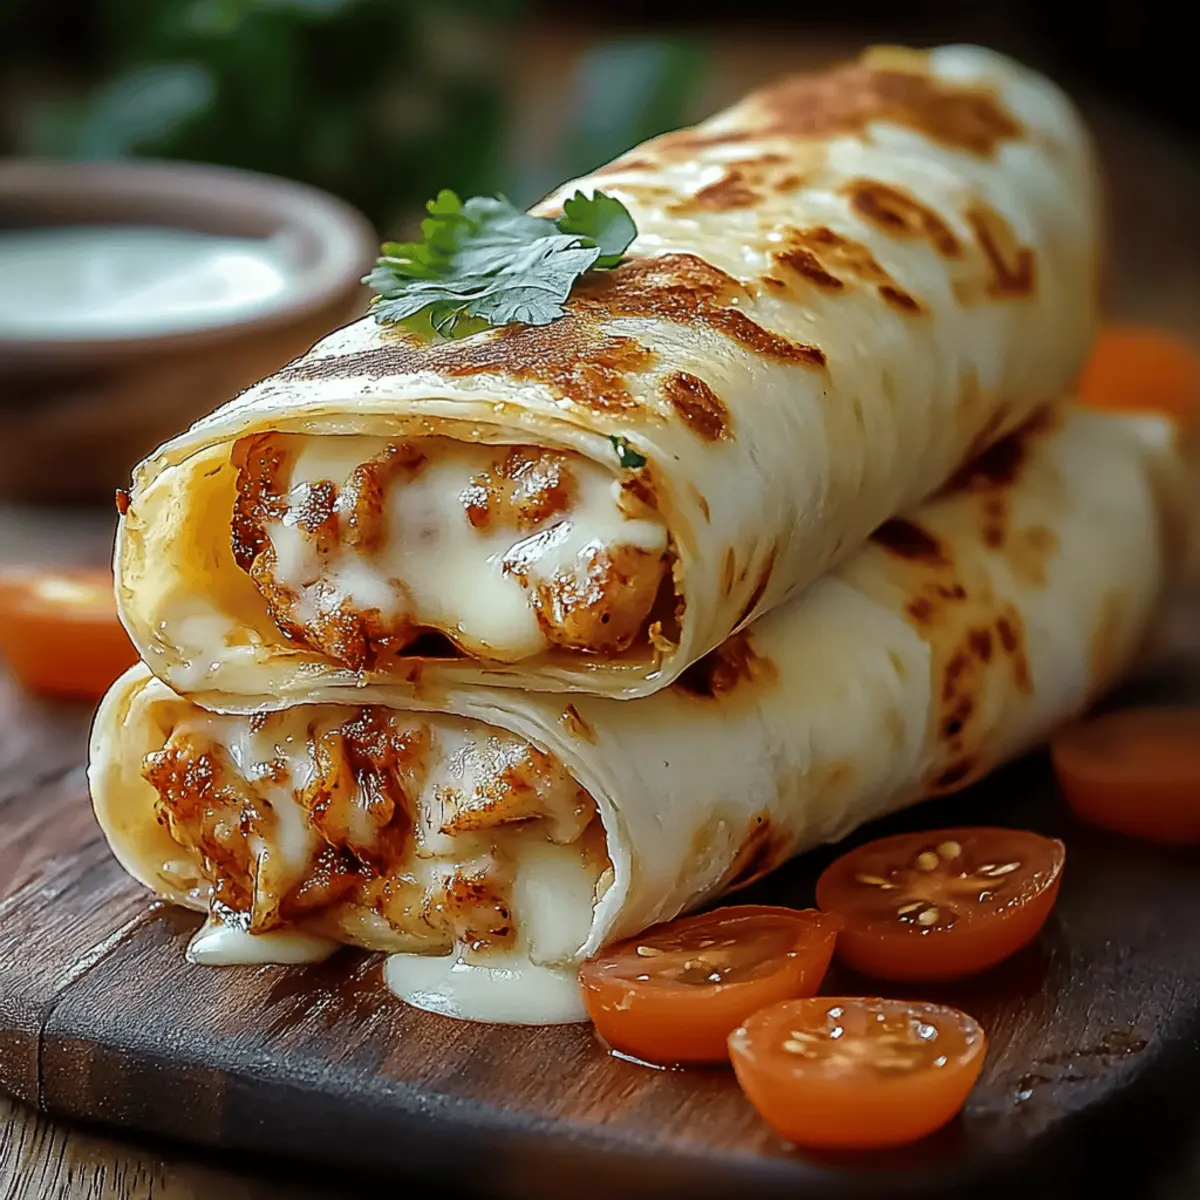
As I prepared my kitchen for a cheerful weeknight dinner, bursts of garlic wafted through the air, tempting my senses. That’s when I decided it was time to whip up these Melty Cheesy Garlic Chicken Wraps! This quick dinner option not only comes together in minutes but is also infinitely customizable, allowing everyone to create their perfect version. With a blissful combination of tender chicken, gooey cheese, and vibrant veggies, these wraps offer a delightful escape from the monotony of fast food. Think easy lunch, casual dinner, or impressive appetizer—all rolled into one delicious package! Who wouldn’t love the idea of wrapping up a variety of flavors and textures in a warm tortilla? Are you ready to elevate your meal game and explore just how versatile these wraps can be?
Why are these wraps a must-try?
Quick and Easy: In just minutes, you can whip up a satisfying meal that doesn’t skimp on flavor. This recipe is ideal for those busy weeknights!
Versatile: Perfect for everyone, you can customize these wraps with a variety of fillings and toppings, catering to all dietary preferences, including gluten-free and vegetarian alternatives.
Flavor Explosion: With each bite, enjoy the delicious blend of melty cheese, savory garlic, and juicy chicken enhanced by crunchy veggies, offering a dinner experience that truly excites the taste buds.
Crowd-Pleaser: Whether for family or guests, these wraps are sure to impress. Serve them with your favorite sides like fresh salad or warm tomato soup to create a well-rounded meal!
Make-Ahead Friendly: Prepare the filling in advance and store it in the fridge for ultimate convenience—making dinner a breeze when you're short on time!
Melty Cheesy Garlic Chicken Wrap Ingredients
For the Filling
• Cooked Chicken (shredded) – A protein powerhouse for the wraps; feel free to use shredded rotisserie chicken for convenience!
• Mozzarella Cheese (shredded) – This gooey cheese adds irresistible creaminess; swap it for cheddar to shake things up.
• Cream Cheese – Provides a rich texture to hold the filling together; sour cream can be a tangy alternative here.
• Mayonnaise – Enhances moisture and creaminess; consider Greek yogurt for a lighter twist.
• Garlic (minced) – Infuses the wraps with aromatic goodness; fresh garlic is best, but garlic powder can suffice in a pinch.
• Italian Seasoning – This blend of herbs elevates flavor; dried basil or oregano can be used if you don’t have the mix on hand.
• Salt – Greatly enhances all the flavors; adjust according to your taste preferences, especially if using low-sodium options.
• Black Pepper – Adds a nice hint of spice; omit it for a milder flavor if preferred.
For the Wraps
• Flour Tortillas – These hold your delicious filling together; try whole wheat or gluten-free tortillas for a dietary-friendly option.
• Fresh Spinach Leaves – Adds a fresh crunch and nutrients; other greens like arugula or mixed greens can be delightful substitutes.
• Diced Tomatoes – Brings moisture and brightness to each wrap; sun-dried tomatoes can provide a richer, more flavorful experience.
• Sliced Green Onions – Contribute a lovely crunch and vibrant flavor; chives work nicely in their stead as well.
Dive into this journey of flavors and textures with these Melty Cheesy Garlic Chicken Wraps—perfect for lunch, dinner, or going the extra mile as an appetizer!
Step‑by‑Step Instructions for Melty Cheesy Garlic Chicken Wraps
Step 1: Prepare Filling
In a large mixing bowl, combine your shredded cooked chicken with mozzarella cheese, cream cheese, mayonnaise, minced garlic, Italian seasoning, salt, and black pepper. Use a fork to mix everything until it’s well-blended and creamy, creating a luscious filling that should be slightly chunky. This filling takes just about 5 minutes to prepare and will be the heart of your Melty Cheesy Garlic Chicken Wraps.
Step 2: Warm Tortillas
Next, prepare your tortillas for wrapping. Heat a non-stick skillet over medium heat and warm the tortillas for 15-20 seconds on each side until they are pliable. Alternatively, you can stack the tortillas and microwave them wrapped in a damp paper towel for 30-60 seconds. This step ensures that your tortillas will roll easily, avoiding any cracks when assembling your Melty Cheesy Garlic Chicken Wraps.
Step 3: Assemble Wraps
Lay the warmed tortilla flat on a clean surface and place a generous scoop of the chicken filling in the center, leaving space around the edges for folding. Top the filling with fresh spinach leaves, diced tomatoes, and sliced green onions. The vibrant veggies add not only a burst of color but also complement the flavors beautifully. Aim for a balanced amount of each ingredient to achieve the perfect wrap.
Step 4: Roll Wraps
Carefully fold in the sides of the tortilla, then roll it tightly from the bottom up to enclose the filling securely. Ensure it's wrapped snugly so none of the delicious filling escapes. Repeat the rolling process for each tortilla, using up all your lovely filling. This process should take about 5 minutes, and soon you’ll have a plate full of enticing Melty Cheesy Garlic Chicken Wraps ready to be enjoyed!
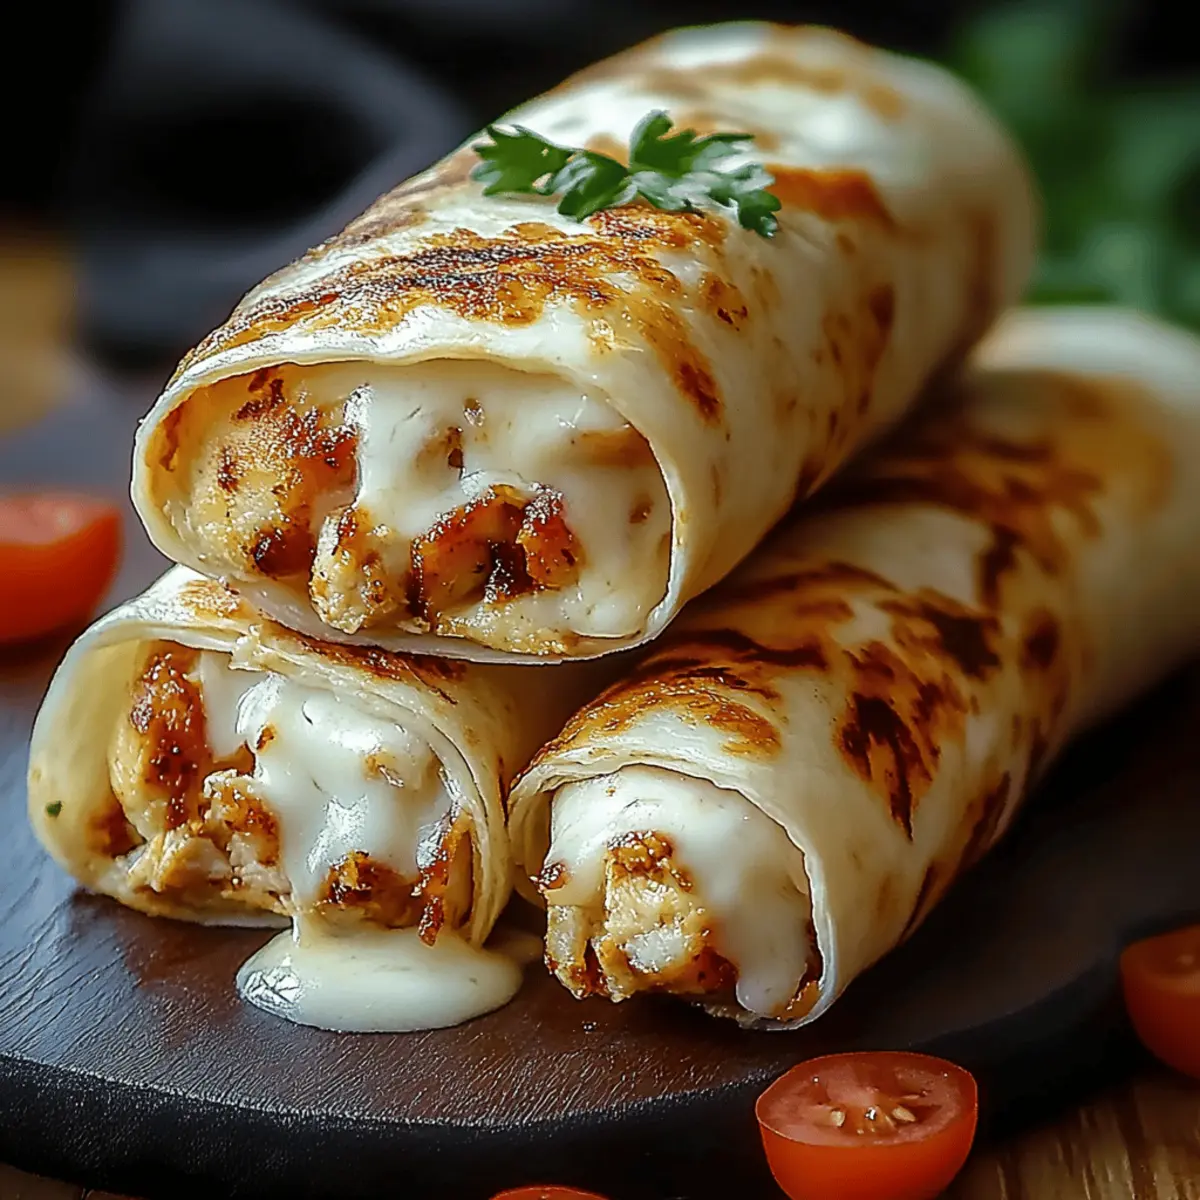
Step 5: Serve or Sear
You can serve the wraps immediately for a fresh bite, or take it a step further by searing them for extra crunch. Heat a non-stick skillet over medium heat and place each wrap seam-side down, cooking for 2-3 minutes per side until they are golden brown and crispy. The searing process will enhance the wrap’s texture and create a beautiful golden crust, making your Melty Cheesy Garlic Chicken Wraps irresistible!

Expert Tips for Melty Cheesy Garlic Chicken Wraps
-
Prep Ahead: Preparing the chicken filling in advance saves time on busy nights. Store it in the fridge for up to 3 days for convenience!
-
Perfect Tortilla Heating: Always warm your tortillas to ensure they're pliable. This prevents tearing and makes rolling the wraps a breeze.
-
Take it Up a Notch: For extra crunch, consider searing your wraps in a pan after assembly. This transforms them into a crispy, golden delight.
-
Balance Your Fillings: Layer the fresh veggies evenly to ensure each bite of your Melty Cheesy Garlic Chicken Wraps has a burst of flavor without overpowering the chicken.
-
Avoid Sogginess: If storing leftovers, separate uncooked wraps from cooked ones. Reheating cooked wraps can lead to sogginess, so store accordingly!
Make Ahead Options
These Melty Cheesy Garlic Chicken Wraps are perfect for meal prep enthusiasts! You can prepare the filling up to 3 days in advance by mixing the shredded chicken, cheeses, mayonnaise, garlic, and seasonings, then refrigerating it in an airtight container to maintain its creamy texture. Additionally, you can warm the tortillas ahead of time and store them wrapped in foil at room temperature for a few hours to keep them pliable. When you're ready to serve, simply assemble the wraps and either enjoy them fresh or sear them in a skillet for 2-3 minutes per side until crispy. This approach saves you precious time during busy weeknights while ensuring you enjoy flavorful wraps that are just as delicious!
What to Serve with Cheesy Garlic Chicken Wraps
As you savor each bite of these delightful wraps, imagine complementing them with sides that enhance the overall dining experience.
-
Fresh Garden Salad: A crisp salad with mixed greens, cucumbers, and a tangy vinaigrette provides a refreshing balance to the warm, cheesy wraps. The crunch of the vegetables beautifully contrasts the creamy filling, making each bite even more satisfying.
-
Zesty Coleslaw: This simple side adds a tangy crunch that plays well against the rich flavors in the wraps. A splash of apple cider vinegar or citrus in your coleslaw dressing can elevate the meal with a bright note.
-
Tomato Basil Soup: A warm cup of tomato soup creates a heartwarming pairing. Its creamy texture and fresh basil notes harmonize with the cheesy goodness, adding a comforting element to your meal.
-
Guacamole and Tortilla Chips: Smooth guacamole adds a creamy and zesty touch, while crunchy tortilla chips introduce a delightful texture contrast. The creamy dip can be enjoyed alongside or smeared right into your wraps for an extra flavor punch!
-
Grilled Veggies: Roasting seasonal vegetables like zucchini, bell peppers, and asparagus enhances their sweetness and adds a beautiful char. Their savory flavor complements the wraps and brings a wholesome feel to your dinner table.
-
Sparkling Lemonade: A refreshing beverage can elevate any meal. The bright citrus flavors of sparkling lemonade cleanse the palate, providing a delightful contrast with the rich, cheesy wraps.
-
Chocolate Chip Cookies: End your meal on a sweet note with warm chocolate chip cookies. Their gooey, melty texture pairs perfectly after the savory main course, leaving everyone with a smile.
-
Herb-Infused Iced Tea: This herbal tea adds an elegant touch to your meal. Infuse tea with fresh mint or lemon balm for a refreshing drink that enhances the meal's overall freshness.
Storage Tips for Melty Cheesy Garlic Chicken Wraps
Fridge: Store leftover wraps in an airtight container for up to 3 days. This helps maintain the freshness and prevents drying out.
Freezer: For longer storage, freeze uncooked wraps in a single layer, then transfer to a zip-top bag. They can be frozen for up to 2 months.
Reheating: Reheat thawed wraps in a skillet over medium heat for about 5-7 minutes, flipping halfway through until heated through and crispy, avoiding sogginess.
Assembling Ahead: If you're preparing ahead of time, assemble uncooked Melty Cheesy Garlic Chicken Wraps and refrigerate for up to 24 hours before cooking.
Melty Cheesy Garlic Chicken Wrap Variations
Feel free to get creative and take these wraps to the next level with these easy twists that will inspire you and your loved ones.
-
Spicy Kick: Add diced jalapeños or red pepper flakes to the filling for an exciting heat that will wake up your taste buds!
-
Veggie Delight: Enhance the nutrition by mixing in sautéed bell peppers or zucchini with the filling. They add crunch and a splash of color!
-
Vegetarian Twist: Substitute chicken with black beans or sautéed mushrooms to keep the flavor robust without meat. Don't forget to adjust seasonings for the best results!
-
Cheese Swap: If you’re in the mood for something different, try using feta cheese or a spicy pepper jack to elevate the flavor profile and give that creamy goodness a tasty twist.
-
Baked Option: For a healthier take, bake the assembled wraps at 400°F for a golden finish instead of searing them. Brush with olive oil for extra crispiness!
-
Tortilla Diversity: Change the wrap’s base by using whole grain or flavored tortillas like spinach or sun-dried tomato for impressive visual appeal and flavor.
-
Fresh Greens: For a refreshing change, mix in arugula or substitute the spinach with fresh basil which complements the garlic beautifully!
-
Nutty Crunch: Top your filling with some chopped nuts like walnuts or almonds for added texture. They bring delightful crunchiness and healthy fats.
With so many options at your fingertips, these Melty Cheesy Garlic Chicken Wraps can be your canvas for culinary creativity! Enjoy the delicious journey.

Melty Cheesy Garlic Chicken Wraps Recipe FAQs
How do I choose the right chicken for the wraps?
Absolutely! For the best flavor, opt for shredded cooked chicken, which can be easily made at home or purchased as rotisserie chicken from your local store. If you prefer a healthier option, use skinless chicken breast and season it well before cooking. Just ensure it’s tender and juicy to complement the cheesiness in these Melty Cheesy Garlic Chicken Wraps.
How should I store leftover wraps?
Very well! Store your leftover wraps in an airtight container and keep them in the fridge for up to 3 days. This method helps to maintain their freshness and prevents them from drying out too much. If you've got wraps that you won't eat in that timeframe, consider freezing them!
Can I freeze the wraps for later use?
Absolutely! To freeze, place uncooked wraps in a single layer on a baking sheet and freeze them until solid. Then, transfer the frozen wraps to a zip-top bag—this keeps them from sticking together. They can be stored in the freezer for up to 2 months. To cook from frozen, just thaw them in the fridge overnight and cook as directed.
What can I do if my wraps turn out soggy?
No worries! If you find your Melty Cheesy Garlic Chicken Wraps are a bit soggy, there are steps you can take in the future. Ensure your tortillas are warmed properly before assembly, and consider using less moisture in your filling ingredients. When reheating cooked wraps, it’s best to do so in a skillet over medium heat to achieve that crispy texture again.
Are these wraps suitable for my gluten-free diet?
Very much so! Simply use gluten-free tortillas in place of traditional flour tortillas, and you're all set! Customize your filling and toppings to match your dietary needs while still enjoying the deliciousness of these Melty Cheesy Garlic Chicken Wraps without any compromise on flavor.
Can I make these wraps vegetarian?
Absolutely! For a delightful vegetarian option, replace the chicken with black beans, sautéed mushrooms, or even seasoned tofu. You may also want to add extra veggies like bell peppers or corn for added texture and flavor—don’t hesitate to get creative with your filling!
Melty Cheesy Garlic Chicken Wraps You'll Love in Minutes
Ingredients
Equipment
Method
- In a large mixing bowl, combine shredded cooked chicken, mozzarella cheese, cream cheese, mayonnaise, minced garlic, Italian seasoning, salt, and black pepper. Mix until well-blended and creamy.
- Heat a non-stick skillet over medium heat and warm tortillas for 15-20 seconds on each side until pliable. They can also be microwaved wrapped in a damp paper towel for 30-60 seconds.
- Lay the warmed tortilla flat, add a generous scoop of chicken filling in the center, and top with spinach, diced tomatoes, and green onions.
- Fold in the sides of the tortilla and roll tightly from the bottom to enclose the filling securely.
- Serve immediately or sear the wraps in a skillet for 2-3 minutes per side until golden brown.
Leave a Reply